Working with the Remove Duplicates dialog box
To begin removing duplicate values, let's open the Remove Duplicates dialog box.
We will be working in the March worksheet.
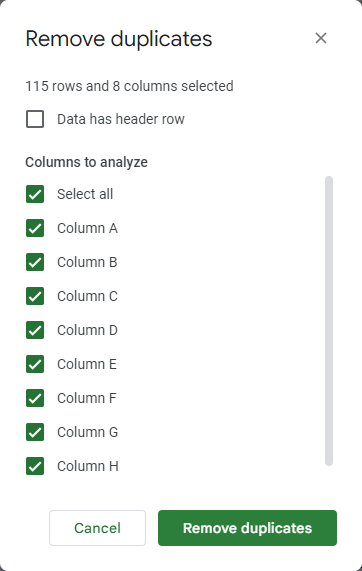
The Remove duplicates dialog box opens:

This dialog box allows us to choose the columns we want to analyze. By default, the "Data has a header row" checkbox isn't checked. Therefore, the columns aren't labeled with their headings but instead the column letters.
Before we remove any duplicate values, let's confirm that the data has a header row.
The list of columns now shows the headings in addition to the column letters.
We want to remove duplicate values from the Description column. We will deselect the other columns.
An alert appears letting us know that 45 duplicate values were removed and 69 unique values remain.
Filtering data
Take a moment to examine the remaining values. While there are no duplicate values, there are some descriptions that aren't purchases such as the previous balance, payments, and refunds. To remove these, we'll filter the Purchase column and remove the blank values.
There are now small filter icons next to each column heading.
The blank values have been filtered and are now hidden.
Let's use another filter to see just the place we purchased groceries.
We now see the four places we purchased groceries in the month of March.


