

Many video projects will involve working with audio clips of some sort, such as background music, voiceovers, and more. For our project, we'll be working with a number of different audio files — first, we'll be adding some pre-recorded voiceovers that describe the different types of dances.
In Premiere Pro, you can work with audio that's been recorded in stereo, mono, and surround sound. The individual audio clips on the timeline will show multiple tracks on one layer if the audio was recorded in stereo, or a single track if it's mono. The audio we're working with today was recorded in stereo.
Before we start adding audio, let's zoom out so we can see all the clips on the Timeline at once. This time, we'll use the mouse in combination with the Alt key on the keyboard to zoom out quickly.
Step 1. To zoom out,
press and hold Alt key, scroll down with the mouse wheel until all clips fit in the timeline
Now that we can see all the video clips we've got on the timeline, we can add the corresponding audio clips.
Step 2. If necessary, expand the Audio bin so the contents can be seen.
Step 3. To add the first audio clip to the Timeline, in the Project panel,
Press & Drag w.mp3 to the Audio 2 track, directly underneath waltz.mp4
Step 4. If necessary, to move w.mp3 to the beginning of the Timeline,
Press & Drag w.mp3 so the beginning of the clip lines up with the beginning of waltz.mp4
Adding More Audio
As you can see, the process for adding audio clips to a sequence is very similar to adding video clips. Let's add the rest of our audio now.
Step 1. To move f.mp3 to the Timeline, in the Project panel,
Press and Drag f.mp3 to the Audio 2 track, matching the beginning of the clip to the beginning of foxtrot.mp4
Step 2. Repeat step 1 to place t.mp3, c.mp3, and s.mp3 on the timeline.
Your timeline should look similar to the following image:
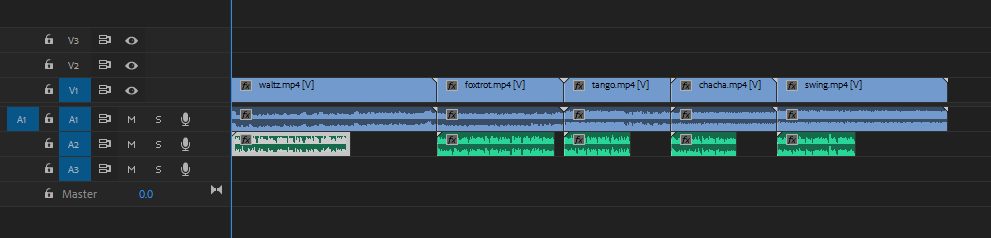
Now that we have our audio added, let's work on adjusting when each audio file starts in relation to the video clip it accompanies.
Using Track Select Tool
We want each of our audio clips to begin playing 3 seconds after the accompanying video clip. We can use a tool called Track Select to manipulate several files at the same time.
Step 1. To position the playhead, in the top left corner of the Timeline panel,
Click![]() , type: 00;00;03;00 Enter
, type: 00;00;03;00 Enter
NOTE: Your playhead position may be set at a different point than the one shown in the step above.
Step 2. Zoom in, if necessary.
Step 3. To select the Track Select Tool, in the Tools panel,
Click![]()
Click ![]()
Step 6. To move all the clips on the Audio 2 track, with the Track Select tool active,
Press & Drag w.mp3 until it meets the playhead