

Our video is looking good, but it still needs a title at the beginning as well as credits at the end. Let's start by adding the credits to the end of the sequence we're currently working on.
To start the process of making ending credits, we'll want to switch to the Captions and Graphics workspace. This workspace contains the Essential Graphics panel, which includes a number of templates we can use to create titles, lower third graphics, captions, and credits.
Step 1. To switch to the Captions and Graphics workspace, at the top of the Premiere Pro window,
Click ![]() , Click Captions and Graphics
, Click Captions and Graphics
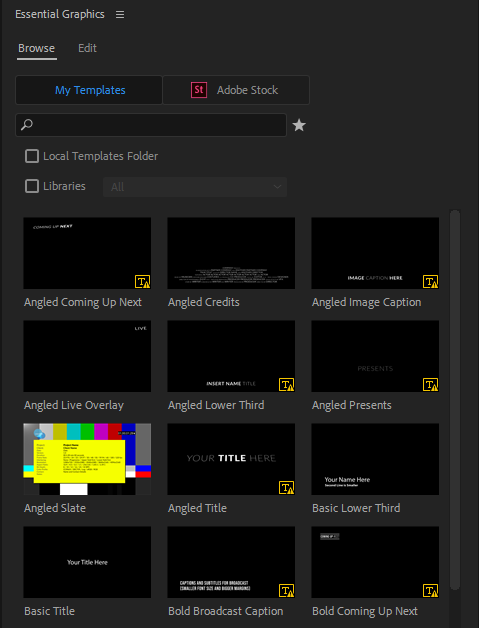
The Captions and Graphics workspace will open, and the panels on the screen will shift slightly to make room for a new panel, the Essential Graphics panel:
NOTE: Depending on your screen resolution settings, your Essential Graphics panel may display things differently. The screen capture shown previously only shows a portion of the Essential Graphics panel, displayed on a high resolution screen.
This panel holds a collection of different templates that make use of text, graphics, and special effects that can be used for titles, credits, and more. We'll be using the preset Classic Credits as a starting point for the credits for our video. Since there are so many different template to scroll through, we'll search for the appropriate template using the search bar at the top of the panel.
Step 2. To search for the Classic Credits template, at the top of the Essential Graphics panel,
Click ![]() , type: Classic Credits Enter key
, type: Classic Credits Enter key
The Classic Credits template will appear, and we can drag it to the Timeline to add it to our sequence.
Step 3. To add the Classic Credits template to the Timeline,
Press & Drag 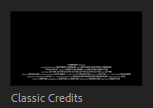 to the Video 1 track, next to swing.mp4
NOTE: At this point, you may receive an error message indicating the fonts used in this template aren't installed on your computer. While it's not necessary to resolve the font issues for the project we're working on, as we'll be changing the fonts, you can choose to get any available fonts from Adobe TypeKit by selecting the checkbox next to each missing font in the Resolve Fonts dialog box in the Sync from Typekit and Get from Typekit fields, then Click the Sync Fonts button to get the necessary fonts.
The template is displayed as a short clip on the Timeline, and it's colored bright pink. Before we start editing the clip, let's see what it looks like so far.
Step 4. Preview the credits clip.
The template's given us a good starting point for our credits, but there are a few things that could be changed to make these suit our needs better.
Editing a Template
While the template saved us a lot of work with putting together the credits, we might want to tweak a few things about the template. It might be a good idea to change the font used to something that matches the theme of our video a little better, and also hide some of the extra lines of text that are part of the template that we won't really need. Luckily, we can make these changes, and many others, to the specific instance of the template we're using. The changes we make won't be applied to the original version of the Classic Credits template, so we still have the original template if we need it.
Before we start making edits, let's zoom in on the Timeline a little bit so we can see the clip better.
Step 1. Zoom in until the credits clip appears larger on the timeline.
Step 2. To start the process of editing the credits clip, on the Timeline,
Double-Click the clip
The Essential Graphics panel will switch from the Browse tab to the Edit tab, and the clip on the timeline will turn gray. The first thing we'll do here is hide the line of text in the template that says "Company Presents", as we won't be needing that line.
Step 3. To hide the first line of text, in the Essential Graphics panel,
Click 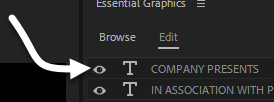
The line of text disappears from the screen. If we need it again for some reason, we can click the layer visibility toggle again to make it visible again.
Next, we'll edit the text of the credits so it includes information about our production. Let's start by editing the first line of visible text. We'll need to use the Selection tool to select that line of text, and we'll select it through the Program Monitor.
Step 4. To activate the Selection tool, in the Tools panel,
Click ![]()
Step 5. To select the first line of text, in the Program Monitor,
Double-Click the first line of text
The text is selected, and we can start typing in the text we want on this line.
Step 6. To change the text displayed on this line, on the keyboard, type:
your name Productions Presents
NOTE: If it's hard to see the text in the Program Monitor, you can zoom in on the footage using the dropdown menu next to the current time listing, towards the bottom left corner of the Program Monitor.
Step 7. Repeat steps 5 and 6 for the following lines of text, replacing the existing text with the following:
| Line number | Text to display |
| 2nd line | Learn to Dance with Michael Fatyanov and Friends |
| 3rd line | Waltz: Connie & Tim Tab key Tab Key Foxtrot: Tim & Kathy |
| 4th line | Tango: Ron & Connie Tab key Tab key ChaCha: Ron & Angela Tab key Tab key Swing: Angela & Tim |
Step 8. Hide the last two lines of visible text.
Styling the Text
Now that we've got the text for the credits changed, let's make some changes to the appearance of the text. In the Edit tab of the Essential Graphics panel, we have lots of options for changing the appearance of text — we can change the font, font size, and font color, as well as change the alignment of text and its position in relation to other lines of text. We'll start by styling a couple of lines of text together, since the lines we'll select will all have the same appearance.
Step 1. Activate the Selection tool, if necessary.
Step 2. To select the lines of text to edit, in the Program Monitor,
Click the first line of text, press and hold Shift key, Click the third and fourth lines of text
Your selection should look similar to the following:

Now that we've got the lines of text selected, we'll change the font and the font size for the three lines of text all at once.
Step 3. To change the font for the selected text, in the Text section of the Essential Graphics Edit tab,
Click ![]() , type: Candara Italic Enter key
, type: Candara Italic Enter key
The font used for the selected lines of text changes. While we still have the text selected, let's make the size of the text larger.
Step 4. To change the font size for the selected text,
Click 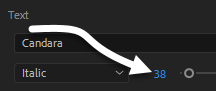 , type: 50 Enter key
Just like when we changed the font, the font size for all three selected rows of text changes. Now we can focus on the appearance of the line of text that includes the title.
Step 5. Select the second line of text.
Step 6. Repeat steps 3 and 4 with the newly selected text, changing the appearance values to the following:
- Font face: Script MT Bold
- Font size: 100
After we resize the text, we notice that the first line of text is overlapping the second line a little bit. We can change this by adjusting the space between the first and second lines of text.
Step 7. Ensure the second line of text is still selected.
Step 8. To change the spacing between the first and second line of text, in the Align and Transform section of the Essential Graphics Edit tab,
Click 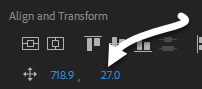 , type: 40 Enter key
The space between the two lines of text increases, and the first line is no longer overlapping the second line.
There are two more things we need to do before we can call our ending credits complete. First, we need to add the music to the credits, and then we'll need to extend the length of the credits clip so it matches the length of the audio.
Step 9. To add the audio for the ending credits, in the Project: Dances panel,
Press & Drag end.mp3 to the Audio 1 track on the Timeline, directly after the audio for swing.mp4
Step 10. To extend the length of the credits clip so it matches the length of end.mp3,
Point to the end of the clip until you see the trim cursor, Press & Drag to the right until the clip is the same length as end.mp3
At this point, you can preview the ending credits if you wish. After viewing the credits, we should save our work.
Step 11. Save the project.
Next, we'll add some transitions between the clips in our sequence.