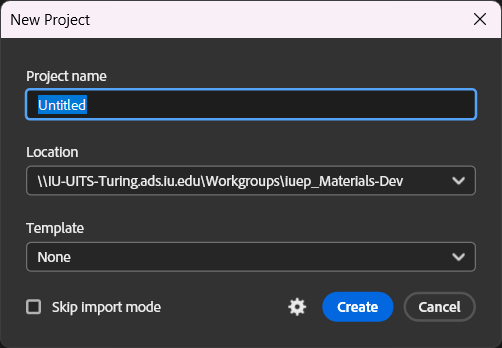
To start creating a new video in Premiere Pro, we first need to create a new project. This project is where we’ll assemble various media files together into a completed video.
As part of creating a new project, we’re given the opportunity to import the individual media files we want to use in the video. For the project we’re working on, we have several previously recorded video files, audio files, and still images that we’ll assemble into a finished video — these media elements are often referred to as clips, or sometimes as assets. (The terms are used interchangeably in these materials.) We’ll learn two different ways for importing assets into a project in this section, including importing assets when creating a new project and importing assets into an existing project.
Before we do this, let's take a moment to talk about using files from online sources in a video project.
Using images and music found online
When creating a video, it can be tempting to incorporate images and music you find online through a search engine such as Google into your project. While there are many sites on the internet that offer free use of their content, there are many others that do not — and some video hosting services will take down content that uses copyrighted material without permission. It’s important to make sure that you have permission to use any images or music you’re including in a video project. This can include paying a fee to license content, using content that’s in the public domain, or using media shared under a Creative Commons license.
The images used in the introduction are all available for download and use under a Creative Commons license, and the song we’ll use for the background music is available in the public domain. Visit the Credits page for Premiere Pro: The Basics to learn more about the creators of the image and audio files.
NOTE: Indiana University faculty, staff, and students can also use images from Adobe Stock in videos they create. Read the IU Knowledge Base article About Adobe Stock at IU to learn more.
Organizing a project’s assets
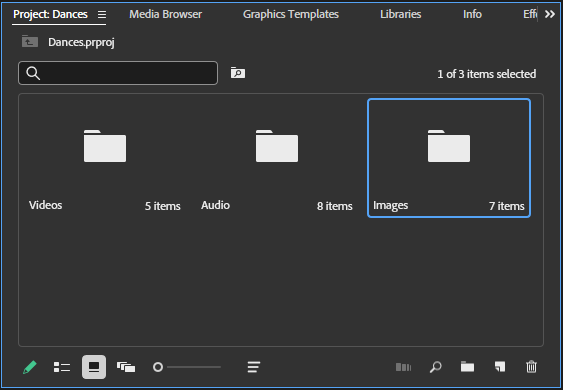
Before creating a project, it can be helpful to think about what types of assets we might work with in a project and how we want to organize them in Premiere Pro to help streamline the editing process. If we’re working on a large project with many different types of media files, we’ll want to have some way to make it easier to find an asset we’re looking for. We can do this by creating bins, which are essentially folders that hold assets we’ve imported into Premiere Pro. These bins will be accessible through the Project panel.
We can create as many bins as we need to keep our project organized, based on our project’s needs — for example, if you’re editing a series of interviews, you could create a bin that contains the necessary audio and video assets for a specific interview. For today, we’ll organize our assets by type: audio, video, and still images. We’ll also create an additional bin to house the sequences (or sections of video) created as part of the project.
A note about working with assets in Premiere Pro
An important thing to be aware of when working with assets in Premiere Pro is that when importing assets into a project, you’re actually creating a link to the file on your computer, and not importing the entire file into the project. This is different than what you might be used to when importing content into a file in applications such as Photoshop, Illustrator, Word, or PowerPoint. If you move or rename a file that’s used in a project, the missing file won't display properly in Premiere Pro. However, you can relink missing assets if necessary — to do this, follow the instructions on the page Relinking offline media in Premiere Pro on the Adobe Help website.