The first step in creating a movie with Adobe Premiere Pro is to collect the media that will be used in the project. While it is possible to capture video footage directly from a video camera into your computer using Adobe Premiere Pro, we'll be working with previously recorded video files which are ready to be imported into Premiere. We'll also incorporate some pre-recorded audio and some still images from Flickr in our project. All of these media elements that will be used in our project are referred to as assets.
It is important to note that when you import assets into Premiere Pro, you are creating links to the files. The items will not be stored in the application itself. This means that if you move or rename the source files while working on a project, Adobe Premiere Pro will not be able to find them. However, you can relink missing assets if necessary when moving a project to another computer.
Let's import the assets needed for the video project.
Step 1. To begin importing assets, on the Menu bar,
Click File, Click Import...
You see the Open dialog box.
We need to specify the name and location of the folder to import.
Step 2. To move to the desktop,
Click
Step 3. To open the PremierePro_Basics folder,
Double-Click the PremierePro_Basics folder
We will need to select the Dance Assets subfolder of the PremierePro_Basics folder, as it contains all the assets we'll be working with.
Step 4. To select the correct folder,
Click the Dance Assets folder
Step 5. To import the folder, at the bottom of the dialg box,
Click 
NOTE: You can also use the Media Browser in the bottom left corner to navigate to the file(s) you wish to import.
The Assets folder appears in the Project panel. By default, the Project panel is set to icon view, so we see a picture of a file folder with the name of the folder in the bottom left corner and the number of files it contains in the bottom right corner.
Let's change the view now.
NOTE: If you've used Premiere Pro previously, the Project panel will use whichever view method you've used previously — if the Project panel is already displaying in List view, you can skip step 6.
Step 6. To switch to List view, in the bottom left corner of the Project panel,
Click 
Step 7. To expand the Dance Assets folder, so you can see the files inside, in the Project panel,
Click 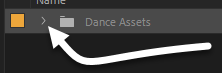
Adobe shows the contents of the Dance Assets folder: three folders containing images, audio, and video. When we imported the assets, we didn't actually bring in copies of these assets. Instead, links to where the files are located have been created, so Premiere Pro knows where to go to get these files. Adobe refers to the folders we've imported as bins. If we want to, we can create additional folders to hold any assets we create and help keep projects organized.
For today's project, we'll be creating one additional bin to store the sequences we create as we edit the video we're working on. Before we create the new bin, we'll want to make sure that any existing bins are deselected, so we're not accidentally creating the new bin inside another one.
Step 8. To deselect any selected bins, in the Project panel,
Click in the blank gray area below the last asset
Step 9. To create a new bin, in the bottom right corner of the Project panel,
Click 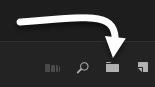
A new folder appears in the Project panel with the default name Bin. Let's rename the folder now.
Step 10. To rename the new folder, on the keyboard, type:
Sequences Enter
Now our bins are in place, and we are ready to create a new sequence. Before we do that, let's go ahead and save our work.
Step 11. To save the project, on the Menu bar,
Click File, Click Save
The project is saved. Unlike most other applications, when we save for the first time in Premiere Pro, we don't have to specify the filename and location, as we did that when we started the project. One thing to keep in mind when working with Premiere Pro is that project files (saved with the extension .prproj) aren't actual video files — in order to view a video made in Premiere in a media player, you'll need to export the sequence as a video file. We'll be doing this closer to the end of today's project.
Let's move on, and create the first sequence for our project.

