Editing a clip using the Source Monitor
When looking at the Source Monitor and Program Monitor panels, you'll notice that the two panels look very similar. Despite their similar appearances, the two panels perform different tasks:
- The Source Monitor plays back an individual clip, and allows you to perform basic edits to a clip that will later be added to a sequence.
- The Program Monitor plays back the entire active sequence that’s visible in the Timeline panel.
The Source and Program Monitors operate independently of each other, and will often display different frames of video. While it’s possible to edit clips in the Timeline panel and preview them in the Program Monitor, as we’ll practice doing later, there may be times where you want to focus on editing a specific clip on its own, and this is where the Source Monitor comes in handy.
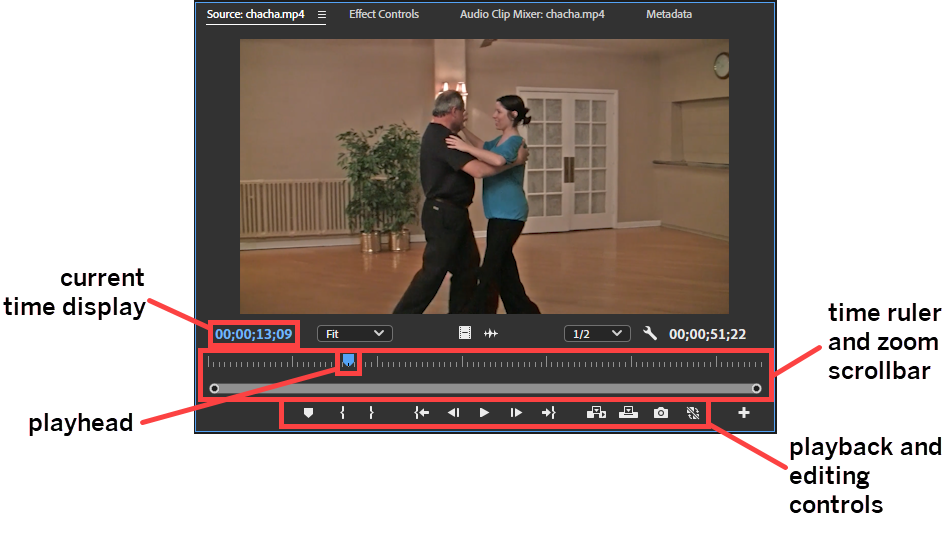
Following is a diagram of the Source Monitor, highlighting the controls and tools we’ll be using today:

The current time display shows the timecode for the specific frame we’re viewing in the Source Monitor. We can use the current time display in the Source Monitor to jump to a specific frame in the clip we’re working with, just like we can do in the Timeline panel. Underneath the current time display is the time ruler, and the playhead shows the location of the frame we’re viewing on the time ruler. There’s also a zoom scroll bar immediately underneath the time ruler, and it functions similarly to the zoom scroll bar at the bottom of the Timeline panel, allowing you to zoom in and out on the time ruler. Underneath the time ruler are the playback and editing controls — we can use these to control playback of the clip, set the In and Out points for the clip, and place the clip on the timeline when we’re done editing it.
Let's practice using the Source Monitor to edit a clip’s In point next.
Setting the In and Out points for a clip
In videography, a placeholder used to mark a specific timecode as the starting point for a clip is called an In point — similarly, a placeholder used to mark a timecode as the ending point for a clip is referred to as the Out point. Setting the In and Out points for a clip is one method we can use to trim the beginning and end of a clip, and we can do this in the Source Monitor using the Mark In and Mark Out controls. Setting the In and Out points for a clip should be done before the clip is added to a sequence – if the In and Out points are set after adding the clip to a sequence, the changes to where the clip starts and ends won't be reflected on the timeline.
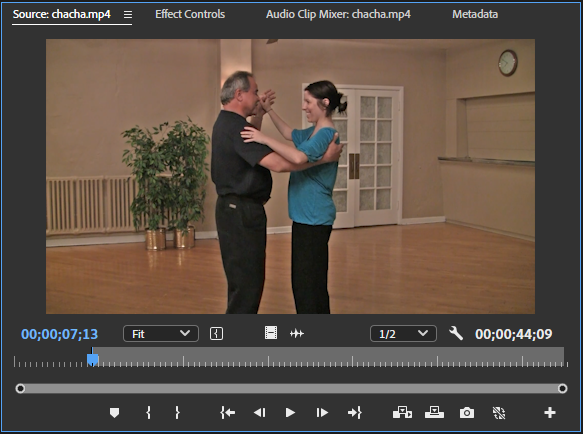
Setting the In and Out points for a clip in the Source Monitor involves positioning the playhead where we want to set the In or Out point, then clicking Mark In or Mark Out respectively. For today, we’ll be setting the In point for the clip chacha.mp4 so the clip starts around the point when the couple starts dancing, at about seven seconds into the clip. We won’t set the Out point, as we want the clip to be a little longer than the voice-over we’ll be adding later and will trim the end of the clip after we add the voice-over.
If you move the playhead in the Source Monitor’s time ruler after marking the In point, you’ll notice that there’s now an indicator of when the clip will start playing, and everything before that point is grayed out, as shown in the following screenshot:

As mentioned previously, we won’t set the Out point, as we’ll be adjusting the end of each clip once the narration is added to the sequence. We can, however, add the clip to the sequence now — we’ll use one of the options in the Source Monitor to accomplish this: the Insert option.
Using the Insert function in the Source Monitor
Another feature of the Source Monitor is the ability to add a clip that’s open in the Source Panel to the active sequence: the Insert and Overwrite functions.
The Insert function works by inserting a clip wherever the playhead is positioned in the active sequence in the Timeline panel — if the playhead is in the middle of a clip, the clip will be split at that location and the clip open in the Source Monitor will be placed where the existing clip is split, with the existing clip restarting where it was split once the inserted clip ends. This process doesn’t replace any of the content in the active sequence.
The Overwrite function, on the other hand, will overwrite an existing clip in a sequence with the clip currently open in the Source Monitor, with the new clip starting wherever the playhead is located.
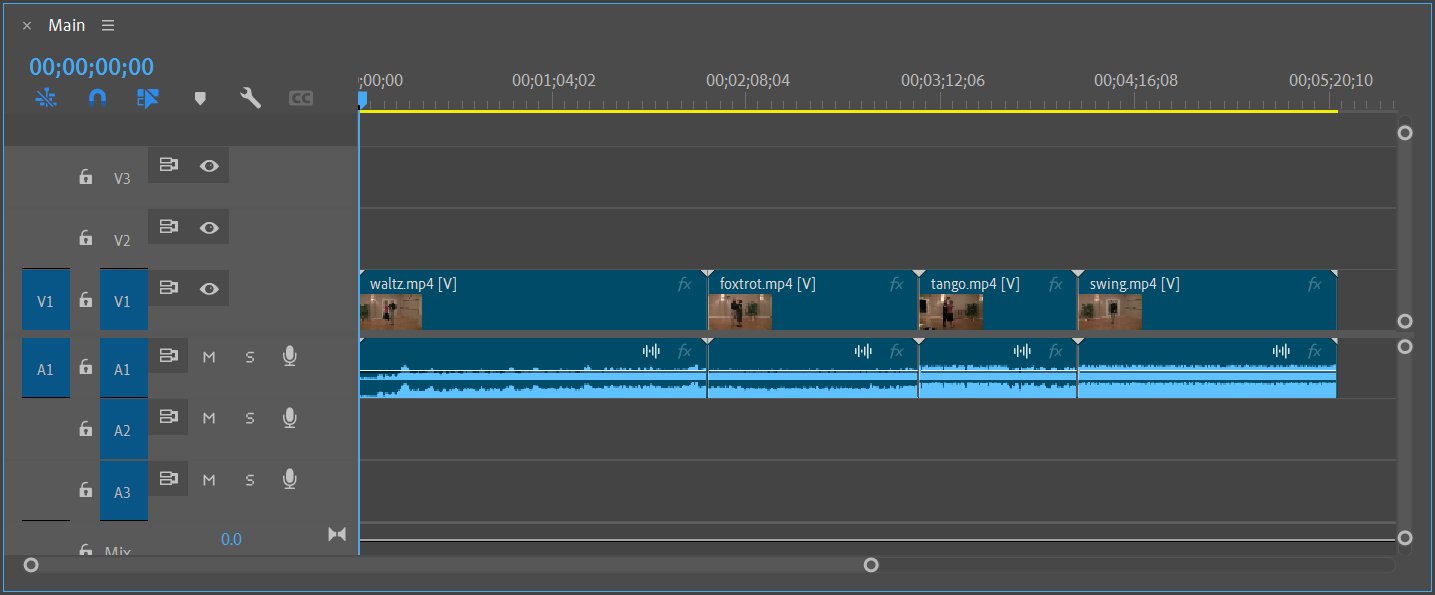
Since we want to position chacha.mp4 between tango.mp4 and swing.mp4, and don’t want to overwrite any of the existing footage, we’ll use the Insert function to add the clip to the sequence between the two existing clips. We’ll start by moving the playhead to where the clip should be inserted, then using the Insert function to add it to the sequence.
Now that we know how to edit clips using the Source Monitor, let’s practice editing clips that have already been added to a sequence.


