When working on a video project, there may be times when you want to incorporate graphics of your own, such as still images or a custom lower third graphic. Photoshop and Illustrator both provide tools that will help with making graphics for video. Creating graphics for use in video requires a different approach than when creating graphics for web or print use, however, and there are several things you'll need to be aware of before creating a video graphic.
Graphics created for video use share a number of similarities with graphics created for the web, as both types of graphics will ultimately be displayed on a screen. Following is a brief outline of the characteristics that video and web graphics share:
Both have a suggested resolution of 72 pixels per inch (ppi).
Both types of graphics use the RGB color mode.
Both types of graphics can be saved in the same file formats — PNG and JPG are best for video use.
Graphics created for video also have their own unique characteristics that make them different from graphics made for other uses. First off, you'll need to be aware of the aspect ratio of the video you're incorporating graphics into, especially if you're making full-screen graphics. Common aspect ratios include 4:3 and 16:9 — 4:3 is the aspect ratio typically seen on older televisions, while 16:9 is the aspect ratio for modern widescreen televisions. You may also need to need to be aware of whether or not your video needs to conform to a specific broadcast standard, such as NTSC or PAL. Finally, you'll need to be aware of title-safe and action-safe areas when creating full-screen graphics for video. (As a reminder, title-safe refers to an area where text and graphics will display without being accidentally cut off by the edges of a screen, and action-safe refers to the area of the screen where any essential action should be located.)
Photoshop and Illustrator both offer presets for creating graphics for video use, and these presets include guides that indicate action-safe and title-safe areas. The following sections outline how to create and save graphics for video in Photoshop and Illustrator.
Creating and saving graphics for video use in Photoshop
The following accordions discuss how to create and save graphics for use in video projects in Adobe Photoshop.
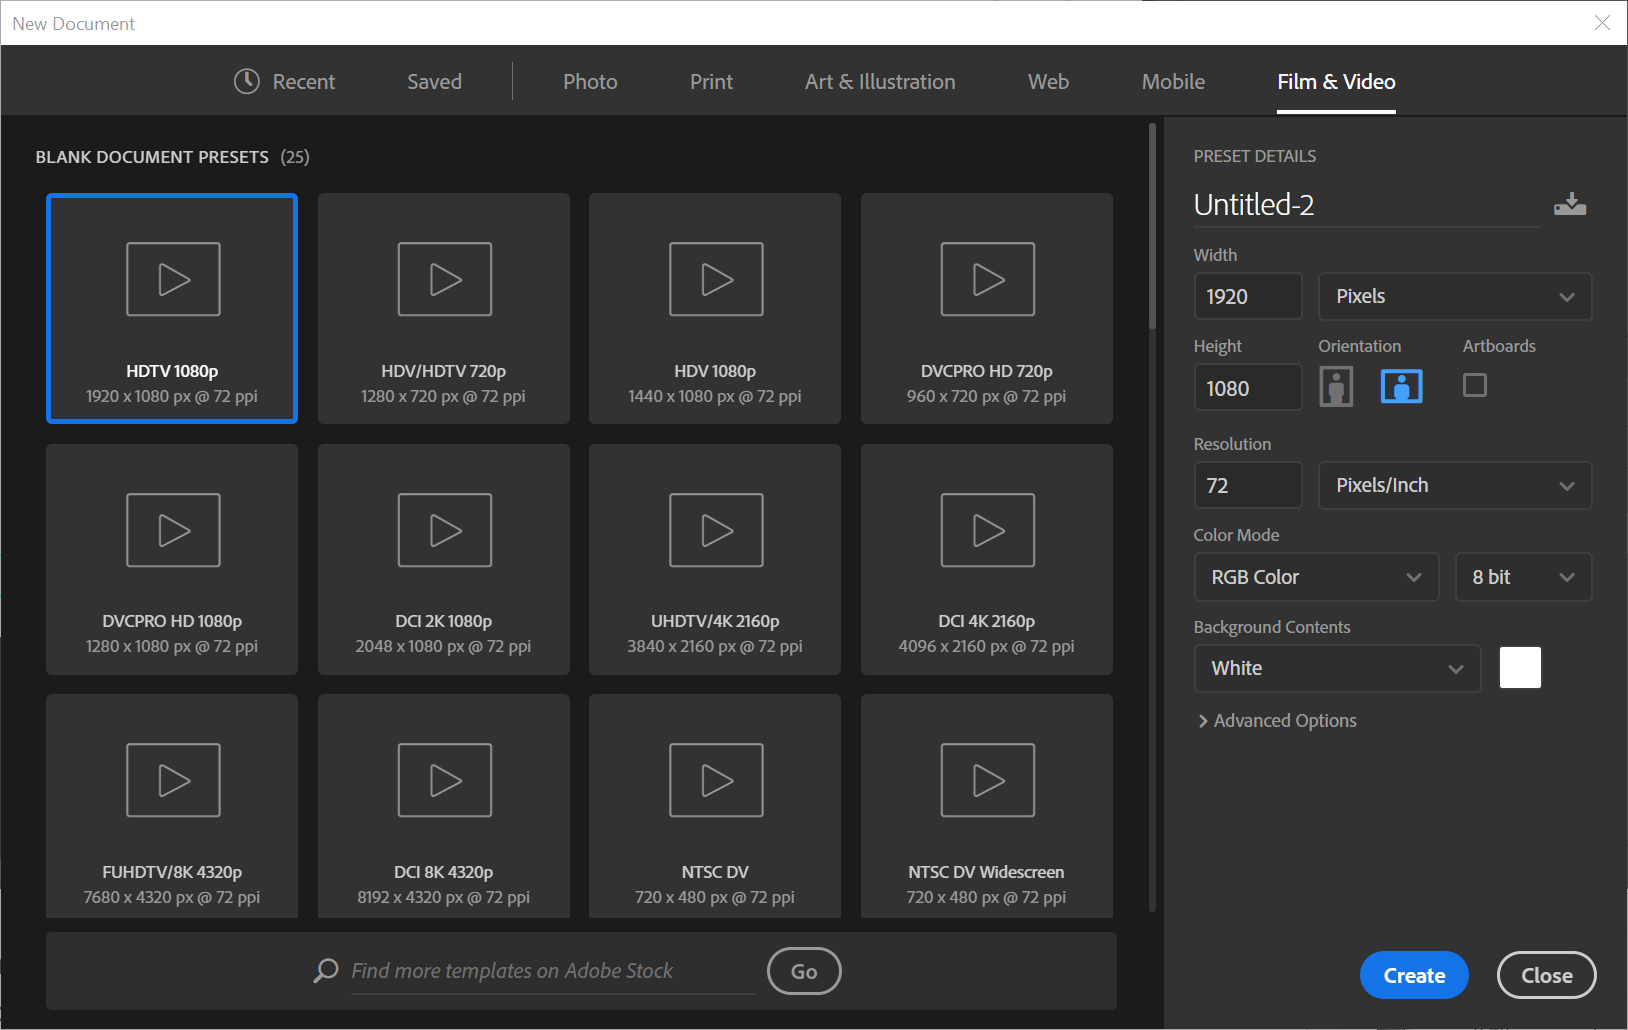
When creating a new graphic for use in video using Photoshop, you'll want to start with the Film & Video presets - there are presets available for many different screen resolutions and broadcast standards (such as NTCS and PAL). The following image shows a number of these presets in the Film & Video preset collection in the New Document dialog box:
These presets will make it especially easy to get started, as you can choose the preset that matches the standard and resolution you're working with and Photoshop will create the new file to the needed specifications.
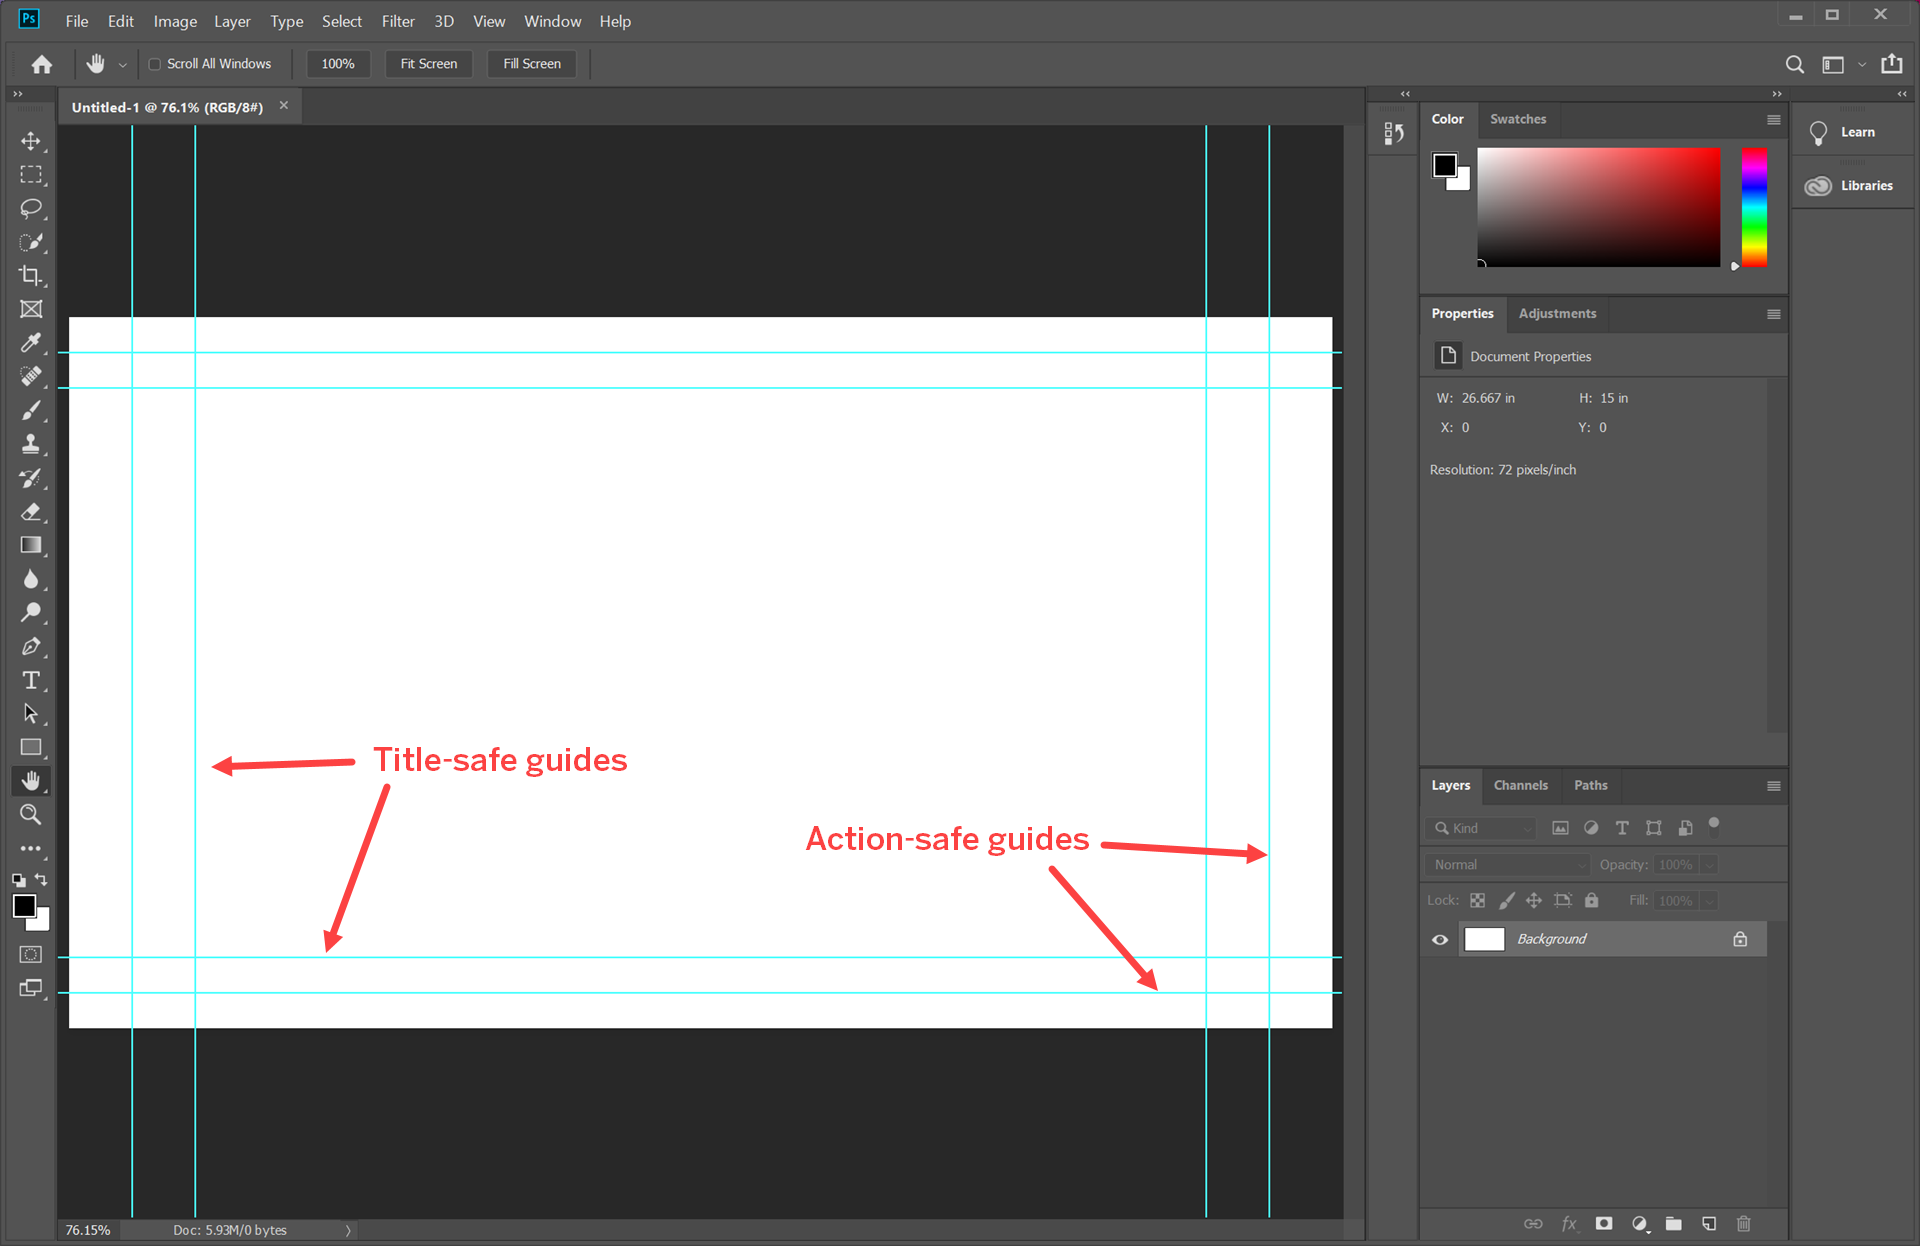
When a new file is created, Photoshop will automatically add guides that indicate title safe and action safe areas.
Once the new document is created, you can then work on designing the graphic.
When saving a graphic created for video in Photoshop, the following file formats are ideal:
High-quality JPEG (.jpg): A high-quality JPG file will retain a smaller file size, while still providing a detailed image for screen use. All video creation programs can work with JPG images.
Photoshop document (.psd): If you're working in Premiere Pro or After Effects, you can import a .psd file directly into either program. The file size will be larger than a .jpg file, however.
Saving a .psd version of a file is rather straightforward, as it's the default file format in Photoshop. Exporting a .jpg version involves a few extra steps, however.
To export a .jpg version of an image, in the Menu bar,
Click File, Point Export, Click Export As...
The Export As dialog box appears:
To change the file format to JPG, in the Format dropdown of the File Settings section, if necessary,
Click , Click JPG
To change the quality to 100%, in the Quality dropdown, if necessary,
Press & Drag the Quality slider all the way to the right
To continue the export process, in the lower right corner of the Export As dialog box,
Click
In the Save As dialog box, navigate to the folder where you wish to save the file, and if desired, type a new name for the file in the File name field.
To finish saving the file, in the lower right corner of the Save As dialog box,
Click
Creating and saving graphics for video use in Illustrator
The following accordions discuss how to create and save graphics for use in video projects in Adobe Illustrator.
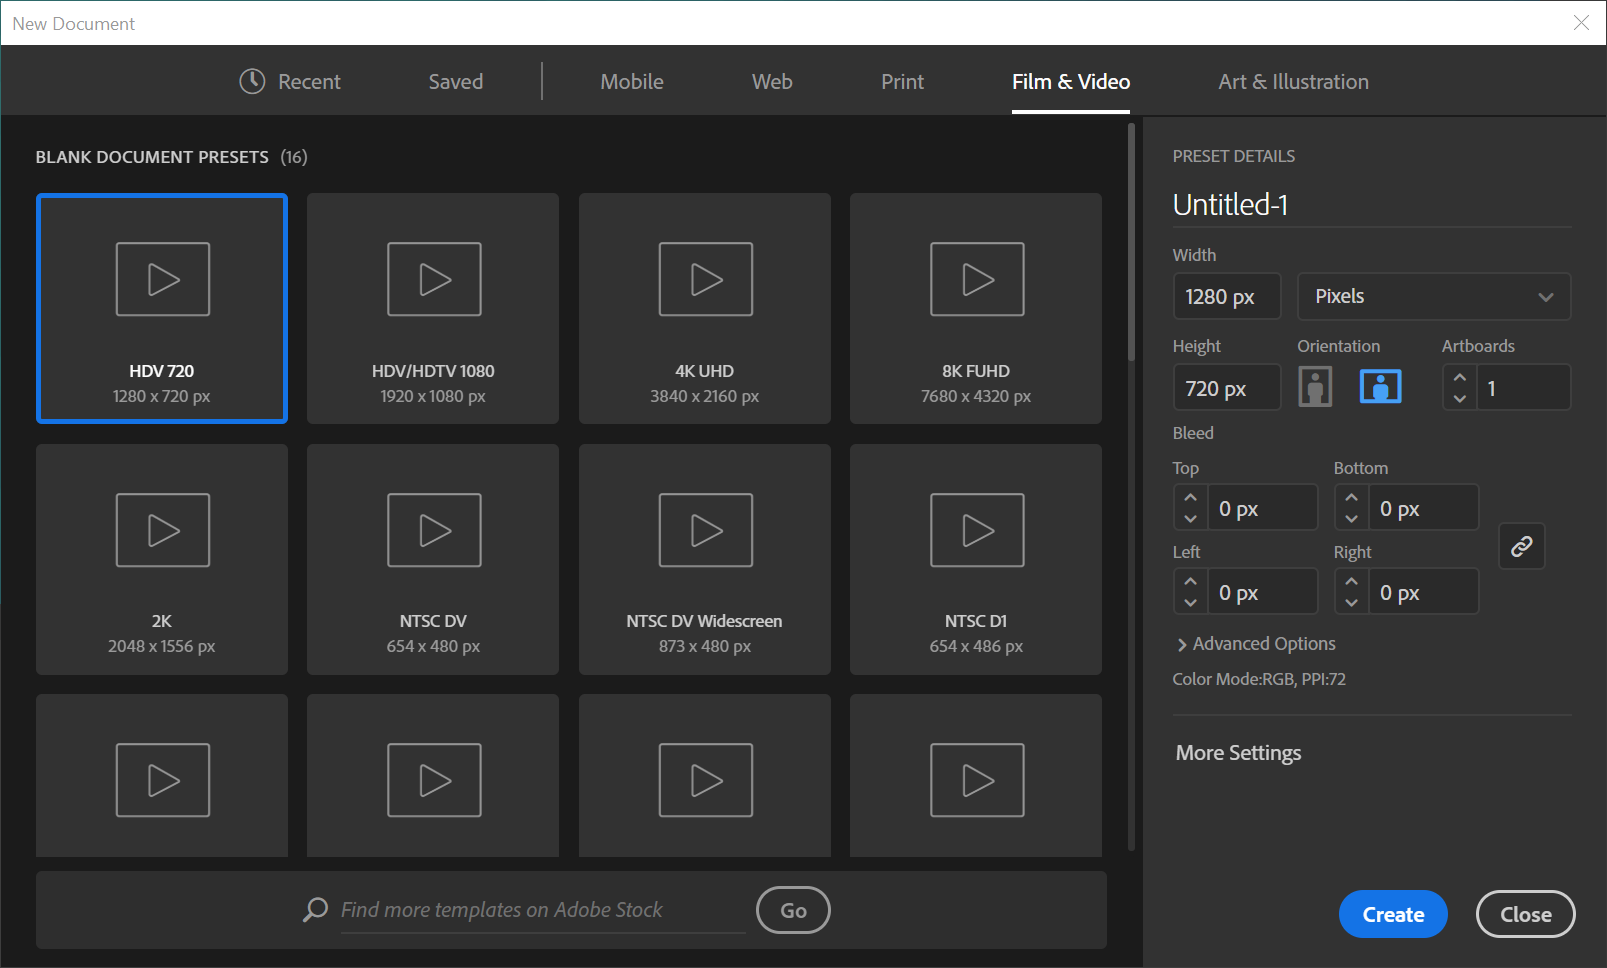
When creating a new graphic for use in video, you'll want to start with the Film & Video presets - there are presets available for many different screen resolutions and broadcast standards (such as NTCS and PAL). The following image shows a number of these presets visible in the Video & Film preset collection in the New Document dialog box:
These presets will make it especially easy to get started, as you can choose the preset that matches the standard and resolution you're working with and Illustrator will create the new file to the needed specifications.
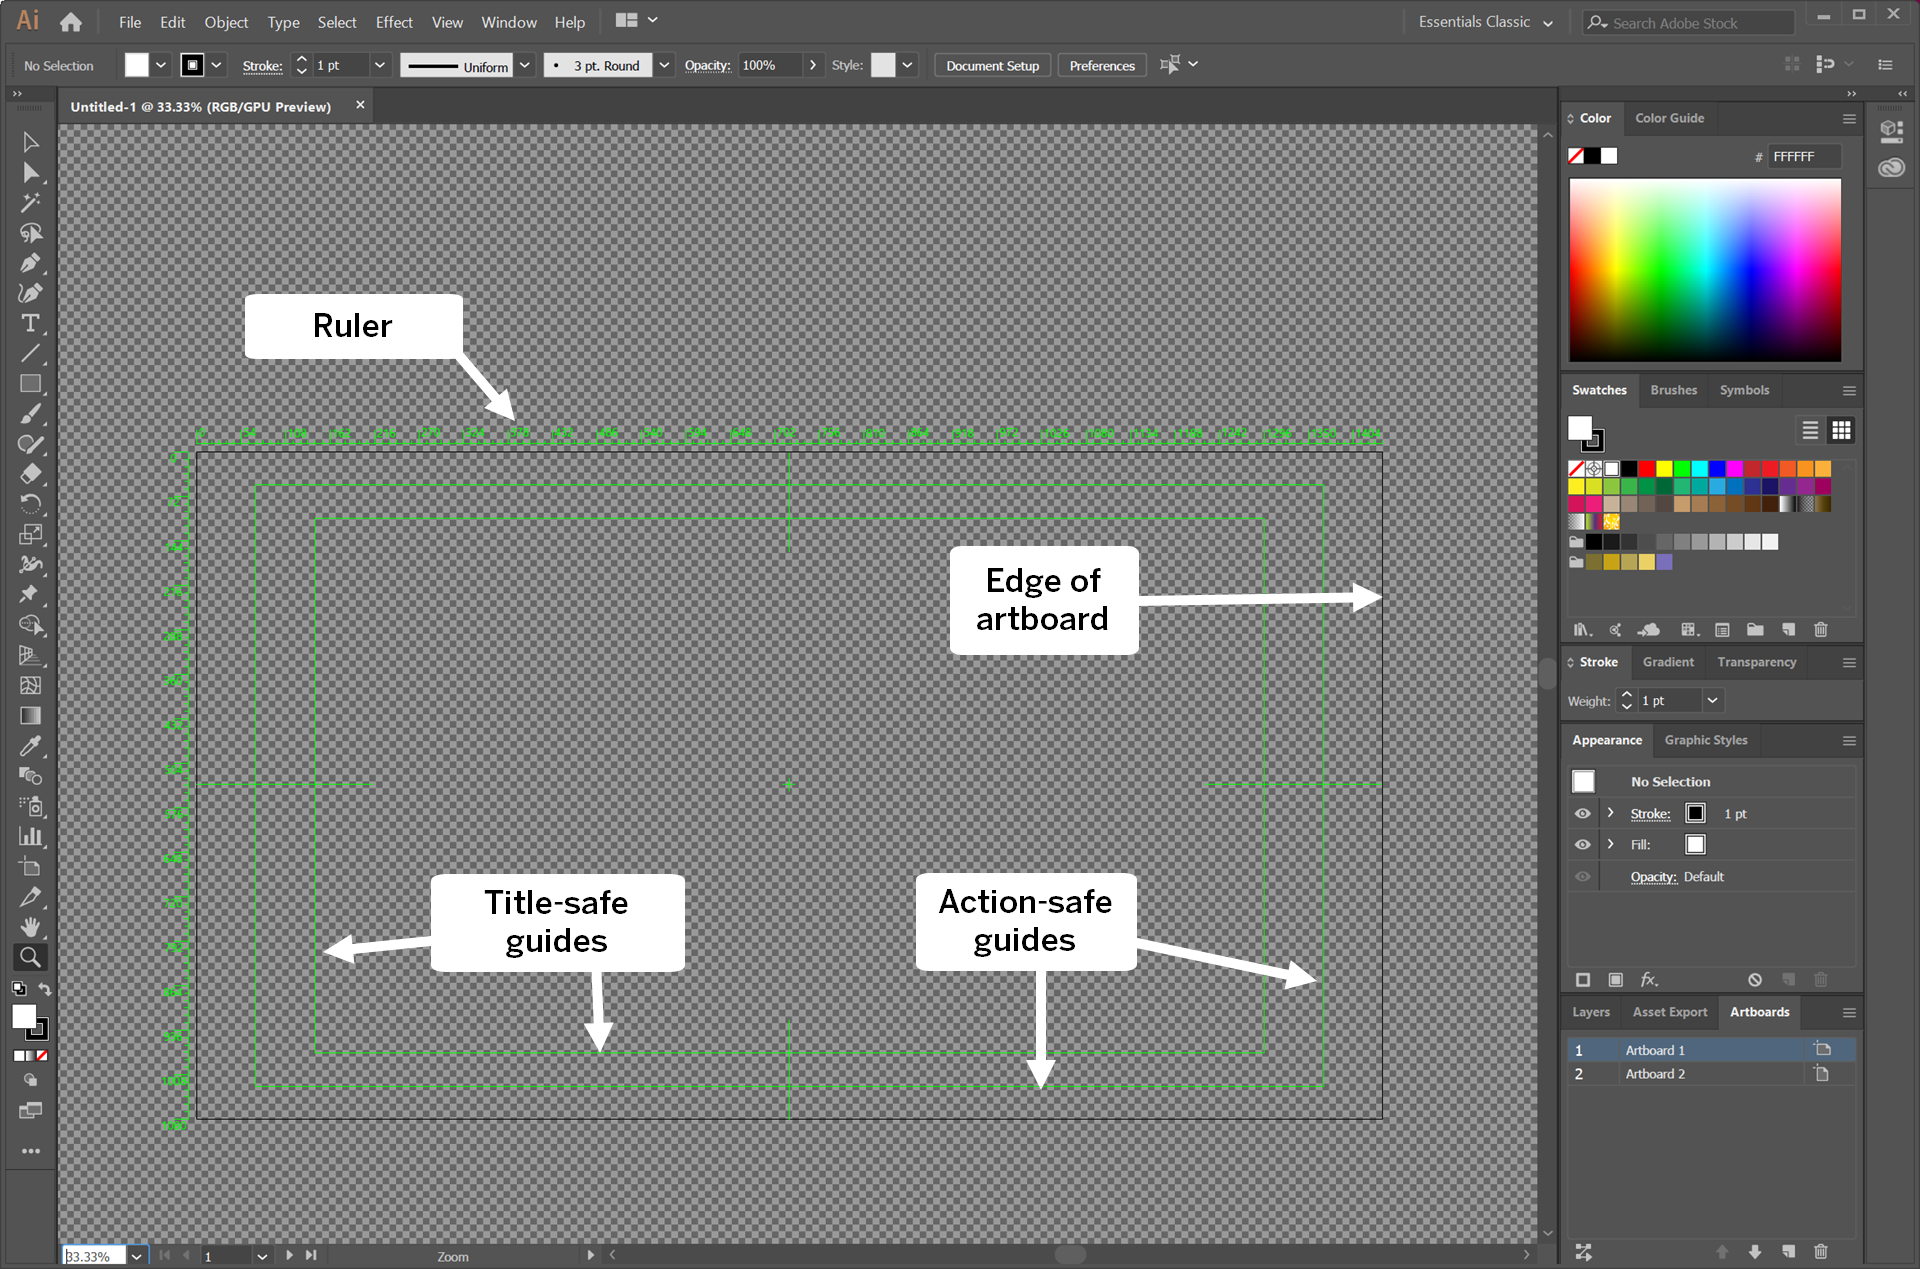
When a new file is created, Illustrator will create an artboard and automatically add guides that indicate title safe and action safe areas, and will also display rulers measuring in pixels.
Once the new document is created, you can start designing your graphic.
NOTE: In Illustrator, when a new document is created using the Film & Video presets, a second, extremely large artboard is sometimes created as well - this is due to a bug, and can be deleted using the following process: in the Artboard panel, Double-Click Artboard 2, Click .
When saving a graphic created for video in Illustrator, the following file formats are ideal:
Portable Network Graphics file (.png): Best format for images with large areas of single colors, or images that include transparency. Results in a relatively small file size.
Illustrator file (.ai): If you're working in Premiere Pro or After Effects, you can import an .ai file directly into either program. Additionally, in After Effects, an Illustrator file can be animated if desired.
Saving as an .ai file is rather straightforward, as it's the default file format in Illustrator. Exporting a .png version involves a few extra steps, however.
To export a .png version of an image, in the Menu bar,
Click File, Point Export, Click Export As...
To choose the appropriate file type, in the Save as type: dropdown, if necessary,
Click , Click PNG (*.PNG)
At this point, you can indicate if you want the exported artwork to conform to the size of the artboard, and not include any parts of elements that are outside the artboard. If you have elements that overlap the outside of the artboard and don't want to include them, or if you want your image to match the size of the preset you chose, you'll want to choose the Use Artboards option.
To indicate you want to export using artboards, if necessary, under the Save as type: field,
Click the checkbox next to Use Artboards
To continue the export process,
Click
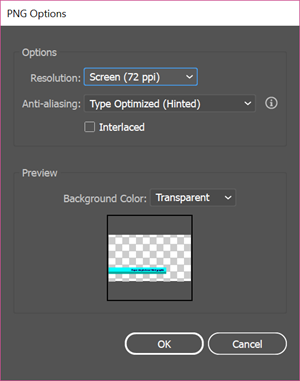
The PNG Options dialog box appears:
From here, if desired, you can adjust any settings needed before completing the export process.