Since we worked with queries in both Access: The Basics and Access: Structuring & Relating Data, we will start by editing some existing queries. When we are revising these queries, we want to be sure that we don't save over the query we are starting with, so before we start working with criteria, let's make it easier to save queries under a different name.
Adding the Save As Command to the Quick Access Toolbar
To make saving queries under a new name easier, we will add the Save As command to the Quick Access toolbar.
NOTE: If you worked through the previous Access workshop materials, the Save As command may already be on the Quick Access toolbar. If so, skip to the next section.
Step1. To view available commands, on the Quick Access toolbar,
Click , Click More Commands...
Step2. To find the Save As command, in the pane on the left, if necessary,
scroll through the list until Save As is visible
Step3. To add the Save As command,
Double-Click the Save As icon
Step4. To close the dialog box,
Click![]()
Saving an Existing Query Under a New Name
Now that we have the Save As button on the Quick Access toolbar, let's use it to save the query under a new name.
Step1. To open an existing query,
Double-Click qrySalariesByRank>70,000Hired2000OrLater

2. To switch to Design View,
Click
Step3. To save the query, on the Quick Access toolbar,
Click![]()
Step4. To name the query, in the Save As dialog box, type:
qrySalary>70,000or<40,000Hired2000orLater, Click![]()
Using And Criteria and Or Criteria
We want to alter the query to also see faculty who are making under $40,000 who were hired on or after January 1.
The criteria currently looks like:

In Access: The Basics, we learned that when we put the criteria in the same row, we are creating an AND query, meaning that both conditions must be true for records to be returned.
In Access: Structuring & Relating Data, we learned that we can use the "or" row to include additional criteria. If we put the <40000 in the Salary field "or" row, we would be creating an OR query that displays people making less than $40,000 regardless of hire date. While we could add the hire date to that second row, there is another way we can create the OR criteria we want in a single row.
We want to combine the criteria for the salary, so we find faculty making more than $70,000 or less than $40,000. In addition to using the grid to create an AND query and an OR query, we can also use the logical operators AND and OR. Logical operators are operators whose results are either true or false.
Step1. To alter the criteria,
Click after ">70000", type: or <40000 Enter key
Step2. To view the results,
Click
Step3. To save the changes, press:
Control key + S
Step4. To close the query,
Right-Click the query tab, Click Close
NOTE: You can also close a query with the keyboard shortcut Control key + W.
Using NOT
Sometimes it's easier to describe what we want to exclude from our results rather than what we want to include. The NOT logical operator allows us to do this.
Let's revise an existing query to see how NOT works.
Step1. To open an existing query,
Double-Click qryCoursesAndSectionsSummer18
Step2. To switch to Design View,
Click
Step3. To save the query, on the Quick Access toolbar,
Click![]()
Step4. To name the query, type:
qryCoursesAndSectionsNotSU18 Enter key
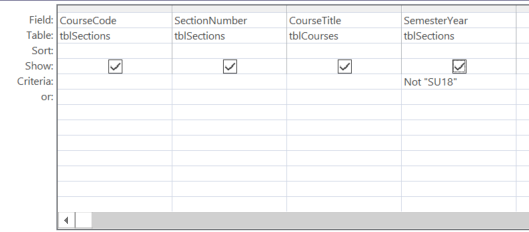
Step5. To position the cursor, in the SemesterYear Column,
Click before "SU18"
NOTE: If you have trouble doing this, you can also Click in the SemesterYear criteria row and then press the Home key.
Step6. To alter the criteria, type:
Not Enter key
Step7. To show the field, in the SemesterYear field,
Click the Show checkbox

8. To view the query,
Click
Step9. To save the changes, press:
Control key + S
Step10. Close the query.
Using Wildcards to Define Criteria
Access allows us to use wildcard characters when we want criteria to be more flexible. The wildcard character in criteria means "anything can go here." The wildcard character is the asterisk (*).
Let's open another query that was created previously and edit it to use wildcards.
Step1. To open the query,
Double-Click qryDeptCoursesFA18NotOnWednesday
Step2. To go to Design View,
Click
Step3. To enter the criteria, in the SemesterYear Criteria field, type:
FA18 Enter key
Step4. To enter the new criteria, in the MeetingDay Criteria field, type:
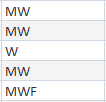
m* Enter key
NOTE: The criteria is not case sensitive.

Step5. To view the query,
Click
Step6. To return to Design View,
Click
Step7. To position the cursor,
Click to the left of Like
Step8. To change the criteria, type:
Not Spacebar Enter key
Step9. To view the query,
Click
Step10. To return to Design View,
Click

Step11. To select the current criteria for Meeting Day,
Press & Drag across Like "m*"
Step12. To change the criteria, type:
*w* Enter key
Step13. To view the query,
Click
Step14. To save the changes, press:
Control key + S

