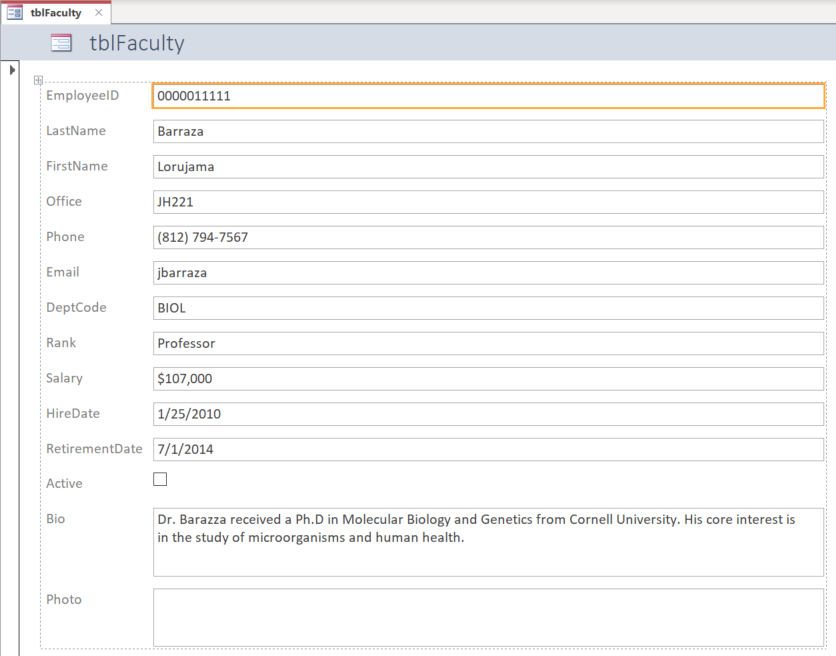
Forms in Access show a different view of our data than we've seen with tables and queries. Forms can be useful, even in a database with only one table, because we can show all the information for a record in an integrated space and make data entry easy and user friendly. The real power of forms begins when you use relational forms with information from multiple tables. This information can then be displayed in an intuitive way, more like forms found on the web, for example, rather than in table format.
We'll start by creating a simple form for our faculty.
Creating a Simple One-Table Form
If we start to create our form with a specific object selected in the navigation pane, Access will make its best guess as to what fields to include based on the selected object. Since our first form will be just based on tblFaculty, we'll select that first.
Step1. To select tblFaculty, in the navigation pane,
Click tblFaculty
NOTE: You do not need to open tblFaculty, just have it selected.
Step2. Click the Create tab on the Ribbon.
Step3. To create a simple form, in the Forms group,
Click![]()

NOTE: The exact layout of your form may be different, depending on your window size and screen resolution.
Step4. To navigate to Joanne Benavidez's record, on the keyboard, press:
Page Down key until the record for Joanne Benavidez is displayed
Step5. To save the form, press:
Control key + S
Step6. To give the form a logical name, type:
frmFaculty, Click![]()
Step7. Close frmFaculty.
Creating a Relational Form
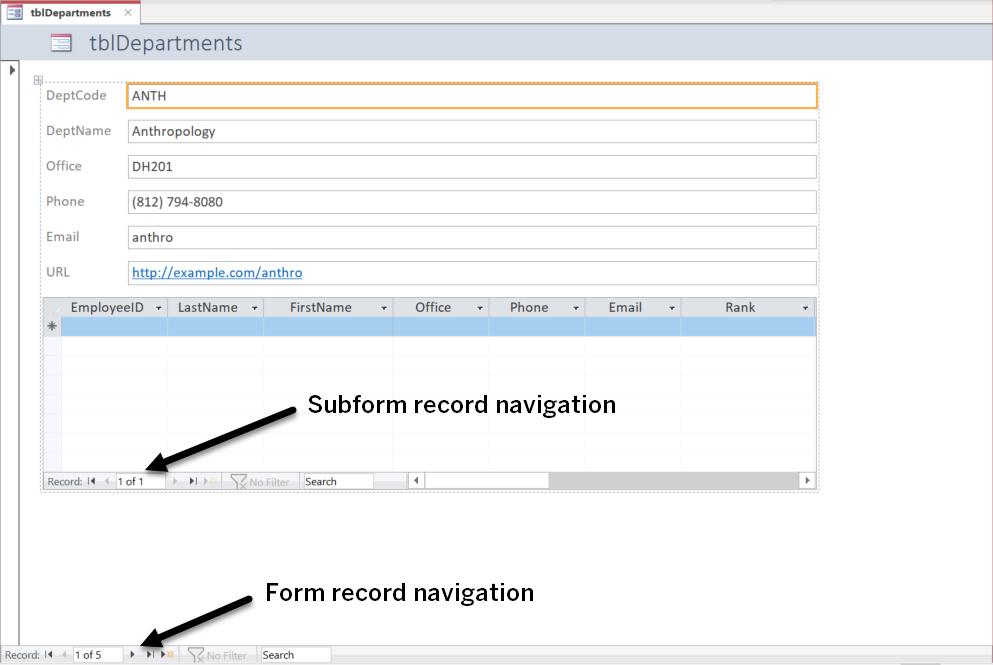
Relational forms can pull together data from multiple tables. To see that in action, we'll create a form based on tblDepartments.
Since tblDepartments is on the "one" side of the one-to-many relationship with tblFaculty, Access will assume that we want to pull information from both tables together.
Step1. Switch to the Create tab, if necessary.
Step2. Click tblDepartments in the navigation pane.
Step3. To create a relational form,
Click![]()
NOTE: If the Form button is grayed out, make sure that you have tblDepartments selected in the navigation pane.

NOTE: The title of the form initially shows as tblDepartments, because that table was the basis for the form; we can change that title by clicking on it if we desire.
NOTE: Depending on your screen size and resolution, the gap between the subform record navigation and the form record navigation might be larger than pictured here.
Step4. To navigate to the next department, at the very bottom of the form, in the record navigation for the main form,
Click
Changing Data in a Form
We've learned that Bella Cedillo's salary is incorrectly entered in tblFaculty. We'll make the fix to the data here in our form.
Step1. Scroll right, if necessary, until the Salary field is visible.
Step2. To find Bella Cedillo's record, scroll down in the subform, if necessary.
Step3. To select the correct field, in Bella Cedillo's record,
Click in the Salary field, Press & Drag across "$61,000," type 81000 Down Arrow key
Step4. To open our most recent query, in the navigation pane,
Double-Click qrySalariesByRank>70,000Hired2000OrLater
Step5. To open the sort and filter menu for the last name column,
Click
Step6. To deselect all names,
Click the Select All checkbox
Step7. To select Bella Cedillo,
scroll down if necessary, Click Cedillo, Click![]()
Step8. Confirm that the new salary is $81,000.
Step9. Right click the qrySalariesByRank>70,000Hired2000OrLater tab, choose Close.
Step10. In the dialog box, click No to close without saving.
Step11. On the Quick Access toolbar, click Save.
Step12. To enter a name for the form, in the Save As dialog box, type:
frmDepartmentsAndFaculty, Click![]()
Step13. Close the form.

