Queries allow you to ask questions of your data. We might ask Access to show us all the faculty in a certain department, or all faculty who were hired on or after a given date. This is where the power of databases becomes apparent, as we can slice and dice our data to find out very specific information. We can analyze our data and find trends by asking the right questions of our data.
When running a query, Access will retrieve and display a set of records in datasheet view, which is called a dynaset. This reflects that the display is dynamic and could change each time the query is run, depending on what data has been added, edited, or deleted.
Creating a Single Table Query
We'll start with a simple one-table select query from tblFaculty, and then see how to build a relational query by connecting faculty and their departments, pulling fields from both tblFaculty and tblDepartments. A select query is a query that displays subsets of data but does not perform any action on them. To start making a query, we'll want to switch to the Create tab on the Ribbon.
Step1. To switch to the Create tab, on the Ribbon,
Click the Create command tab

Step2. To open the Query Design tool,
Click![]()
Selecting a Table for a Query
We will open tblFaculty to start with, as all the fields we need for our first query are in that table.
Step1. To open up tblFaculty, in the Add Tables pane,
Double-Click tblFaculty
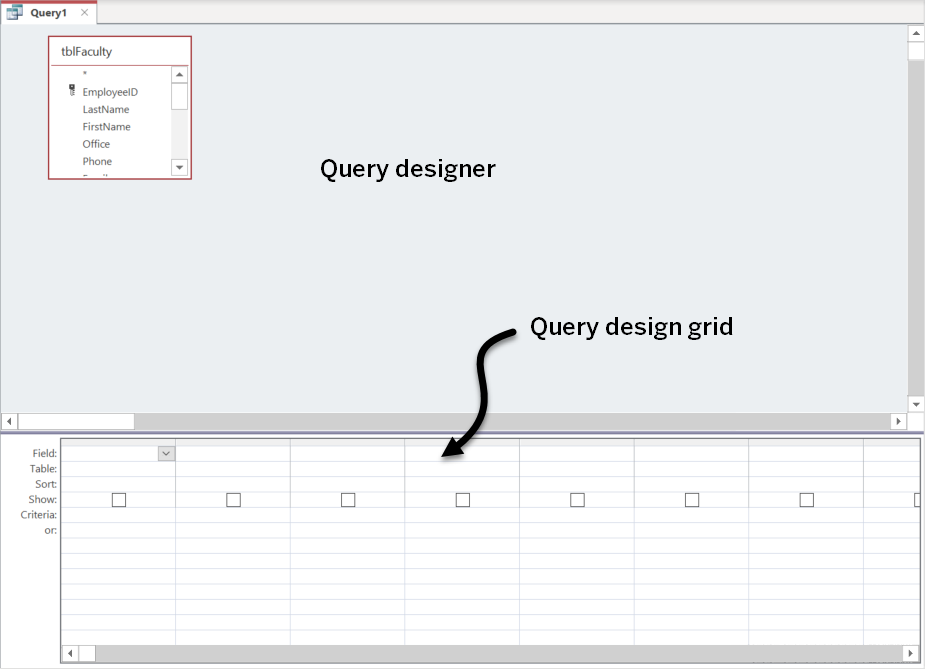
Step2. Expand the tblFaculty window, if necessary, so that all of the fields are displayed.
Selecting the Appropriate Fields
For our first query, we'd like a list of all faculty members with their departments and rank.
Step1. To add the first field to the query, in the tblFaculty window,
Double-Click LastName
Step2. To add the next field,
Double-Click FirstName
Step3. To add the last two fields to the query,
Double-Click DeptCode, Double-Click Rank
Step4. To switch to datasheet view,
Click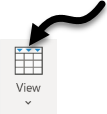
NOTE: Although there is a Run option on the Design tab on the Ribbon, simply viewing our results in datasheet view is sufficient for this query. In some cases, Run is used to make changes to the data, but it's always safest to look at the results using datasheet view first.
Sorting the Query Output
The default display of our initial query is by EmployeeID number, but that is not particularly useful in this case. We'd like to have our faculty listed alphabetically by name, as that order is easier to understand at a glance.
We'll sort by last name and then first name. We'll have to switch back to design view first.
Step1. To switch back to design view,
Click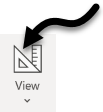
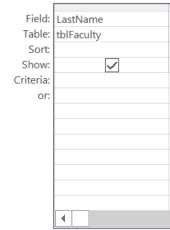
Step2. To sort the output by last name, under the LastName column,
Click the Sort field
Step3. To select the desired sort option, in the Sort field,
Click , Click Ascending, press: Tab key
Step4. To select the desired sort option,
Click , Click Ascending
Step5. To return to datasheet view,
Click
Using Criteria to Filter Query Results
Suppose we wanted to focus on the faculty of the Political Science department. We could sort our records by department code and then scroll down to the relevant section, but it would be even easier if we could limit our query output to just display the relevant records.
We'll make use of the Criteria field for the DeptCode field in the query design grid to filter our results.
Step1. Return to design view.
Step2. In the query design grid, under DeptCode,
Click in the Criteria field
Step3. To limit our results to faculty in the Political Science department, type:
POLS
NOTE: Entering the department code in lowercase letters will return the same results.
Step4. To view the results,
Click
Editing Values in a Query
Our dynaset may resemble a new table, but what we're actually seeing here are the values in the underlying table (in this case, tblFaculty). This means that while we are viewing our output, we could make changes to the data in the dynaset, and this change would then be saved in tblFaculty.
Let's see this in action by editing a faculty member's name. We have learned that Billy Black would prefer to go by his full first name, William.
Step1. To edit Billy Black's first name, in the fifth row of the dynaset,
Click Billy
Step2. To change the value,
Press & Drag across "Billy," type: William Down Arrow key
NOTE: Check that the edit icon ![]() is no longer next to the record to ensure that your changes have been saved.
is no longer next to the record to ensure that your changes have been saved.
Step3. To open tblFaculty,
Double-Click tblFaculty
Step4. To edit Brian Briones's record, in the fifth row in the FirstName field,
Click Brian
Step5. To change the first name to Bill,
Press & Drag across "Brian," type: Bill Down Arrow key
Step6. To return to the query, at the top of the object workspace,
Click Query1
Step7. Scroll down, if necessary, to find the last name "Briones" in the query output.
Step8. To begin saving, in the Quick Access toolbar,
Click![]()
Step9. To name the query, in the Query Name field, type:
qryPOLSFaculty Enter key
Creating a Relational Query
Now that we've seen how to create a simple, one-table query, let's try creating a more complex query that includes information from tblDepartments, and lists all faculty members by their departments.
We're going to base our new query on what we've done so far, but before we start making changes, we should save the query with a new name. This way, we don't risk overwriting the current query.
Saving a Query with a Different Name
It's a very common thing to adjust an existing query to ask a related but slightly different question of the data, in this case, to list all faculty with the full department name. However, we don't want to lose the structure of the original query that we built. Instead, we will come up with a new name for this query, and save it as a different database object.
It would be helpful to have the shortcut to Save As in our Quick Access toolbar in the upper-left corner of the program. As with most other Microsoft Office programs, the default tools on the toolbar are just Save, Undo, and Redo. However, Microsoft makes it pretty easy to add additional tools to the Quick Access toolbar.
Adding a Shortcut Tool to the Toolbar
We'll add Save As to the Quick Access toolbar in the upper left, so that if we decide to tweak other database objects, we'll have an easy way to save those objects with a new name.
Step1. At the top of the object workspace, click the qryPOLSFaculty tab, if necessary.
Step2. To start adding a new tool to the toolbar, in the upper-left corner of the Access window,
Click
Step3. To search for additional commands,
Click More Commands...
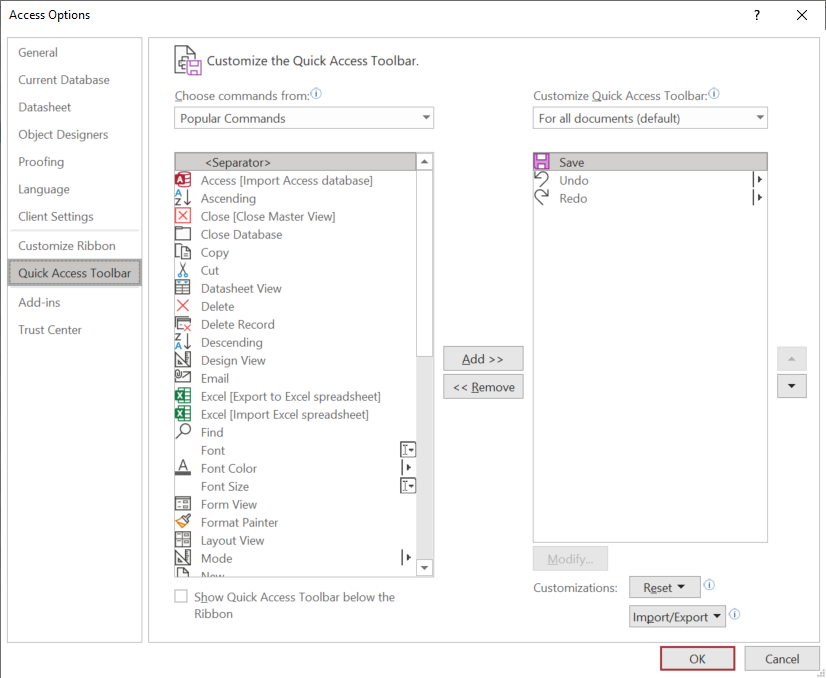
Step4. To choose Save As, in the list on the left,
scroll down if necessary, Click Save As
Step5. To move Save As to the Quick Access toolbar list on the right,
Click![]()
Step6. To accept the changes, in the bottom right corner of the Access Options dialog box,
Click![]()
Step7. To save our query with a new name, in the Quick Access toolbar,
Click![]()
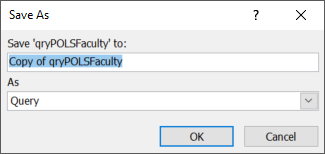
Step8. To rename the query, in the upper field, type:
qryAllFacultyByDept, Click
Adding Another Table to a Query
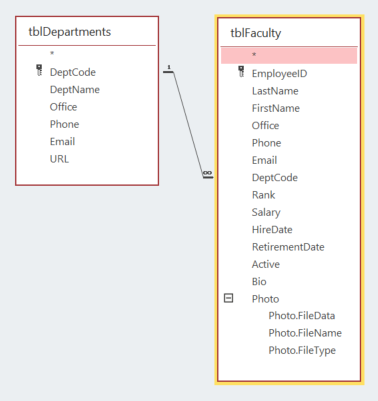
Now that we've saved our query with a name that describes what we want it to do, we'll need to add tblDepartments to our Query Design workspace so that we can add the necessary fields.
Step1. To begin, switch to design view.
Step2. To add another table to the Query Design workspace, in the Add Tables pane,
Double-Click tblDepartments
Step3. Expand the window for tblDepartments, if necessary, to see all the fields.
Step5. To move tblFaculty in the workspace,
Press & Drag to the right of tblDepartments
Adding and Removing Fields from a Query
We would like to add the full department name to our query, rather than just listing the department code. We could double-click DeptName from tblDepartments to add this field to the end of our query, but we'd like to list that first, so we'll use a different method to add it.
Step1. To add DeptName to the beginning of our query,
Press & Drag DeptName to the first column of the query design grid
Step2. To remove the criteria from the DeptCode column, in the query design grid,
Press & Drag across "POLS," press: Delete key
Step3. Switch to datasheet view.
Step4. Switch to design view.
Step5. To select the DeptCode field, in the Query Design grid,
Click
Step6. To delete the field, with the entire field's column selected, press:
Delete key
Step7. To sort alphabetically by department name, in the Sort field for the DeptName column, type:
a
Step8. Switch to datasheet view.
Step9. Scroll down to see the full sort, if needed.
Step10. Save the query.
Comparing Query Results with the Underlying Data
As we look at our results, there seems to be a department missing from our list. In our tblDepartments, there are actually five records. Let's open tblDepartments to confirm this.
Step1. Open tblDepartments from the navigation pane.
Step2. Click the tblFaculty tab at the top of the object workspace.
Step3. To open the Find dialog box, press:
Control key + F
Step4. To search for the Anthropology department, in the Find Next field, type:
anth Enter key
Step5. To close the Find dialog box,
Click![]() , Click
, Click![]()
Adding Additional Criteria to a Query
Suppose we'd like to retrieve a list of faculty that were hired after a specific date, and earn above $70,000. In addition, we'd like to sort our results by rank. We'll add some fields to our query, and use criteria to limit what records are returned.
Before we adjust our existing query, let's use Save As again, so that we don't accidentally overwrite the structure of qryAllFacultyByDept before giving it a new name.
Step1. Return to the qryAllFacultyByDept tab.
Step2. To save the query settings with its current name, press:
Control key + S
Step3. To save the query with a new name, in the Quick Access toolbar,
Click![]()
Step4. To rename the query, in the upper field, type:
qrySalariesByRank>70,000Hired2000OrLater, Click![]()
Step5. Return to design view, if necessary.
Step6. To add the additional fields we need to the query design grid, in the tblFaculty window in the query designer,
Double-Click Salary, Double-Click HireDate

Step7. To set the criteria, in the Criteria field of the Salary column, type:
>70000 Tab key
Step8. In the Criteria field of the HireDate column, type:
>=1/1/2000
NOTE: Access treats dates as numbers; this allows us to use mathematical operators such as < or > or = with dates.
Step9. Click the View button to return to datasheet view and see the results.
Step10. Click the View button to return to design view.
Reordering the Fields
Remember that Access performs multiple sorts in order from left to right. If we add a sorting by rank in the current location, we will not get the order we're looking for. We need to move Rank to the beginning of the query design grid.
Step1. To select the Rank field in the query design grid,
Click
Step2. To move the Rank column before the DeptName column, with the Rank column selected,
Press & Drag the Rank column before the first column on the left
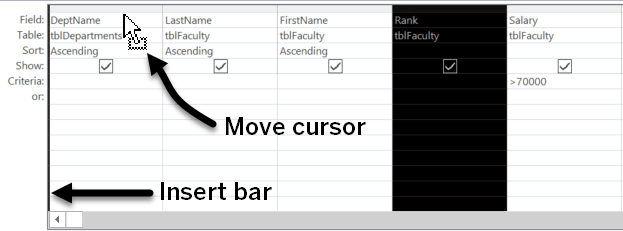
Step3. To sort on Rank,
Click in the Sort row of the Rank column, type: a
Step4. Click View to return to datasheet view.
Step5. Return to design view.
Step6. To hide the hire date, in the HireDate column of the grid,
Click the Show checkbox
Step7. Return to datasheet view.
Step8. Save the query.
Step9. To close all open objects, at the top of the object workspace,
Right-Click the tblFaculty tab, Click Close All

