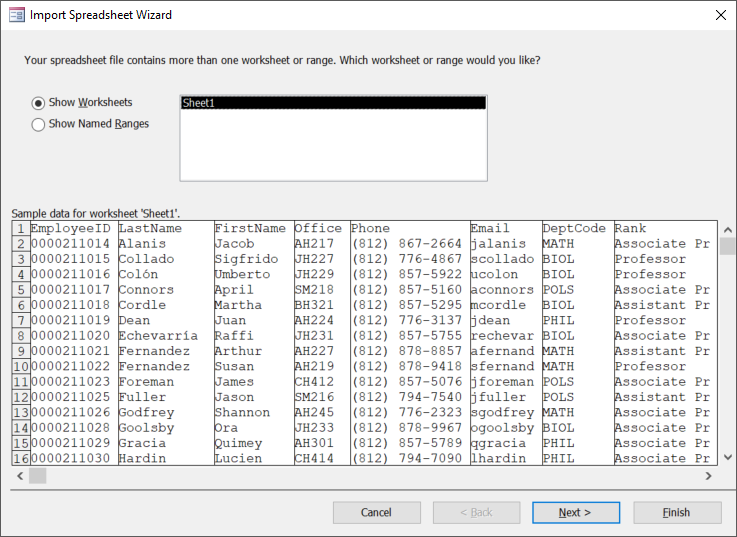
Suppose that someone has entered additional records for faculty in a different file. Data from spreadsheets and text files can be appended to existing tables in Access from other applications, such as Excel. The key to importing data is that the data must be arranged and organized in tabular (columnar) format, much like an Access table appears. When appending data from an existing spreadsheet, each cell in a spreadsheet column must contain similar types of data, and column labels must match Access field names. A complete spreadsheet or just a named range of cells may be imported.
Next, we'll import additional faculty members' data from an Excel spreadsheet into our Access table.
Step1. To switch to the External Data command tab, on the Ribbon,
Click the External Data command tab
Step2. To begin importing data from an Excel file, in the Import & Link group,
Click  , Point From File, Click Excel

Step 3. To find the file to import,
Click![]()
Step4. Navigate to the Access-The Basics folder.
Step5. To select the correct file for import,
Double-Click Faculty_to_import.xlsx
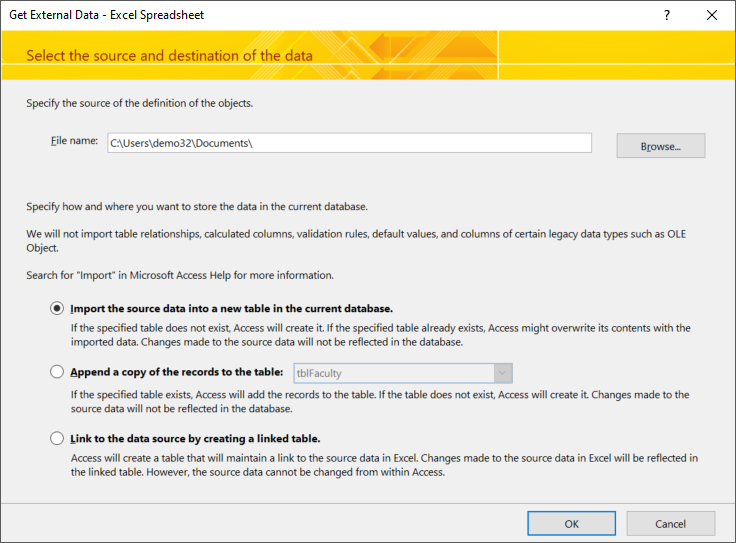
Step6. To append the data in this file to our existing table,
Click the "Append a copy of the records to the table:" radio button
Step7. To continue,
Click![]()

Step8. To continue,
Click![]()
Step9. To continue,
Click![]()
Step10. Confirm that tblFaculty is displayed in the Import to Table field.
Step11. To finish importing the data,
Click![]()

Other common problems that may cause import errors when appending data to an existing table are:
- Data types are not consistent between the external file and the existing Access table. For example, text data may not import correctly into a field in which the data type is set to Number.
- The field size in the Access table is too small to accommodate the field data from the external file. Either the record will not import or the data will be truncated.
- There are duplicate primary key values in some records.
- A field property is set to "required" in Access, but a field value in the external file is blank. The record most likely will not import.
- The number of columns being imported doesn't match up with those in the current database.
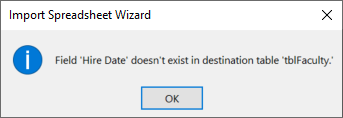
Step12. To dismiss the error message,
Click![]()
Step13. To dismiss the message,
Click![]()
Step14. To cancel the import,
Click![]()
Fixing the Excel Table for Import
There are a number of ways we could go about fixing the problem with the mismatch between the "Hire Date" field in our Excel file and the "HireDate" field in our Access table. The simplest way to fix this problem, particularly because there is only one field name that is problematic, is to open the Excel file and correct the column heading, and then redo the import steps.
Step1. To minimize Access, in the upper-right corner of the Access window,
Click
Step2. Navigate to the Access-The Basics folder on your computer.
Step3. To open the Excel file,
Double-Click Faculty_to_import.xlsx
Step4. To dismiss the Protected View warning, if necessary,
Click Enable Editing
Step5. To edit the cell, in the Excel file,
Click the first cell in column J
Step6. To replace the text, type:
HireDate
NOTE: Make sure you type the text precisely, with a capital "H" and a capital "D," but no space between "Hire" and "Date."
Step7. To move away from the cell, on the keyboard, press:
Enter key
Step8. To save the changes, in the Quick Access toolbar,
Click
Step9. To close Excel, in the upper-right corner,
Click
Re-importing the Excel Data
Now that our HireDate column heading should match the field heading in Access, we should be able to successfully import our Excel data.
Step1. To switch back to the Access window, in the taskbar,
Click![]()
Step2. To open the External Data tab, on the Ribbon, if necessary,
Click the External Data tab
Step3. To begin importing the data again, in the Import & Link group of the Ribbon,
Click  , Point From File, Click Excel
Step4. To locate the Excel file, in the Get External Data window,
Click![]()
Step5. Browse to the Access-The Basics folder, if necessary.
Step6. In the File Open window,
Double-Click Faculty_to_import.xlsx
Step7. In the lower part of the Get External Data window,
Click the "Append a copy of the records to the table:" radio button
Step8. Confirm that tblFaculty is displayed in the drop-down menu.
Step9. To accept these settings,
Click![]()
Step10. To confirm that the new column heading is correct, at the bottom of the spreadsheet preview,
Click![]() until the HireDate column is visible
until the HireDate column is visible
NOTE: If the data preview shows strange characters instead of text, try clicking in an empty section of the scroll bar rather than using the arrows on either end.
Step11. To continue,
Click![]()
Step12. To continue,
Click![]()
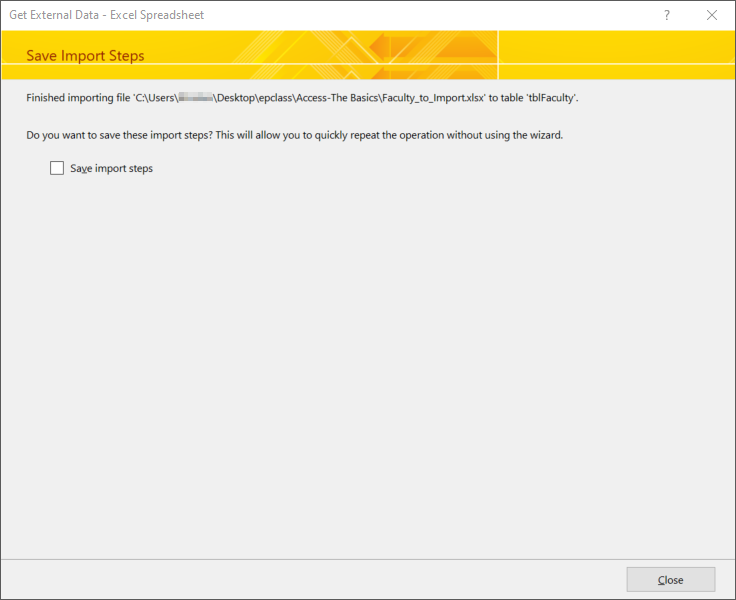
Step13. To finish the import process,
Click![]()

Step14. To dismiss the Get External Data window,
Click![]()

