

We have been modifying reports using Layout View, but we can also modify them in Design View. Some tasks are easier in one versus the other, although many can be accomplished in either view. Often, the most efficient approach is to switch between them depending on what you're trying to do.
The following are some tasks that are easier in Design View:
- Moving fields
- Adding different types of controls to a form, such as drop-down lists, lines, or labels
- Editing text box controls without using the Property Sheet
- Resizing form sections, such as the report header or footer sections
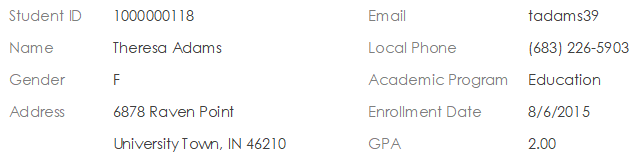
We are going to work with rptStudentTranscript. Remember, this report is organized by student information, with details about the students' enrollments, including the calculated GPA value from qryGPACalc. A grouping level was added to group the students' enrollments for each semester together. The records for the students' enrollments are sorted by course title. The layout chosen was outline, and the orientation of the report was set as portrait.
Some changes we want to make to the report include:
- Fixing the title of the report
- Moving the GPA to be with the rest of the student information
- Sorting the student records by last name, and then by first name
- Forcing each student's record on a separate page
- Making the default view of the form be Print Preview
- Fixing various formatting issues
We'll make these changes in Design View.
Understanding Design View for Reports
Just like forms, reports are divided into sections on the Design grid. These sections can be used to position information or group data to suit the purpose of the report. Let's examine the various elements of the Design grid.
Let's open the report.
Step1. To switch back to rptStudentTranscript,
Click![]()
Step2. To switch to Design View, in the status bar at the bottom of the screen,
Click
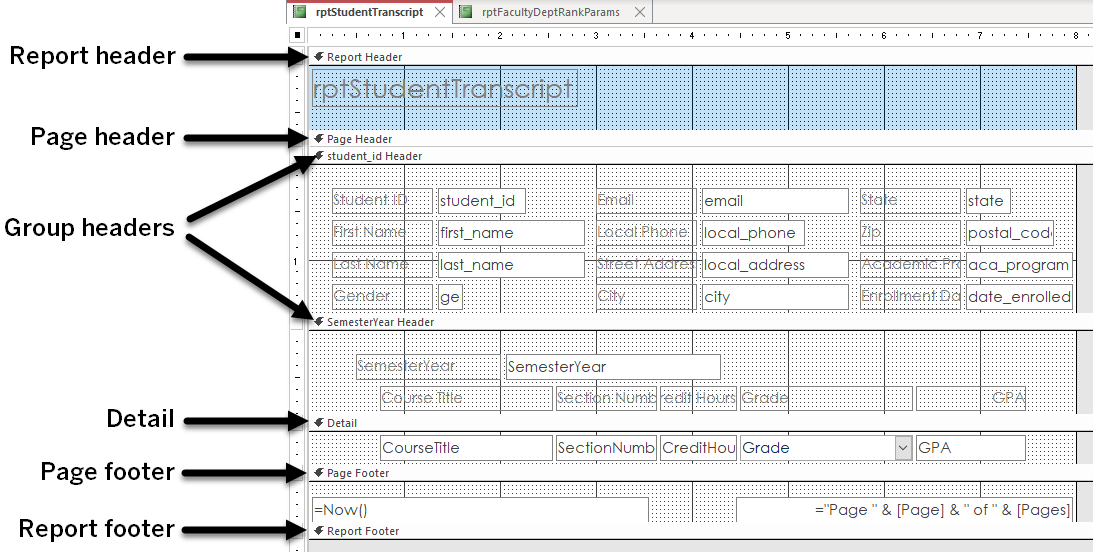
Report Sections
The Report Sections (header and footer) define the areas in which we may place items we want to appear at the beginning or end of the entire report. Any text or information placed in the Report Header appears only once at the very beginning of the report. Usually the report's title is placed there. Similarly, any text or information placed in the Report Footer would only appear once at the very end of the report, such as grand totals for data in the report.
Page Sections
The Page Sections (header and footer) mark off the areas in which we may place items we want to appear at the top or bottom of each page. The Page Header often holds the column headings that identify the fields of information below them on the page. The Page Footer is often used to display page numbers and the date the report was created.
Group Sections
These sections are created to allow the report data to be grouped in a certain way.A Group Header holds any information that should appear at the top of each data group such as a label describing the group. A Group Footer holds any information that should appear following each group of data.
In our report, when we chose to view the report by tblStudents, the section for student_id header was added; when we grouped courses by SemesterYear, the SemesterYear Header was added.
Detail Sections
The Detail section presents the detail level data we want displayed in the report. Once grouping is set, the fields of information to display for each record in the report are placed in the Detail section.
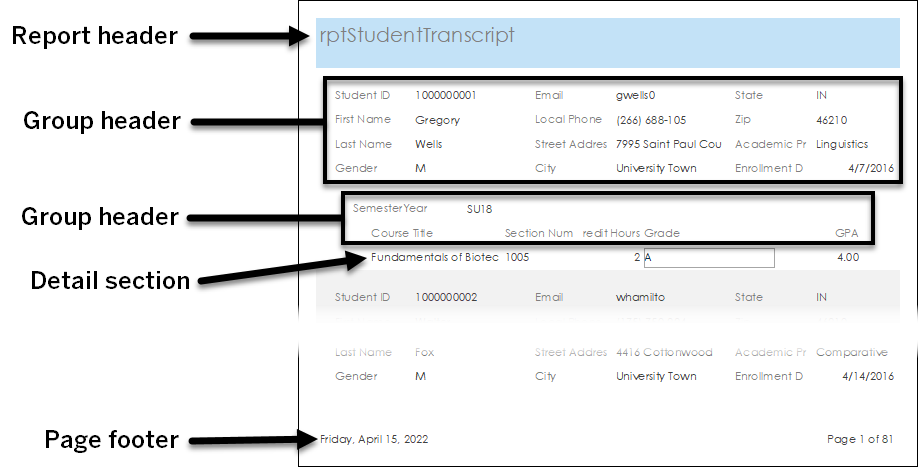
The following illustration identifies the sections in Print Preview mode:
Changing the Sort Order
When we created rptStudentTranscript using the Report Wizard, we chose to view the records by tblStudents. That selection created the grouping definition that was wanted: courses for each student listed together. However, that sort order is not optimal for finding a certain student and seeing their courses. The primary key field, student_id, is being used for the sort. As a result, Gregory Wells is first in the report, simply because he has the lowest student id number. The logical order is alphabetically by last name and then by first name.
Let's see how to base the sort order on last_name and first_name.
Step1. To see the Group & Sort settings the wizard created, in the Grouping & Totals group,
Click![]()
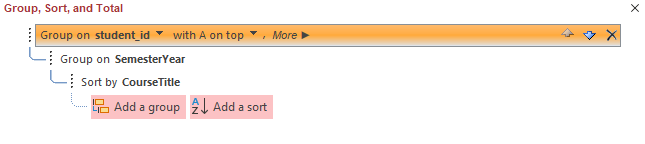
Step2. To add a sorting criteria, at the bottom of the screen,
Click![]()
3. To add last_name as a sort criteria,
Click last_name
Step4. To move the last_name to the top of the sort criteria, in the last_name sort declaration,
Click three times until last_name is at the top of the list
NOTE: When the field is at the top of the list, the up arrow will be disabled.
Step5. Scroll to the bottom of the Group, Sort, and Total pane.
Step6. To add another sorting criteria,
Click![]()
Step7. To choose first_name, in the drop-down list,
Click first_name
Step8. Move first_name up to be the second criteria in the list.
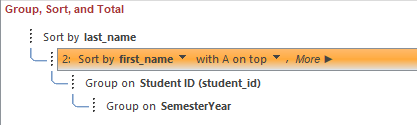
Step9. Save the changes to the report.
Step10. To switch to Print Preview,
Click
Step11. Return to Design View.
Adding Sort Levels to a Report
The sort order of the faculty and departments report we created earlier could also be better.
This section has less guidance than the previous sections. If you would like a walk-through, watch the video Challenge Exercise: Adding Sort Levels to a Report.
Step1. Switch to rptFacultyDeptRankParams.
Step2. Add sorting levels for department name, last name, and first name.
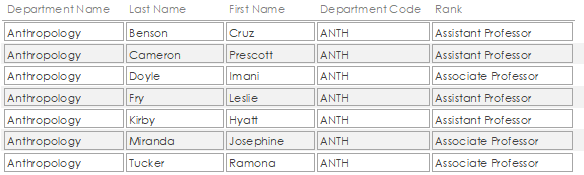
NOTE: Remember that the report can show more than one department, depending on what parameters are entered.
Step3. Save the changes to the report.
Step4. Switch to Print Preview to confirm the changes took effect.
Expanding and Collapsing Sections
There are times we want to expand or shrink sections of a report. In our student transcript report, there is a Page Header section below the Report Header section. However, there is no space in the Page Header for content. This means that the section is collapsed and not visible if we view the report in Report View, Layout View, or Print Preview.
We want a header at the top of every page, rather than one at the beginning of the whole report, so we want to expand the page header and add content to it. We also want to remove content from the Report Header and collapse that section.
Before we move the title, let's change the text of the label.
Step1. Switch back to rptStudentTranscript.
Step 2: Switch to Design view, if necessary.
Step3. To select the title, in the Report Header,
Click the label rptStudentTranscript
Step4. To select the title,
Double-Click the text of the label
Step5. To replace the text, type:
University of the Midwest Enter key
Step6. To cut the title, press:
Control key + X
Step7. To select the Page Header section,
Click
Step8. To paste the title, press:
Control key + V
Step9. Reposition the label about 2 and a half inches from the left side of the page.
Step10. To position the cursor,
Point
Step11. To collapse the section,
Press & Drag upwards until the bottom of the section reaches the section title
Step12. Save the report.
Step13. Switch to Print Preview and navigate through the report.
Adding Additional Objects to a Report
Now that we have the page header, we would like to make it more impressive looking. We want to add the university logo to the page header and add a subtitle for the report.
Step1. Switch to Design View.
Step2. Deselect the title, if necessary.
Step3. To start to add an image, in the Controls Group,
Click
Step4. To browse for the image,
Click Browse...
Step5. Navigate to the Access Designing folder, if necessary.
Step6. To select the image,
Double-Click midwestlogo.gif
Step7. To place the image, in the Page Header,
Click 1/8th of an inch down from top and left side of the section
Step8. To start to add a label to the Page Header, in the Controls Group,
Click![]()
Step9. To place the label,
Click below "University of the Midwest" at the 3 inch mark
Step10. To add text to the label, type:
Official Student Transcript Enter key
Step11. Save the changes to the report.
Step12. To view the report in Print Preview,
Click
Working with Page Breaks
We would like for each student record to begin at the top of a new page in rptStudentTranscript. We will use the Force Page Break property in the Property Sheet to make this change to a section of the page. We are given four options: None, Before Section, After Section, and Before & After. These options are only available for the group header and footer sections (if applicable), or the Detail section.
To make each student appear on a new page, in which section can we force a page break? Since we want each student's information on a new page, we'll add a break on the student_id header. We might think we'd have to choose "After Section" to prevent the page header from appearing by itself on the first page, but that would cause the student information to get separated from the student's enrollments. We can choose "Before Section" instead, and Access will know to keep the page header with the content.
Let's add the Force Page Break now. We'll also fix the default view of the form to Print Preview.
Step1. Switch to Design View.
Step2. To select the student_id Header,
Click![]()
Step3. Select the Format tab of the Property Sheet, if necessary.
Step4. To set properties so that each student will appear on a separate page, in the Property Sheet,
Double-Click the Force New Page property
Step5. To select the report properties, in the left upper corner of the report,
Click
Step6. To switch the Default View,
Double-Click Default View
Step7. To switch to Print Preview,
Click
Step8. Navigate through the report.
Step9. Save the report.
Step10. Switch to Design View.
Moving Fields Between Sections
Right now the GPA field is in the Detail Section. This means it appears after every course the student has taken. Since the GPA is calculated based on all courses, not individual courses, it's current location isn't ideal. We'll move the GPA field and label into the student_id header section.
Previously, we cut and pasted the title of the report to move it from one section to another. However, if we tried that with the GPA label and field, they would end up back in the sections they already appear in. This is because the GPA label is in one section of the form, and the field is in another.
Instead, let's create some extra room in the student_id header section and move the fields by pressing and dragging.
Step1. To make room for the GPA,
Point , Press & Drag downward about an inch
Step2. To select the GPA label, in the SemesterYear section,
Click the GPA label
Step3. To move the GPA label, in the SemesterYear header section,
Press & Drag the field to the student_id header section, under the Gender label and field
Step4. To move the GPA field, repeat steps 3 and 4 with the field in the Detail section.
Step5. To view the changes, switch to Print Preview.
Concatenating Multiple Fields Into a Single Field
Often, we would like to merge multiple fields into a single field on reports. Having the field merged together can allow us to be more efficient with space. In this report, we would like to have a single label for Name, and then have a field show the student's first name and last name in one field.
Let's do that now.
Step1. Switch to Design View.
Step2. To select the type of field to add to the report,
Click![]()

Step 3. To add the textbox to the report, below the GPA label and field,
Click at about the 1 inch mark from the left
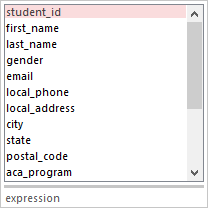
Step4. To enter the expression in the Unbound text box, type:
=[first_name]+" "+[last_name] Enter key
NOTE: Any text that is not a field name must be included within quotation marks, including spaces and punctuation. Access will automatically place brackets around a field name if it is one word.
Step5. To switch to Print Preview,
Click
Step6. Switch back to Design View.
Step7. To select the text box, if necessary,
Click the concatenated name text box
Step8. Open the Property Sheet pane, if necessary.
Step9. To switch to the Format tab, in the Property Sheet pane, if necessary,
Click Format
Step10. To remove the borders,
Click Border Style, Click![]() , Click Transparent
, Click Transparent
Further Improving the Report Layout
At this point the report is functional, but not very attractive. Fix the style issues and alignment of the form. You may want to work in both Layout and Design View to make these changes.
See the following list of things you might do:
- Delete the First Name and Last Name labels and fields.
- Reposition the label and concatenated name field.
- Make the concatenated field wider.
- Change the text of the label for the concatenated field to "Name".
- Change the label of the street address to "Address".
- Concatenate the city, state, and zip together and arrange the address to look like this:

- Adjust the locations of the fields in the student_header to change from three columns of data to two columns. Here is an example of what this might look like:
- Change the color in the background of the Page Header to match the background in the logo image, which is #FAF6D8.
- Change the font sizes and/or colors.
- Tighten up white space.
- Change other background colors as desired.
- When you're done, close all open tabs.
Now that we've created several forms and reports, we're ready to get our database set up for others to use.