

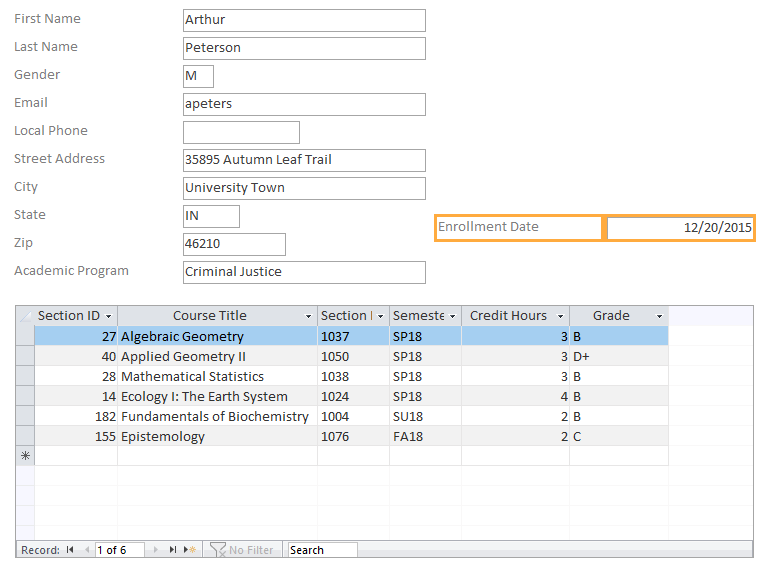
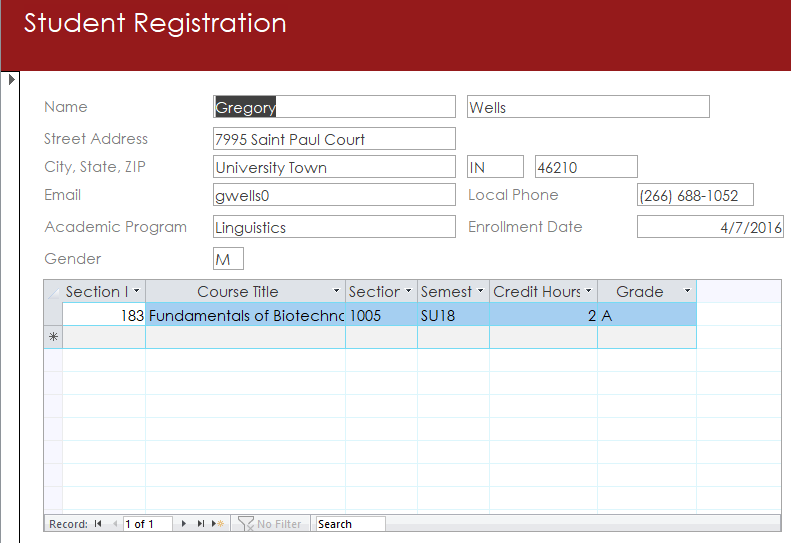
While the form works, it can be better. Let's see how we can change the design to make it easier to use. We want to refine the layout of the student information, remove the subform title, and modify the subform layout so we can see all of the information for a class in one row.
We are currently in Form view which, as noted already, is the ideal view for performing data entry and editing tasks. We can make design changes to the form by using other views. Access typically gives users three different ways to view a form: Form View, Layout View, and Design View. These views can be described as follows:
- Form View displays the form. We cannot change the layout or design of a form in Form View, but we can enter and edit data in this view. This is the view that we started in and have been using for data modification.
- Layout View is a visually-oriented way to modify the way a form looks. Since the underlying data displays while working in Layout View, we can resize fields appropriately. However, data cannot be modified or edited while in Layout View, and its design editing capabilities are somewhat limited.
- Design View is the most detailed way to edit the layout of your form. We can also add headers and footers, but we cannot see or modify the underlying data while in this nview.
We will see a fourth viewing option a little later on: Datasheet View. Datasheet View is available when a form is displayed in that view. This is most commonly done with subforms.
Working in Layout View
As noted above, Layout View is perfect for making basic modifications to the look and feel of the form. To make more advanced changes, we w wou will use Design View.
Let's switch to Layout View. We will begin making some basic changes to the form so you can see the options within this view.
Step1. To switch to Layout View, on the Ribbon, in the Views group,
Click 
Changing the Title and Caption
The easiest problem to tackle in Layout View is changing the title. The title is currently set to the name of the form, frmStudentRegistration, and is displayed in the banner area at the top of the form. We want to change the title to something more readable.
Step1. To change the title of the form,
Triple-Click frmStudentRegistration, type: Student Registration Enter key
Click 
Step3. To select the entire form,
Click the vertical bar on the left edge of the form

Step4. To begin changing the Caption of the form, at the top of the Property Sheet pane, if necessary,
Click the All tab
Step5. To change the text of the Caption,
Double-Click the Caption text, type: Student Registration Enter key
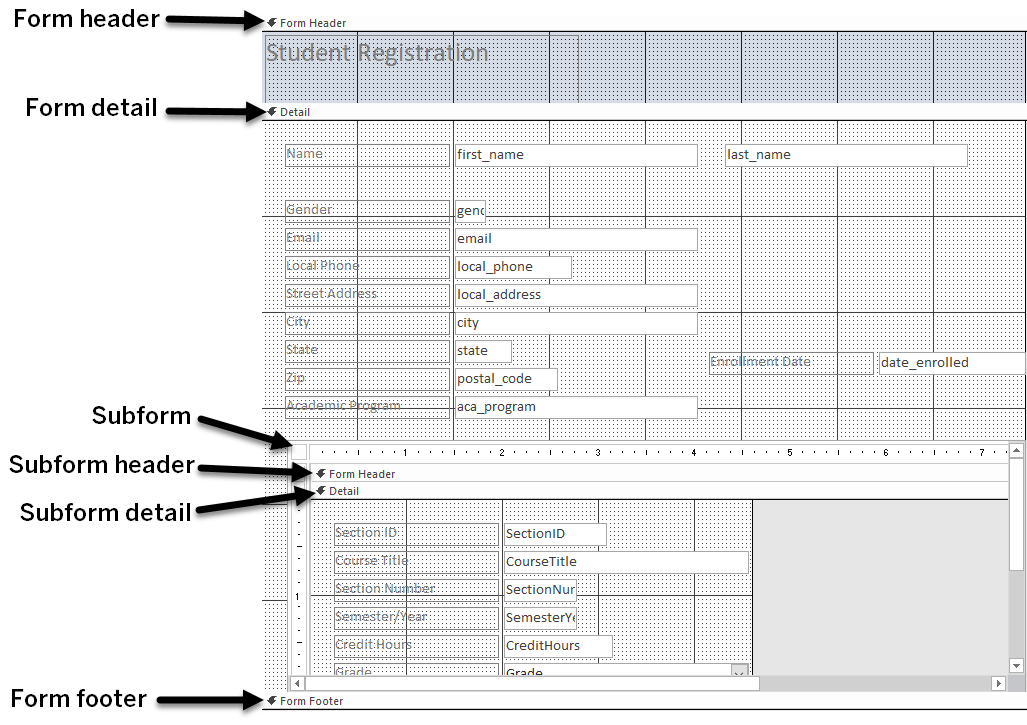
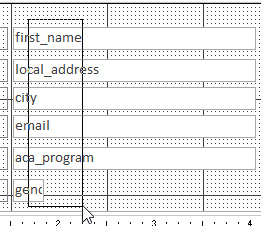
Changing the Subform Layout
The next easy item to change is the layout of the subform. We can remove the title and make the subform wider so we can see all of the fields.
Step1. To delete the subform label, to the left of the subform,
Click fsubStudentRegistration, press: Delete key
Step2. To select the subform,
Click anywhere in the subform
Step3. To position the cursor,
Point to the left edge of the subform to get the double-headed arrow

Step4. To expand the form,
Press & Drag the subform's border to the left
NOTE: Try to get the left edge aligned with the left edge of the field labels in the top half of the form.
Step5. Adjust column widths as necessary.
Step6. Adjust the subform width to accommodate the columns, if necessary.
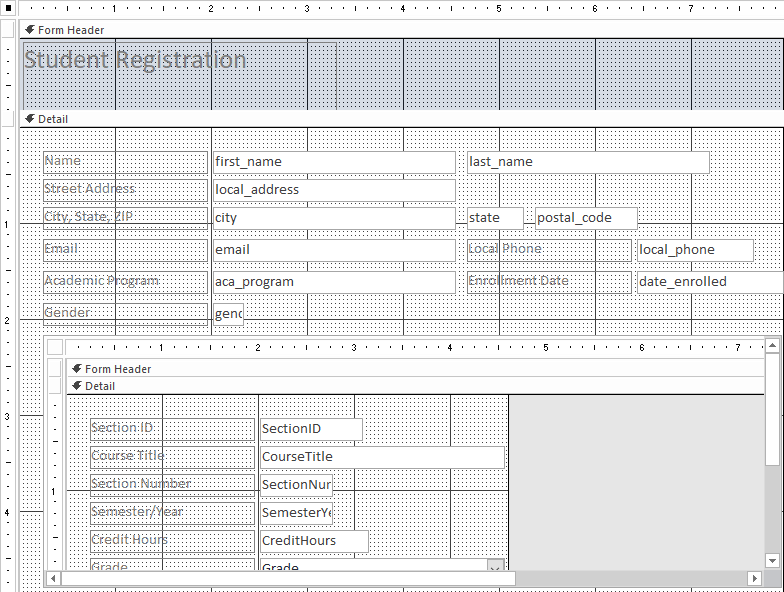
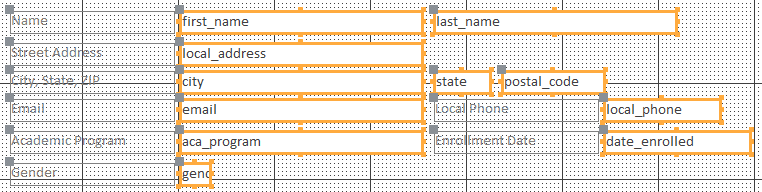
Changing the Main Form Layout
Let's suppose we want the first row to display as first name and last name. To do this, we would need to move the Enrollment Date field down and then drag the Last Name field into its place. Let's try this out.
Step1. To select the Enrollment Date label and field,
Click the Enrollment Date label, press Shift key and Click the Enrollment Date field
![]()
Step2. To move the objects out of the way,
Point to selected objects, Press & Drag downward
Step 3. To move the Last Name field to the right of the First Name field,
Press & Drag the Last Name field to the right of the First Name field
Step4. Use the arrow keys on the keyboard to fine tune the positioning of the Last Name field as needed.
Step5. To change the text of the First Name label,
Double-Click First Name
Step6. To select the part we want to delete,
Press & Drag First , press: Delete key
NOTE: Make sure you delete the space after the word "First."
Step7. To remove the Last Name label,
Click the Last Name label, press: Delete key
Step8. To save the changes, on the keyboard, press:
Control key + S
Working in Design View
We'll switch into Design View to finish our layout changes. Some tasks, such as precisely moving fields, are easier in Design View. Others, such as resizing form sections (for example, the form header or footer), or changing the default view, can only be done in Design View.
The following tasks are better performed in Design View:
- Moving fields
- Locking multiple fields
- Adding different types of controls to a form, such as drop-down lists, lines, or labels
- Changing the tab order, which is the order you move through fields when pressing the Tab key
- Editing text box controls without using the Property Sheet
- Resizing form sections, such as the Form Header or Footer sections
- Changing certain properties that cannot be changed in Layout View (such as Default View)
Let's switch to Design View to make more advanced changes to our form.
Step1. To switch to Design View, using the Status bar located in the bottom right corner,
Click ![]()
NOTE: You can change the density of the grid dots by altering the Grid X and Y properties on the form's Property Sheet.
Moving Fields
When moving fields and labels in Design View, we get a visual indicator as well as alignment tools to help position the fields and labels precisely. Generally, when we move a field or its label in Design View, both fields move together. We'll see how to change this behavior in the next section.
First, we'll move the Street Address label and its field together.
Step1. To move the Street Address label,
Press & Drag Street Address label below Name
NOTE: Objects can also be moved using the arrow keys on the keyboard.

Step 2. Move fields as needed to arrange the fields as in the image.
Moving Fields and Labels Independently
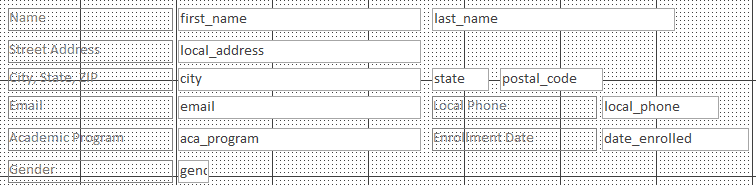
So far in Design View, we have moved labels and fields together. Access does this by default when you press and drag a field or its label. However we now want to move fields independently of their labels so that we can place the State and Zip fields to the right of the City field, as they would appear on a mailing label:

When we want to move a field or a label independently, we can use the small gray box that appears in the upper right corner of a selected object. Let's try that now.
Step1. To move the State field only (without its label),
Click the State field (not the label), Point  , Press & Drag the field to the right of the City field
Step2. Move the postal_code field (which has the caption of Zip) to match the location in the previous image.
Step3. Remove the State and Zip labels.
Step4. To change the City label to describe the entire row,
Click the City label, type: , State, Zip Enter
Repositioning the Remaining Fields and Labels
Now we are ready to finish repositioning our fields and labels. Using the techniques you just learned, work through the following steps.
This section has less guidance than the previous sections. If you would like a walk-through, watch the video Challenge Exercise: Repositioning the Remaining Fields and Labels.
Step1. Make the row below the City, State, Zip row be Email and Local Phone.
Step2. Move the Academic Program and Enrollment Date fields and labels up so they are below the row with Email and Local Phone.
Step3. Move the Gender field up below Academic Program.
Step4. Move the subform up so it is below the Gender row.
Step5. Save the design changes.
Aligning and Evenly Distributing Fields on the Form
Most likely, the fields and labels are not all aligned or as evenly distributed as we would like them to be. Let's see how to fix this problem.
Step1. To begin aligning the left column on the form,
Press & Drag a box around the labels at the start of each row and the subform

NOTE: Be sure that the fields themselves are not included in your selection.
Step2. To align the selected items to the left, on the Ribbon,
Click the Arrange tab, Click ![]() , Click
, Click ![]()
NOTE: We also have the option of aligning objects by their top, right or bottom sides.
Step3. To make the distances between each row equal, while the labels for each row and the subform are still selected,
Click  , Click
 ![]()
NOTE: When vertically aligning a row, Access may decide to align everything with the label and/or field that was out of alignment. If this happens, simply use the up or down arrow key to move the selection back to the desired vertical position.
Aligning the Remaining Fields and Labels
Using the techniques you just learned, make sure the rest of the columns and rows are aligned.
This section has less guidance than the previous sections. If you would like a walk-through, watch the video Challenge Exercise: Aligning Remaining Fields and Labels.
Step1. Left align the last_name and state fields with the Local Phone and Enrollment Date labels.
Step2. Top align the city, state and postal_code fields.
Step3. Top align the Email and Local Phone fields and labels.
Step4. Top align the Academic Program and Enrollment Date fields and labels.
Step5. Save the design changes.
Locking Fields
Now we have the form laid out the way we want it to look. Remember that the purpose of this form is to register students for course sections; we don't want the student demographic data to be editable in this form. Access allows us to lock fields; this will make the fields read only and make it impossible to edit them.
NOTE: While we could have locked fields while in Layout View, we can only set this property for one field at a time. In Design View, however, we can work with multiple fields at once.
We want to select all of the student fields, without their labels, because labels can't be locked. We'll start by drawing a box around the first group of student data fields, and then add the remaining fields to our selection before locking the fields.
Step1. To select all of the student fields in the first column of fields,
Press & Drag a box around the first column of student fields
Step2. To add the remaining fields to the selection,
press Shift key and Click the remaining student fields
Step3. To lock the fields, in the Property Sheet pane,
Click the Data tab, Double-Click Locked
Preventing New Student Records from Being Added
Even though we locked the student fields, it is technically possible to click on the Add New Record button at the bottom of the form. It would bring up a blank record, but we would not be able to enter any values. We need to correct that by making it impossible to add a new record.
All we have to do to prevent new records from being added to a form is set the form's Allow Additions property to No. Let's see how to do this.
Step1. To select the form's properties, in the upper left corner of the object workspace,
Click 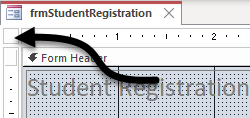
Step2. In the Property Sheet pane's Data tab, in the 5th row from the bottom,
Double-Click Allow Additions
Changing the Look of the Form
Next, we want to make some changes to the colors and fonts on the form. Using document themes is an easy way to specify colors and fonts. Using a theme in Access changes all of the objects in the database, so they can easily create a standard look.
We will choose a Theme that sets the font style to sans-serif. Then, we will set the title background for this form to the University of the Midwest's maroon color.
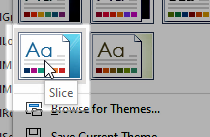
Step1. To choose a Theme for the form, on the Ribbon,
Click the Design tab, Click  , Click the Slice theme
NOTE: The names of the themes will appear in a tool tip when the mouse hovers above the theme's icon, as shown in the following image:
Step2. To select the header for the main form,
Click 
Step3. To change the background color of the Form Header area, on the Ribbon,
Click the Format tab, Click ![]() , Click a dark red color swatch
, Click a dark red color swatch
Step4. To select the title label,
Click the title label
Step5. To change the selected text to white, on the Ribbon,
Click ![]() , Click the white color swatch
, Click the white color swatch
Testing the New Form
Now that we have made several changes, let's switch into Form view and test out the form.
Step1. Switch to Form view.
2. Try adding a new student record or editing data in an existing student record.
Step3. Save the form.