As we have seen, using the Create Form button is not adequate when the subform has to pull data from more than one table. There are two main ways to create a form that pulls data from many related tables:
- Create a query that pulls together all of the fields you want and then build a form for the query.
- Use the Form Wizard, which steps you through the process and builds the needed query for you behind the scenes.
We will use the Wizard to build our form since it will make it easier to pull fields from multiple tables into a subform.
Step1. To select the main table for the form, in the Navigation pane, if necessary,
Click tblStudents
Step2. To create the form using the Form Wizard, on the Ribbon,
Click the Create tab, Click ![]()
Step3. To move all of the fields of the table onto the new form,
Click ![]()
Step4. To remove the student_id field from the Selected Fields list,
scroll to the top of the list, Click student_id, Click ![]()
Step5. To select the last field in the Selected Fields list,
scroll to the bottom of the Selected Fields list, Click date_enrolled
Automatically Filling Field Values in a Form
Since one of the main uses of forms is data entry, as designers, we want to reduce or eliminate the possibility of a user entering bad or duplicate data using our forms. One way we can lessen the possibility of this happening is to have a form automatically fill data already stored in our database. An example of this could be designing a form to automatically look up a student's first and last name when we enter the student's id number. In our database, we would like information about a course section to be automatically populated in the form. Let's consider the following relationship:

In our form, we want to have Course Title, Section Number, and Semester Year automatically fill when we select a particular course section by Section ID. To make this happen, we need to include the Section ID field from tblEnrollments. By including the foreign key field from the related table, Access can look up the data in the remaining fields in our form.
In our case, we're not adding new courses or sections, we're just adding students to existing course sections. Since Access looks up the values for the Course Title, Section Number, and Semester Year fields when a Section ID is selected, we are reducing the user's need to re-enter data into these fields manually. Manually re-entering data is one of the most common ways to introduce bad or duplicate data into a database. Recall that duplicate data in a database is a violation of the rules of normalization introduced in Access: Structuring & Relating Data.
NOTE: The Course Title field is being pulled from tblCourses. This works because tblSections is on the many side of the relationship with tblCourses.
Since we designed this form with the task of assigning students to sections in mind, we're choosing to set it up to make adding new course sections impossible. If we did want to use this form to add new course sections, we would have to choose the unique Section ID (SectionKey) from tblSections.
We'll use the wizard to add the rest of the fields that we need for our form.
Step1. To add data from another table, from the Tables/Queries drop-down list,
Click ![]() , Click Table:tblEnrollments
, Click Table:tblEnrollments
Step2. To move the SectionID field to the Selected Fields area,
Double-Click SectionID
Step3. In the same manner, use the table below to add the fields listed to the form:
| Table name | Fields |
|---|---|
| tblCourses | CourseTitle |
| tblSections | SectionNumber, SemesterYear |
| tblCourses | CreditHours |
| tblEnrollments | Grade |
Step4. Once you have added all of the above fields, to continue,
Click ![]()
Choosing How the Data is Grouped
We are asked to select a view for the data. The view refers to how the data will be grouped in our form. We can see a preview of each arrangement and decide which one will best meet our needs.
The first view has our data grouped by tblStudents. This organization puts all of the student fields into the main form area at the top, and the rest of the fields below, in a subform. This seems like a reasonable way to organize our form, but let's look at the other options before we make a decision.
We'll start with the by tblEnrollments option.
Step1. To get an alternate view of the data,
Click by tblEnrollments
Step2. To preview a different view of the data,
Click by tblSections
Step3. To preview another way to organize the data,
Click by tblCourses
Step4. To return to the original view,
Click by tblStudents
Exploring the Linked Forms Option
The two radio buttons at the bottom of the tblStudents view give us additional options for how we view the subform. We want to consider which of these will better suit our needs.
The first option, currently selected, is Form with subform(s). This option embeds the subform in the main form. Let's see how using linked forms would be different.
Step1. To get a sense of what linked forms would look like, underneath the preview section of the dialog box,
Click the Linked forms radio button
Step2. To return to Form with subform(s) view and continue making the form,
Click the Form with subform(s) radio button, Click ![]()
Step3. To accept the Datasheet view layout,
Click ![]()
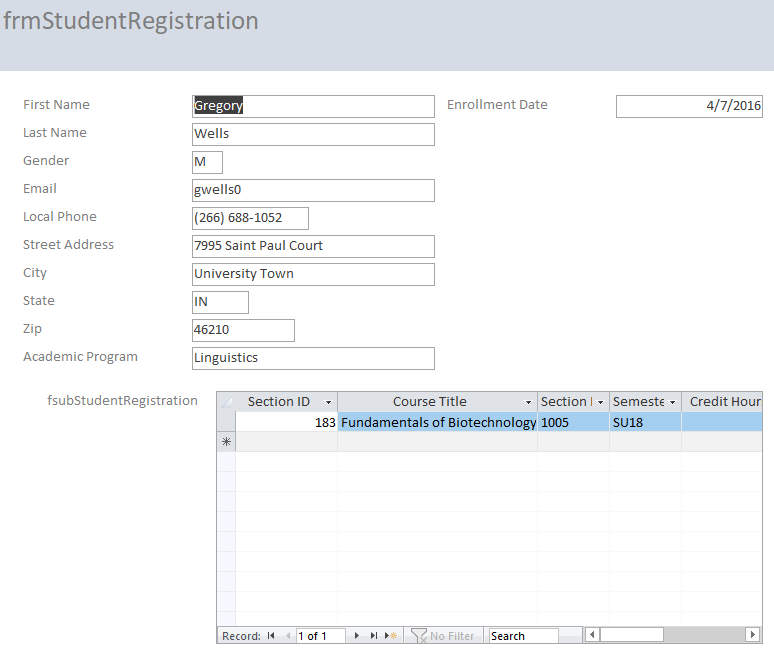
Naming the Forms
The last screen of the wizard allows us to specify names for the form and subform.
Step1. To set the main form name, in the Form field,
Double-Click the current text, type: frmStudentRegistration Tab key
Step2. To name the subform, in the second form field, type:
fsubStudentRegistration
NOTE: The "frm" is the standard prefix for a form, and "fsub" is the standard prefix for a subform. Technically, a subform is still a form, but it's connected to another form.
Step3. To finish the wizard,
Click ![]()