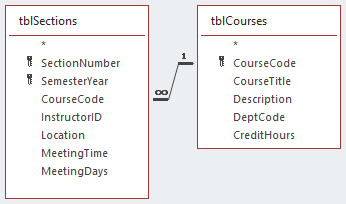
A relational query is a query that uses multiple related tables as its data source. Let's explore some properties of relational queries. Suppose we would like to see all courses being taught at the university during summer 2018, including their CourseCode, SectionNumber, SemesterYear, and CourseTitle. We would also like to be able to add new section records via the query.
Let's create the query now.
Step1. To begin building a query, on the Ribbon,
Click the Create tab, Click![]()
Step2. To add tblSections and tblCourses, in the Add Tables pane,
Double-Click tblSections, Double-Click tblCourses

NOTE: If desired, you can resize the tables at this point to see all of each table's fields.
Selecting Fields for a Query
When we are building a query, it's important to keep in mind the primary purpose the query will serve in our database. The primary purpose of this query, aside from viewing data about the courses and sections, is to be able to easily add sections of any course in our course catalog. You will notice that the CourseCode field is a join field, a field that creates a relationship between two tables. The important question is: How do we know which of these key fields to use in the query?
To answer the question, let's examine the way Access will behave depending on which field is selected. First, if we choose the primary key field, CourseCode from tblCourses, from the query, we could add new courses to tblCourses. This is not the behavior we are looking for in this case. We can create courses by adding a record directly to tblCourses.
If we were to select the foreign key field, CourseCode from tblSections, Access will be able to look up data from tblCourses based on the one-to-many relationship we've already established. This can be a real time saver in data entry tasks. Just remember that lookup fields are always created in the foreign key field, which then allows Access to look up other information from the primary table based on this value. Selecting the foreign key field also allows us to add new sections for a particular course from the query.
Let's add the fields we need to see to make this query work.
Step1. To add the fields to the query, from tblSections,
Double-Click SemesterYear, Double-Click CourseCode, Double-Click SectionNumber
Step2. To add the CourseTitle field from tblCourses,
Double-Click CourseTitle
Step3. To view the query results, on the Ribbon,
Click![]()
Step4. Resize the columns as you see fit in order to see the data more clearly.
Step5. Switch back to Design view.
Step6. To filter to courses offered during summer 2018, in the Criteria field for SemesterYear, at the bottom of the screen, type:
SU18 Enter key
Step7. To hide the SemesterYear column,
Click
Step8. To save the query, press:
Control key + S
Step9. To name the query, type:
qryCoursesAndSectionsSummer18, press: Enter key
Step10. To view the query, on the Ribbon,
Click![]()
Adding More Tables to the Query
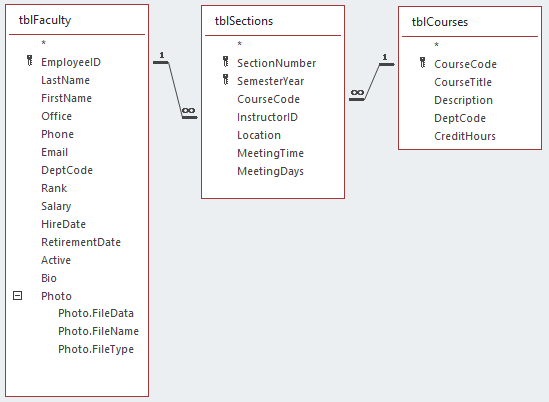
Let's make one more modification to this query. Let's add in the instructor of the section.
Since we're changing the query, we will give it a new name.
Step1. Return to Design view.
Step2. To save the query with a new name, press:
F12 key, type: qryFacultyCoursesSectionsSummer18, press: Enter key
Step3. To add tblFaculty to the query, in the Add Tables pane,
Double-Click tblFaculty
NOTE: You can Press & Drag tblFaculty from the Navigation pane into the query designer, too.
Step4. Adjust the tables in the query designer as you see fit.

NOTE: You may need to rearrange the tables to see them in this order.
Step5. To add the first and last name of the instructor, in tblFaculty,
Double-Click LastName, Double-Click FirstName
Step6. Reorder the fields however you see fit.
Step7. To view the query, on the Ribbon,
Click![]()
Step8. Save qryFacultyCoursesSectionsSummer18.

