Forms provide a flexible way to view, add, edit, and delete data and are much more efficient than using tables or queries to do so. We will create a form that will allow us to assign faculty members to sections.
In Access: The Basics, we saw how easy it is to create a relational form by first selecting the primary table. This time, we will first create a query with all the data we need to make our form work, and then create a form based off of that query.
Building a Query
In order to assign instructors to courses, we will need values from several different tables. Let's begin by creating a new query and pulling in date values from multiple tables.
Step1. To begin building a query, on the Ribbon,
Click the Create tab, Click
Let's consider what data would be helpful for non-technical folks entering data:
- The course code, to easily identify the correct course.
- The course title and section number, to easily identify the correct section.
- The semester and year, to be sure we have the correct course/section combination.
- The faculty roles and their names, including their ID numbers for resolving ambiguity.
This tells us that we need to include tblFaculty, tblSections, and tblSectionsInstructors.
Step2. To add all of our tables, in the Add Tables pane,
Double-Click tblSections, tblSectionsInstructors, and tblFaculty
Now we're ready to add the fields for our query. One of the things to consider here is which table we want to bring a particular field from. We're interested in maintaining the Lookup properties from tblSectionsInstructors, so if there is a field that we need that appears in that table, we should include it.
Step3. Add the following fields to our query in the order they appear in the table:
|
| tblSections | CourseCode |
| tblSections | SectionNumber |
| tblSections | SemesterYear |
| tblSectionsInstructors | InstructorID |
| tblFaculty | LastName |
| tblFaculty | FirstName |
| tblSectionsInstructors | Role |
You'll notice that the InstructorID field is involved with the join between tblSectionsInstructors and tblFaculty. How do we determine which InstructorID to use? This depends on how we want to use our form. If we want to be able to not only assign existing faculty to teach sections, but also to create and assign new faculty, we would want to include the primary key field (EmployeeID from tblFaculty). However, if we only want to assign existing faculty to teach a section, we want to use the foreign key field (InstructorID from tblSectionsInstructors). Using the foreign key field also allows Access to automatically fill fields in our form with values from the related table. For example, when we choose a faculty member, the name fields will automatically populate with values from tblFaculty.
Our form will be used to assign existing faculty to teach sections, hence we will use InstructorID. In addition, by using InstructorID, we will also be taking advantage of the lookup field we created in tblSectionsInstructors. Any properties set on a field in a table will be inherited by objects based on that table, i.e. queries and forms.
Step4. Save the query as "qryAssigningFaculty."
Step5. Switch to Datasheet view to see the results of the query.
You should see 227 records.
Step6. Close qryAssigningFaculty.
Creating a Form
Today, let's use the Form Wizard to build our form. We're using the wizard so we can modify some of the properties of the form before it's created.
Step1. To select the query as our data source, in the Navigation pane,
Click qryAssigningFaculty
When we start with the query selected in the Navigation pane, we start with the query selected in the Form Wizard as well.
Step2. To start the form wizard, on the Ribbon,
Click the Create tab, Click
The Form Wizard dialog box appears:
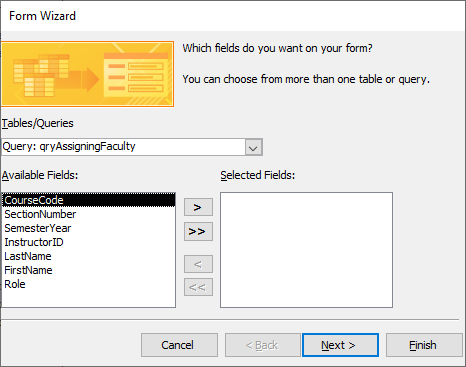
NOTE: As seen in the previous screenshot, a display bug may cause part of the dialog box to be cut off. As a result, your Form Wizard dialog box may look slightly different than the one pictured here.
Since we selected qryAssigningFaculty before starting the wizard, it is selected in the Tables/Queries drop down list. Let's add all the fields from our query to the form.
Step3. To add all of the fields from the query to the form,
Click , Click
The next screen allows us to determine how the form uses the data available:
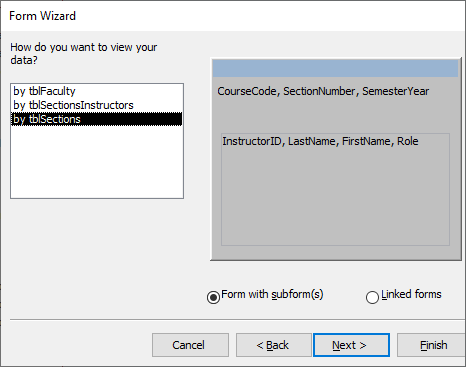
For example, we can display data from the perspective of tblSections, tblSectionsInstructors, or tblFaculty.
Step4. To explore the other view options,
Clickeach entry in the "How do you want to view your data?" list box
The default option is the best for us today since we're assigning faculty to course sections. This will create a main form with course section information and a subform with information about the different faculty members.
Step5. To select by tblSections, in the list box,
Click tblSections, Click
We're asked how we would like the subform to be displayed:
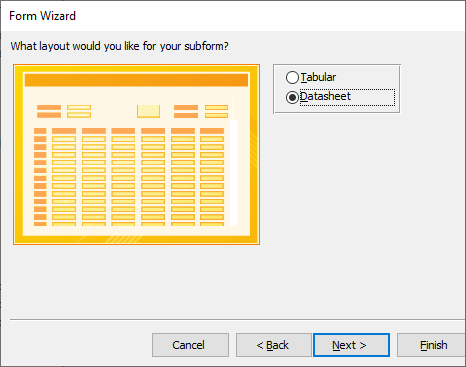
In this case, we would like to use datasheet layout. Datasheet layout is the most common layout for subforms.
Step6. To select datasheet, if necessary,
Click the Datasheet radio button
Step 7: To continue,
Click 
The next screen allows us to name our forms:
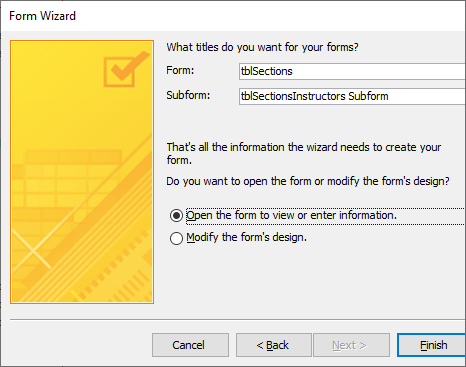
We will name each form here and then finish the wizard.
Step8. To name the forms, starting in the Form: field,
Double-Click the default value, type: frmAssignFaculty Tab key fsubAssignFaculty
Step 9. To finish creating the forms,
Click
We see the form appear in data entry mode:
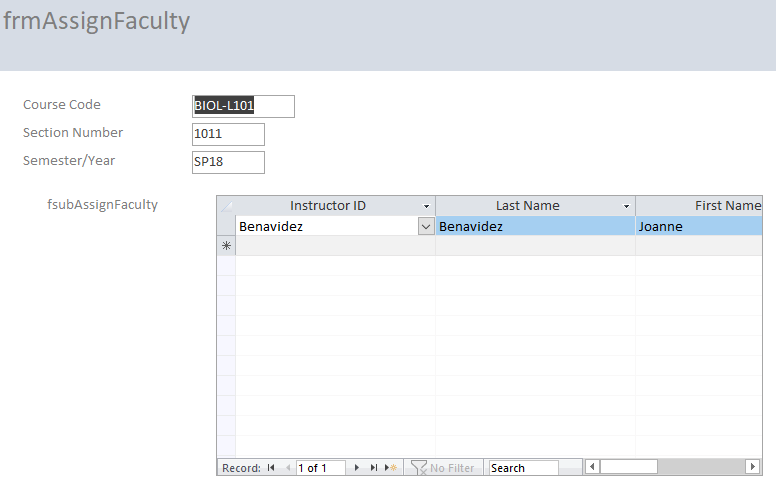
We can make some simple changes in Layout view to make this form easier to use.
Step10. To switch to Layout view, on the Ribbon,
Click
NOTE: If the field list is obscuring your view, you can close it using the X in the upper-right corner.
We want to delete the label for the sub form, make the subform wider, and change the title of the form. Let's start with the title.
Step11. To change the title, at the top of the form,
Triple-Click frmAssignFaculty, type: Assign Faculty to Sections Enter key
Next, let's delete the subform's label.
Step12. To delete the subform's label,
Click fsubAssignFaculty, press: Delete key
Last, let's make the subform wider so we can see more of the fields.
Step13. To widen the subform,
Click the subform, Press & Drag the left and right borders until the subform is as wide as you would like
Your form should look like this:
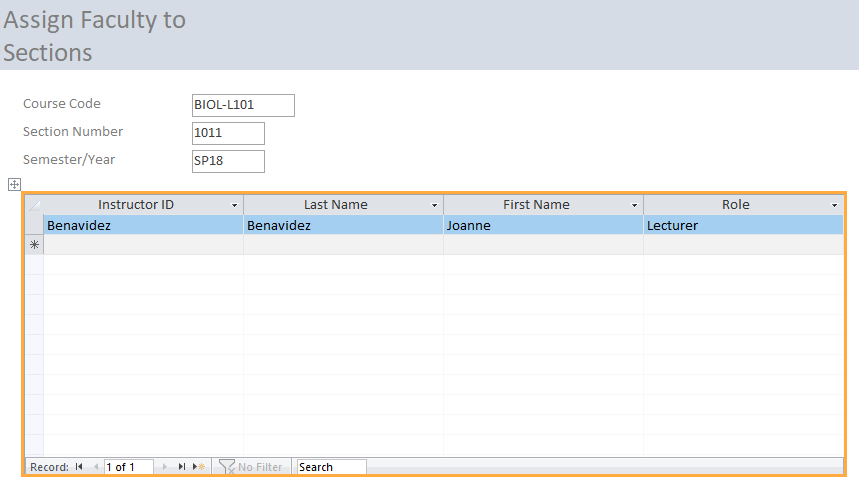
Step14. Save the form and switch back to Form view.
At this point, we can assign more faculty members to teach particular courses simply by selecting their EmployeeID from the InstructorID drop down list and assigning them a role from the Role drop down list.
Step15. To assign an additional faculty member to section 1011 of BIOL-L101 in the spring of 2018,
Click the Instructor ID field for the empty record, Click , Clickany faculty member, Click the Role field, Click
 , Clickany role
Step16. Repeat step 15 as many times as you would like for as many courses as you would like.
We can close the form.
Step17. Save and close frmAssignFaculty.
![]()
![]()

![]() , Click
, Click![]()

![]()


![]()

![]() , Clickany faculty member, Click the Role field, Click
, Clickany faculty member, Click the Role field, Click![]() , Clickany role
, Clickany role
