For our main project today, we will be creating a 30-second movie trailer. This trailer will be created with several animations which we will sequence to create the full animation. We will also add some music at the end of the project.
This project will consist of several compositions consisting of animated text, most of which will be 5 seconds long, and a final animation with the title of the movie and release date, which will be 10 seconds long.
For time's sake, we have a partially completed project that we can work with. Let's open this project now.
Step 1. To open the file, from the Menu bar,
Click File, Click Open Project...
Step 2. To open the file,
Double-Click Trailer Comps.aep
Step 3. To convert the project to the newest version of After Effects, if necessary,
Click OK
Creating a Blank Composition
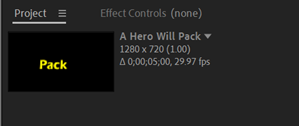
Before we create a blank composition, we want to ensure that it will match the rest of our project. If the composition is too large, it will be clipped, and if it is too small, it will have a border around the outside edge. Neither one is acceptable. So let's examine one of the currently listed compositions to see how large it is.
Step 1. To see how the current title card is set up, in the Project panel,
Click the first composition listed
Step 2. To create a new composition, at the bottom of the Project panel,
Click 

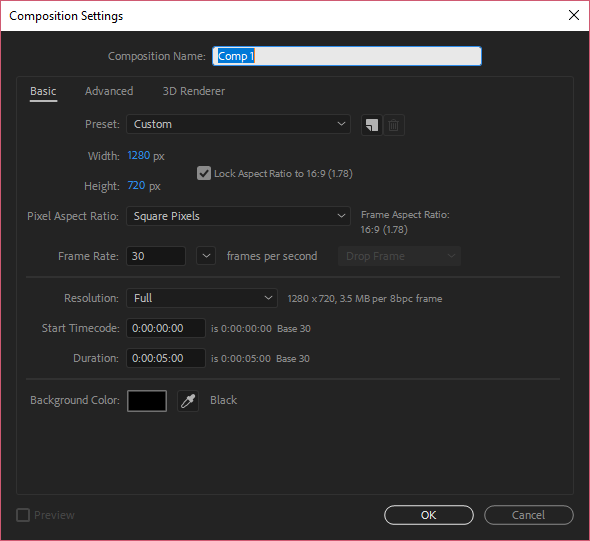
Step 3. To name the composition, in the Composition Name field, type:
On a Distant Planet
Step 4. To select the preset, in the Preset drop-down,
Click , Click HDV/HDTV 720 29.97
Step 5. To set the timecode, in the Duration field, if necessary, type:
0;00;05;00
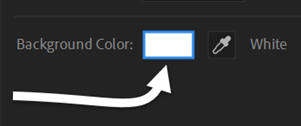
We'll also need to change the composition's background color to black.
Step 6. To start the process of changing the background color,
Click 
The Background Color color picker will display. We'll set the color to black using the hexadecimal color code field.
Step 7. To set the color, in the hexadecimal color (#) field,
Press & Drag the current value, type: 000000 Enter key
Step 8. To finish creating the composition,
Click
Creating and Formatting Text
The composition we just created will be the first composition seen in our animation, so let's put some text in. This text will be on two lines, and will move in from the left and right sides, meeting in the middle before fading out.
Let's do this now.
Step 1. To activate the Type tool, in the Tools panel,
Click
Step 2. To add text to the composition,
Click anywhere inside the composition panel, type: On a Distant
Step 3. To close the text box, type:
Control key + Enter key
Note for MacOS Users - To close the text box, on the keyboard press: Command key + Enter key.
Step 4. To create the second line of text,
Click below the first line of text, type: Planet
Step 5. To close the text box and switch to the Selection tool, in the Tools panel,
Click
Step 7. To select both text blocks,
Click the first text box, hold Shift key and Click the second text box
Step 8. To change the font, in the Font name drop-down menu in the Text section of the Properties panel,
Click![]() , type: Eras Demi ITC Enter
, type: Eras Demi ITC Enter
Step 9. To set the text color,
Click 
Step 10. To set the color, in the hexadecimal color (#) field,
Press & Drag the current value, type: FFA302 Enter key
Step 11. To move the text,
Press & Drag the text boxes until they match the following arrangement:

Step 12. To select the second line of text,
Click a blank area of the canvas, Click the line reading "Planet"
Step 13. To set the font size, in the size field,
Click the current size, type: 130 Enter key
Animating Position
Previously, we animated the opacity property so that our text would fade in and out. Now we will animate the position of our text. In our final animation, the two lines of text will move slowly from the edges of the frame to their final position.
We have set up our animation to view the final frame. We are starting from the end because we know what the final frame will look like. The text will not be visible at the beginning of the animation, so it will be easier for us to start at the end of the animation, where the text will be visible.
Let's do this now. Remember our animation process.
Step 1. To set the playhead in the correct location on the timeline, on the keyboard, press:
End key
NOTE: We could also Press & Drag the playhead to the end of the timeline.
Step 2. To select both text boxes,
Click the first line of text, hold Shift key, Click the second line of text
Understanding TRAPS
TRAPS is an acronym in After Effects that helps us to remember the five properties we can animate and gives us a list of keyboard shortcuts to use to quickly animate these properties.
TRAPS stands for the following:
| Property | Keyboard Shortcut |
|---|---|
| Opacity | T |
| Rotation | R |
| Anchor Point | A |
| Position | P |
| Scale | S |
Notice that Opacity is the only property that does not use its first letter as a keyboard shortcut, but since this is the only exception, it shouldn't be a problem.
Let's try out our keyboard shortcut now. We can see that to animate the position, we should press the P key on the keyboard.
Step 1. To show the Position property, on the keyboard, press:
P

Step 2. To place the first keyframe, in the Timeline panel next to the Position property,
Click ![]()
NOTE: Because both of these layers are selected, we can click either of the Position stopwatches in order to begin animating.
Step 3. To move the playhead to the beginning of the timeline, on the keyboard, press:
Home key
Step 4. To select a single text box,
Click away from the text, Click the text "On a Distant"

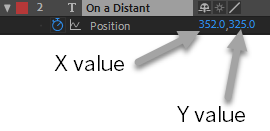
Step 5. To move the "On a Distant" text to the right, in the Timeline panel,
Point to the X value for the On a Distant layer, then Press & Drag the X value to the right until the text just leaves the canvas
Step 6. To select the text,
Click the text reading "Planet"
Step 7. To move the "Planet" text to the left, in the Timeline panel,
Press and Drag the X value for the Planet layer to the left until the text just leaves the frame
NOTE: You might need to release the mouse button and Press & Drag again if you hit the edge of the screen with your cursor while changing the value.
Step 8. To test the animation, on the keyboard, press:
Spacebar
Step 9. To stop the animation, on the keyboard, press:
Spacebar
Step 10. Save the file.


