When working with a complex composition, we will have several different objects, all with different animation properties and effects. We can also animate some of the effects as well.
It can be difficult to keep track of various objects and effects interacting with each other. Because of this, in this section, we will also explore some organizational techniques that can help us focus on a small portion of the composition.
Let's create a new composition. We'll need to move to the Project panel first.
Step 1. To move to the Project panel, on the Menu bar,
Click Window, Click Project
Step 2. To create a new composition, in the bottom of the Project panel,
Click 
Step 3. To name the composition, in the Composition Name field, type:
Planet Animation Enter key
Working with Solids
In After Effects, all the effects we can apply require an object to use. Sometimes, we don't have a specific object but still want the effect.
For these scenarios, we have solids. Solids are simple shapes, such as rectangles, that we can use as the basis for effects. They can also be used to provide solid color backgrounds in some cases.
Let's create one now.
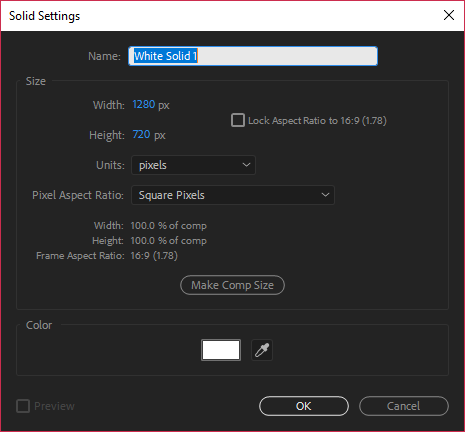
Step 1. To create a solid, on the Menu bar,
Click Layer, Point New, Click Solid...

Step 2. To name the solid, in the Name field, type:
Stars
Step 3. To ensure that the solid is the correct size,
Click
Step 4. To set the color, at the bottom of the dialog box, if necessary,
Click 
Step 5. To select the color white, in the # field, type:
FFFFFF
Step 6. To finish changing the color of the solid, in the upper right corner of the Solid Color dialog box,
Click
Step 7. To complete the solid creation process,
Click
Adding a Star Field Effect
We'd like this solid to turn into a field of stars. We could try to achieve this through a combination of effects, but there is a single effect that will do all of this for us. It is called CC Star Burst.
The CC stands for Cycore, which is a company that has created a series of effects for After Effects. To see all of them, simply search for CC in the Effects & Presets panel.
Let's find this effect in the Effects menu.
Step 1. To find the effect, from the Menu bar,
Click Effect, Point Simulation, Click CC Star Burst
Step 2. Preview the animation using whichever method you choose.
Step 3. Stop the animation, and return to the beginning of the timeline using whichever method you choose.

Step 4. Set the following field values:
| Setting | Value |
|---|---|
| Scatter | 250 |
| Speed | .01 |
| Grid Spacing | 2 |
Step 5. Preview the animation.
Step 6. Stop the animation, and return to the beginning of the timeline.
Step 7. Save the file.
Using Fractal Noise
One of the most common and useful effects in After Effects is Fractal Noise. This effect can be used to create a random pattern of noise that we can use as the basis for a lot of interesting effects. We can control what the pattern looks like to a large degree, and we can also animate these patterns, making them shift and move in interesting ways. Adding color to this pattern allows us to enhance the effect.
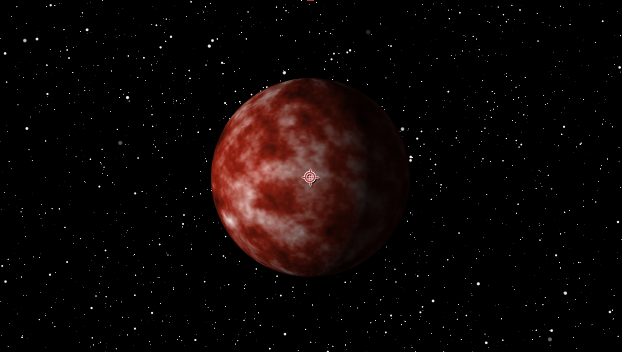
We will use Fractal Noise today to create the texture for a planet. Once the noise is set, we will apply the Sphere effect to wrap the noise pattern around a spherical shape, and then we will adjust the noise pattern to achieve a look that we like for our planet.
We need a solid to apply the Fractal Noise effect to.
Step 1. To create a solid, from the Menu bar,
Click Layer, Point New, Click Solid
Step 2. To name the new solid, in the Name field type:
Planet Enter key
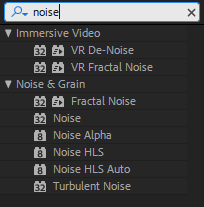
Step 3. In the Effects & Presets panel, in the search field type:
Noise Enter key

NOTE: Turbulent Noise is a filter that can be used in similar situations as Fractal Noise. The main difference between the two is that Turbulent Noise is hardware-accelerated. This means that it can use your graphics card to render faster. Experiment with both to see which works better in different situations.
Step 4. To add the effect, in the Effects & Presets panel, under the Noise & Grain heading,
Double-Click Fractal Noise

Step 5. To test out the options for Fractal and Noise Type, in the Effect Controls panel,
Click for Fractal Type and Noise Type, and select different options
Step 6. To test out the Contrast and Brightness options, in the Effect Controls panel,
Press & Drag the sliders for Contrast and Brightness to see how they change the effect
Step 7. To reset the effect, at the top of the Effect Controls panel,
Click Reset
Adding the Tritone Effect
On of the main issues with Fractal Noise is that it does not include color, so if we want any color included, we will need to add another effect. There are several effects we can use, but one of the most simple and effective is the Tritone effect.
The Tritone effect allows us to change the color of a grayscale object by replacing the white, gray and black colors with new colors of our choosing. Since white, gray and black are the only colors present in a grayscale image, this can give us a good simple way to quickly alter the colors.
Let's add this now.
Step 1. To add the Tritone effect, in the Effects & Presets panel search field, type:
Tritone
Step 2. To add the effect, in the Effects & Presets panel,
Double-Click Tritone
Step 3. To change the midtones, in the Effect Controls panel,
Click 
Step 4. To select a new color,
Click a different color, then Click
Adding the Sphere Effect
Finally, to complete our planet effect, we need to make a sphere out of this noise texture. We'll use the CC Sphere effect to accomplish this. This is a simple effect that creates a sphere, and we can control size, position, and lighting from within the effect itself.
Let's add this now.
Step 1. To add the Sphere effect, in the Effects & Presets panel search field, type:
CC Sphere
Step 2. To add the effect, in the Effects & Presets panel,
Double-Click CC Sphere

Step 3. Save the file.

