A web page usually contains text and images, and can also include more sophisticated elements such as sound, animation, and video. A website is essentially a set of web pages linked together. The files in a website may be hierarchically organized into directories, which may contain images and related web documents.
Document Management and File Structure
All the documents, images, and other media used for a site should be located under one main folder, known as the root folder, to prevent broken links. One of the best practices is to create a new site folder and an additional subfolder for images before beginning a new site. If the site will have many pages or files, create additional subfolders for each main category of the site. Web designers often group assets of certain types in their own subfolders, such as images, CSS styles, JavaScript files, etc.
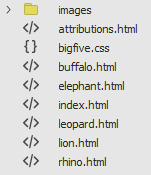
While there are several different ways a site can be constructed, ours will have a simple hierarchical structure. Within the site folder, we will have six HTML files, a CSS file, and a folder containing images. The diagram below illustrates the file structure of the sample website:

NOTE: The terms "folder" and "directory" are used interchangeably throughout this document.
Local Versus Remote Sites
Before a website is published on the web, the working version of the website files is known in Dreamweaver as the local site, because the files are typically only on the computer's hard drive. The version of the site that is published, or located on a remote web server and viewable on the web, is referred to as the remote site.
Defining a Site Locally
We'd like to use Dreamweaver's site management and organization tools, which can be accessed by defining a site. In order to define a site, we need to indicate where on our computer we are going to store the files that belong to that site. A folder called dreamweaver has already been created for the site we are going to create today. We would like to let Dreamweaver know that all the files of the site will be stored in this folder.
NOTE: The video demonstrates the next section of content.
Description of the video:
[00:00:05]
>> Now what we're going to do first before we start building our site is define a site in Dreamweaver locally so define our local site on our machine and Dreamweaver has a really nice site management and organization tools that we can use to help define a site in order to define a site we need to indicate where on our computer we're going to store the files that belong to that site we've got a folder called Dreamweaver basics that we're going to use for this example and it's already got the files that we're going to use to create a website we want to let Dreamweaver know that all the files for the site are going to be located in this folder.
[00:00:41]
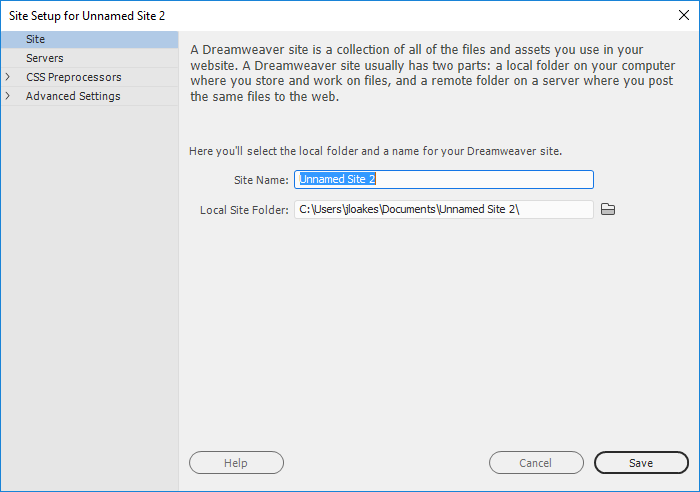
Let's go ahead and start defining a site to start that we're going to go up to the menu bar click site and then new site. Will see the site set up dialog box the first thing will want to do is name the site and we're going to give it the name Africa's big five.
[00:01:03]
Next we'll use the browse feature to let Dreamweaver know which folder contains the files will be using for this site so to look for the folder we're going to look at the right side of the local site folder field you'll see a little tiny folder icon will be clicking that and that will open up our browser window little allow us to choose our root folder.
[00:01:21]
Once we get in there we'll just need to navigate to wherever our files are for our website for my purposes today I've got a folder on the desktop called class that my Dreamweaver basics folder is and so I'm going to go ahead navigate class and then into Dreamweaver basics.
[00:01:40]
One time inside the Dreamweaver basics folder if I take a look at the bottom of the Choose root folder dialog box Dreamweaver basics in that folder field to select this folder all I need to do is click the select folder button at the bottom of that I lockbox.
[00:01:57]
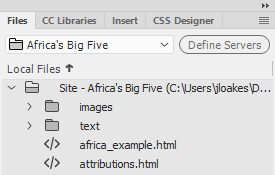
Once we've got our folder defined we can go ahead and. Click save to save our changes. There are other settings we could specify here but for now we're done defining our local site. Once we've defined our site the files that are located in that site folder that we just to find they're located in the Files Panel so we can access these files without leaving Dreamweaver.
Step1. To start to define a site, on the menu bar,
Click Site, Click New Site...
You see the Site Setup dialog box:

Let's name the site.
Step2. To name the site, in the Site Name field, type:
Africa's Big Five
We'll use the browse feature to let Dreamweaver know which folder contains all the files we'll be using for this site.
Step3. To look for the folder, to the right of the Local Site Folder field,
Click
You see the Choose Root Folder dialog box.
We need to specify the name and location of the folder to open.
Setting the Location for the Local Root Folder
When the dialog box opens, it lists a default location. All of our exercise files are contained in the epclass folder, located on the desktop. We'll want to change our location to this folder.
We will start at the desktop, since our exercise file folder, epclass, is located there.
Step1. To move to the desktop,
Click
The current location is now set to the desktop. All of our exercise files are contained in the epclass folder, located on the desktop.
Step2. To open the epclass folder,
Double-Click
The epclass folder contents are now visible.
Step3. To indicate which folder should be the local root folder,
Click dreamweaver
You see dreamweaver in the Folder field near the bottom of the Choose Root Folder dialog box.
Step4. To select the dreamweaver folder,
Click
NOTE for MacOS Users: To select the dreamweaver folder, Click Choose.
Step5. To accept these changes,
Click
There are other settings we could specify here but for now, we are done defining the local site.
Once the site is defined, the files that are located in the site folder appear on the right in the Files panel:


