Macros can be run in several different ways. They can be launched from the Macro dialog box, by using an assigned shortcut key, from a button on the Quick Access Toolbar, or from within another macro. We will explore each of these approaches except the shortcut key in this workshop.
Using the Macro Dialog Box
Let's first see how to run the macro we created from the Macro dialog box.
Step1. To select the next sheet,
Click the 2004 worksheet tab
Step2. To access the macro commands, on the right side of the Ribbon,
Click
NOTE for MacOS Users: To access the macro commands, on the Ribbon in the View tab, Click .
.
Step3. To run the AutoFit macro, in the Macro dialog box,
Click AutoFit, Click
NOTE for MacOS Users: Skip foward to the heading, "Adding a Macro to the Quick Access Toolbar on MacOS".
Adding a Macro to the Quick Access Toolbar in Windows
If a macro is to be used often, adding it to the Quick Access Toolbar will make access easy.
NOTE: If you add a macro to the Quick Access Toolbar that is stored within an individual workbook (not the Personal Macro Workbook), it will only be available when that workbook is open.
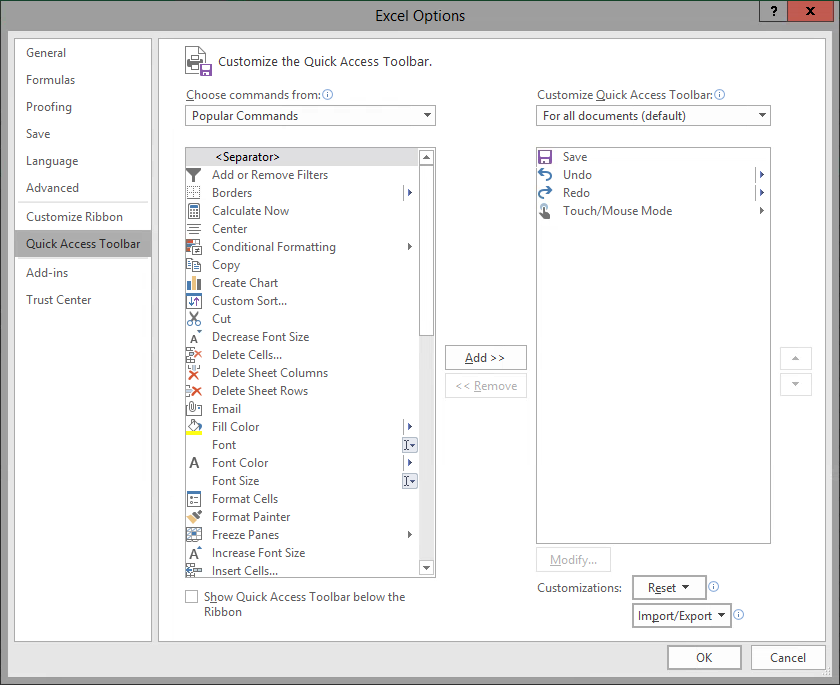
Step1. To begin customizing the Quick Access Toolbar,
Click File, Click
Step2. To customize the Quick Access Toolbar, in the navigation pane,
Click Quick Access Toolbar

Step3. To find macros in the choose commands from drop-down list on the left,
Click , Click Macros
Step4. To insert the <Separator>, in the Choose command from: column,
Double-Click <Separator>
Step5. To add AutoFit to the Quick Access Toolbar, in the left column,
Double-Click AutoFit
Changing the Icon and Name of a Button
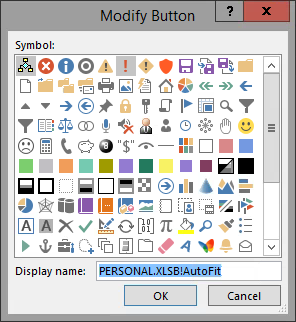
Once a command is added to the Quick Access Toolbar, we can modify the way it looks and the caption it displays when the mouse hovers over it.
Step1. To begin modifying the AutoFit button, in the right column,
Click AutoFit
Step2. To open the modify menu, below the right column,
Click

Step3. To change the display icon,
Click any icon
Step4. To select the current display name, in the Display Name field,
Press & Drag the current value, type: Auto Fit
Step5. To make the change,
Click
Step6. To close the Customize window,
Click
NOTE: To remove a command button from the Quick Access Toolbar, Right-Click the button and select Remove from Quick Access Toolbar.
Adding a Macro to the Quick Access Toolbar on MacOS
If a macro is to be used often, adding it to the Quick Access Toolbar will make access easy.
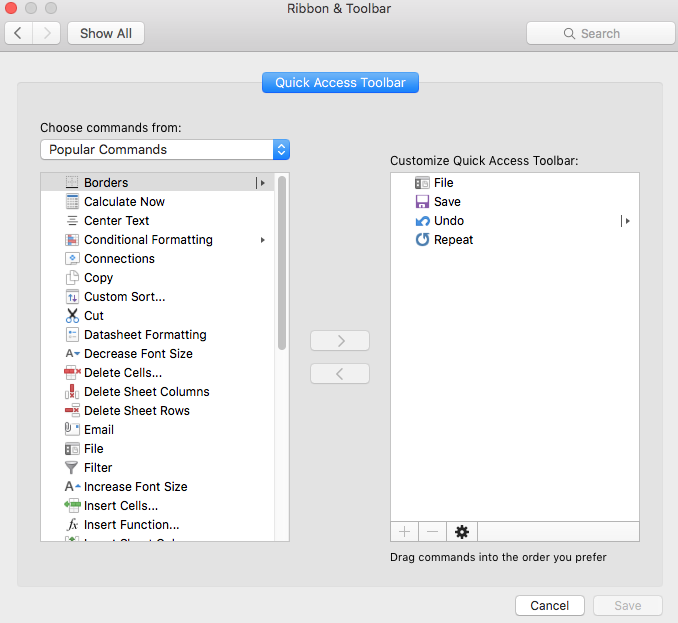
Step1. To begin customizing the Quick Access Toolbar, in the Menu bar,
Click Excel, Click Preferences...
Step2. To customize the Quick Access Toolbar,
Click

3. To customize the Quick Access Toolbar, find macros in the choose commands from drop-down list on the left,
Click , Click Macros
Step4. To add AutoFit to the Quick Access Toolbar, in the left column,
Click AutoFit, Click , Click
Changing the Name of a Button on MacOS
While we can't change the icon associated with a macro, we can change its name on MacOS.
Step1. To rename the macro on the Quick Access Toolbar, in the right pane of the Ribbon & Toolbar dialog box,
Click <<No Label>>, Click , Click Rename...
Step2. To change the name of the button, type:
Auto Fit, Click
Step3. Close the Preferences window.

Using the Quick Access Toolbar to Run a Macro
We can use the new Auto Fit button to format a sheet in one simple step. Let's use the button to format the cells on the 2005 worksheet.
Step1. To select the 2005 worksheet,
Click the 2005 worksheet tab
Step2. To run the macro, on the Quick Access Toolbar,
Click the Auto Fit button

