Now that we've built it, let's use it. Using a grid system is relatively easy as it just requires us to put the right classes in the right places to create the layouts we want. Most of the pages in our site already have the appropriate markup in place, but we will be learning how to use the grid with the home page and you will have a chance to practice on your own with the FAQ page.
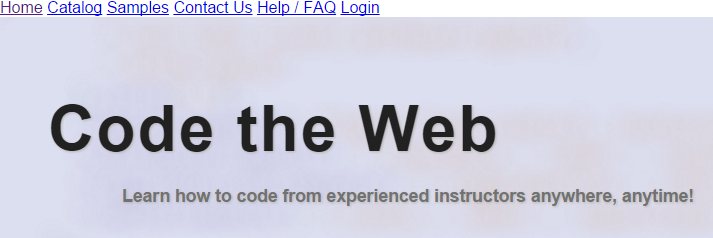
Let's use the navigation of the site as a way to explore how to put a grid system on an existing design. Right now, our navigation looks like a row of un-styled links at the top of our page:

The code that's generating this right now is relatively simple:
<nav class="main full-width">
    <a href="index.html">Home</a>
    <a href="catalog.html">Catalog</a>
    <a href="samples.html">Samples</a>
    <a href="contact.html">Contact Us</a>
    <a href="faq.html">Help / FAQ</a>
    <a href="login.html">Login</a>
</nav>
Exiting code block.
We would like to make the navigation be a horizontal bar of buttons situated at the top of the screen. This will be accomplished by creating a six column row that extends across the entire page. Notice that there is no .container in this code but instead, there is .full-width. To make a grid extend across the page, we give the parent element the .full-width class rather than .container. Recall from earlier that .container has a max-width value of 1024 pixels. This prevents .container elements from extending to the full-width of the browser. The .full-width rule simply has width: 100%; as its declaration.
Before the columns will be effective, we need to wrap our navigation in a .row. Since the navigation element already contains our navigation, we can add the row class to it instead of making a new division.
Step1. If necessary, activate index.html in the code editor.
Step2. To add the row class to the navigation element, type the code in bold below [Region 18]:
<nav class="main row full-width">
    <a href="index.html">Home</a>
    <a href="catalog.html">Catalog</a>
    <a href="samples.html">Samples</a>
    <a href="contact.html">Contact Us</a>
    <a href="faq.html">Help / FAQ</a>
    <a href="login.html">Login</a>
</nav>
Exiting code block.
Step3. To add the columns surrounding each hyperlink, type the code in bold below [Region 19]:
<nav class="main row full-width">
    <div class="one column">
        <a href="index.html">Home</a>
    </div>
    <div class="one column">
        <a href="catalog.html">Catalog</a>
    </div>
    <div class="one column">
        <a href="samples.html">Samples</a>
    </div>
    <div class="one column">
        <a href="contact.html">Contact Us</a>
    </div>
    <div class="one column">
        <a href="faq.html">Help / FAQ</a>
    </div>
    <div class="one column">
        <a href="login.html">Login</a>
    </div>
</nav>
Exiting code block.
NOTE: swipe.txt contains the entire <nav> element.
Step4. To make our login link appear like a button, type the code in bold below [Region 20]:
<div class="one column button">
    <a href="login.html">Login</a>
</div>
Exiting code block.
Step5. Save and refresh index.html.

Step6. If necessary, activate index.html in the code editor.
Step7. To add two rows to the training band, type the code in bold below [Region 21]:
<div class="full-width jumbo band">
    <div class="container">
        <div class="row">
            <h2>Video Training</h2>
            <img src="images/prlba_title.jpg" alt="title from perl the basics" class="full-width"/>
            <p>Video training is created and supplied by our community.</p>
            <h2>1-on-1 Training</h2>
            <img src="images/jason_tiny.jpg" alt="One-on-one training" class="full-width"/>
            <p>1-on-1 training is supplied by industry leading experts in their fields.</p>
        </div>
        <div class="row">
            <p><a href="samples.html" class="button">See Training Samples Here</a></p>
        </div>
    </div>
</div>
Exiting code block.
NOTE: swipe.txt contains the entire <div class="container"> element.
Step8. To add the columns to the training band, type the code in bold below [Region 22]:
<div class="full-width jumbo band">
    <div class="container">
        <div class="row">
            <div class="three columns">
                <h2>Video Training</h2>
                <img src="images/prlba_title.jpg" alt="title from perl the basics" class="full-width"/>
                <p>Video training is created and supplied by our community.</p>
            </div>
            <div class="half column">
                <h2>1-on-1 Training</h2>
                <img src="images/jason_tiny.jpg" alt="One-on-one training" class="full-width"/>
                <p>1-on-1 training is supplied by industry leading experts in their fields.</p>
            </div>
        </div>
        <div class="row">
            <div class="six columns">
                <p><a href="samples.html" class="button">See Training Samples Here</a></p>
            </div>
        </div>
    </div>
</div>
Exiting code block.
NOTE: swipe.txt contains the entire <div class="row"> element.
Step9. Save and refresh index.html.


