Adding depth with gradients
While solid colors may work for parts of illustrations, sometimes a different fill effect is needed. In these cases, we can use gradients to give our drawings some depth.
Gradients work by blending colors smoothly into one another, thereby giving the object the appearance of either roundness or depth. This way, we can add some visual interest to an object.
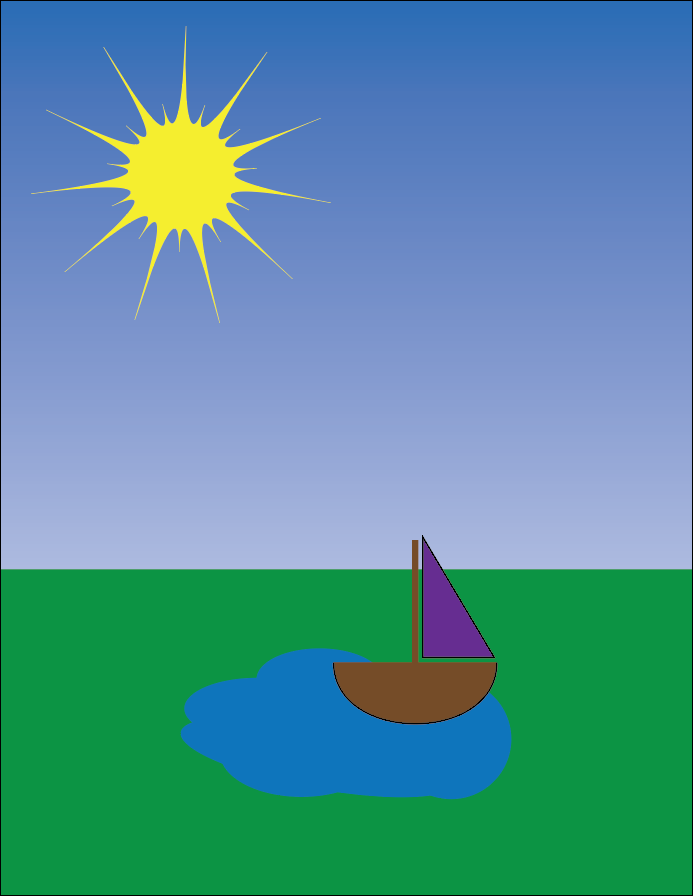
In this section, we will apply a gradient to our background to make it appear like a pleasant blue sky. To do this, we will create a custom gradient and apply it to the background.
Designing a Custom Gradient
Illustrator comes with several default gradient effects for us to use, but we may want to use a different gradient than the preset ones Illustrator provides.
The Gradient panel allows us to select the colors in a gradient, as well as the spacing between them, in order to create a custom gradient effect. We also can choose between a linear gradient and a radial gradient. In a linear gradient, one color blends seamlessly into the next in a linear fashion. In a radial gradient, the color starts in the middle, and blends out in a circular pattern to the edges of the shape. The following examples help illustrate the difference between linear and radial gradients:
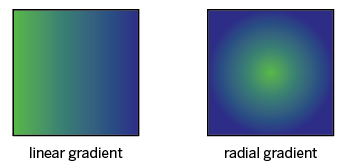
Let's familiarize ourselves with the Gradient panel before we start creating the gradient background. First, we'll want to ensure nothing is selected on our artboard, so we don't inadvertently add the gradient to an existing item. We'll also want to make sure we set the gradient to be used as an object's fill instead of its stroke. Then, we'll open up the Gradient panel and take a look at its contents.
The Gradient panel appears:
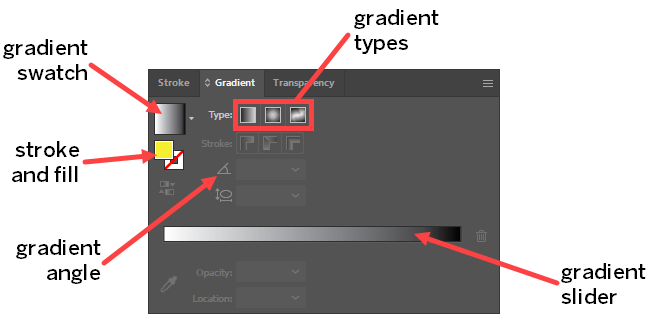
In the upper left corner of the panel, we see the gradient swatch, which shows what our gradient will look like if we were to apply it to an object right now. Underneath that is another set of the stroke and fill swatches, allowing us to choose what part of a shape we want to apply the gradient to. Below the Stroke and Fill swatches, we have the reverse gradient button, which allows us to quickly reverse the orientation of our gradient. On the upper right side of the panel, we see the gradient type buttons — here, we can choose from linear, radial, and freeform gradients. We can also change the angle of our gradient in the Gradient panel. Across the bottom of the panel is the gradient slider, which is where we can adjust the colors in our gradient.
Let's take a moment to activate the gradient slider, then we'll learn more about how it's used to create a gradient.
Now that the Gradient Slider is active, we see little circles of color underneath the slider, as shown in the following image:

Each of these circles is referred to as a color stop, and we can have as many of them as we wish in our gradient. By default, when creating a new gradient, the slider shows the minimum amount of color stops underneath the slider, with white on the left side and black on the right. When we double-click one of those color stops, a sub-panel will appear that will allow us to change the color used for that specific color stop.
One thing to note about the Gradient panel is that when working with the default black and white gradient, the color mode is set to grayscale as Illustrator isn't using any colors in this default gradient. We'll need to switch our color mode to one that allows us to work with many colors, rather than just shades of black and white. We'll be using the CMYK color mode, which is optimized for printing.
The Gradient Slider should now look similar to the following image:

The gradient we just made is also visible in the fill swatch that appears in the Tools panel, Swatches panel, and Gradient panel. We're now ready to make the rectangle that will serve as the sky in our landscape drawing. After doing that, we may need to change the angle of our gradient so that the blue appears at the top of our rectangle.
Now we have a sky for our landscape drawing — however, it's covering up all the other parts of the scene. We'll fix this, and in the process gain a better understanding of how Illustrator places objects on our artboard.


 ,
, 


 ,
, 