With the A-Cover parent page complete, let's work on the B-Inside parent pages. The B-Inside parent consists of two facing pages displayed in a spread, so we can see how both pages look next to each other. We'll start out by creating the headers at the top of each page, then we'll add a page number to the bottom outside corner of each page.
Available Files
The following files are available for download:
Creating the page headers
For the headers on the inside pages, we'll create a text frame that's 1/4 inch tall that sits on top of the three columns of text. We'll need to move to the B-Inside parent first so we can add the header, then we'll create the header at the top of the left page of the spread. Once we have the frame created, we'll then add text to the frame and style it.
- To open the Pages panel, in the Panel dock,
Click

- To switch to the B-Inside parent, in the parent pages section of the Pages panel,
Double-Click

NOTE: You may have to move the divider at the bottom of the parent pages section of the Pages panel in order to see the B-Inside parent page.
- Collapse the Pages panel, if necessary.
- To zoom in on the top of the left page of the spread, in the Tools panel,
Click
 , Click the top of the left-hand page until it takes up most of the document window
- To activate the Type tool, in the Tools panel,
Click

- To switch to the Character Formatting Controls, if necessary, on the far left side of the Control panel,
Click

- To position the cursor where we want to start creating the frame,
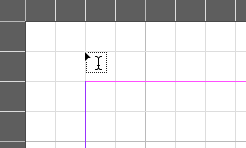
Point to the top left corner of the grid square one square above the left side of the left column, as shown below:

- To create a text frame for the header, on the left-hand page of the B-Inside spread,
Press & Drag down one grid square and across the top of all three columns
- To add the newsletter name to the text frame, type:
Midwest Pet Pals Gazette
- To select the text, with the Type tool active,
Triple-Click the text
- To change the font to Verdana Italic, in the Font drop-down menu in the Control panel,
Click
 , type: Verdana, Click Verdana Italic
 - To change the font size, in the Font Size drop-down in the Control panel,
Click
 , Click 10 pt
The header looks good, but we may want to add something to help separate it from the main content of the page. A paragraph rule may be just the thing we need for our header.
Creating paragraph rules
One of the simplest design elements available to a graphic designer is a line. In many cases, a simple black line is the most effective way to accomplish any number of tasks, including separating sections, calling attention to part of a page, or acting as a barrier at the top or bottom of a page.
InDesign makes it easy for us to add lines to a paragraph through the use of paragraph rules. These lines, or rules, can be added above and/or below a paragraph of text. We can also customize their appearance and position in relation to the text the paragraph rule is applied to.
Let's add a paragraph rule underneath the text in the header, to help make it more obvious that the text above the line is part of the header, and everything underneath it is part of the content of the newsletter. We can add paragraph rules through the Paragraph panel menu.
- Ensure the newsletter's name is still selected.
- To switch to the Paragraph panel, in the Panel dock,
Click

- To open the Paragraph Rules dialog box, in the upper right corner of the Paragraph panel,
Click
 , Click Paragraph Rules…
 - To preview changes as they're made, if necessary, in the bottom left corner of the Paragraph Rules dialog box,
Click the Preview checkbox
- To indicate we want to add a paragraph rule underneath the text, in the rule type drop-down menu at the top left corner of the dialog box,
Click
 , Click Rule Below
 - To display the paragraph rule, next to the rule type dropdown,
Click the Rule On checkbox
- To change the spacing between the text and the paragraph rule, in the Offset field,
Click
 once
once
NOTE: The value in the Offset field should read 0.0625 in.
- To finish adding the paragraph rule, in the bottom right corner of the dialog box,
Click

- To deselect the text,
Click on the pasteboard above the document page
The header for our page should now look like the following image:

Copying the header from the left page to the right page
Let's go ahead and add the header to the right-hand page. We'll do this by copying the existing frame and changing the text alignment so it's right-aligned instead of left-aligned. As part of this, we'll gain some experience using the Selection tool, which we haven't used yet.
About the Selection tool
The Selection tool allows us to select an entire frame and its contents so they can be moved, resized, rotated, or otherwise modified. Here, we'll use the Selection tool in combination with a keyboard modifier to copy the header frame we just created — all we'll need to do is hold down the Alt key while pressing and dragging the frame to make a copy.
To make it easier to accomplish this task, let's first adjust the zoom level of the pages so both pages in the spread take up the entire document workspace. We'll use another shortcut to accomplish this - this one involves the Hand tool.
- To quickly zoom out so the entire spread fills the document window, in the Tools panel,
Double-Click

- To activate the Selection tool, in the Tools panel,
Click

- To copy the header from the left page, on the keyboard, press and hold:
Alt key, Press & Drag the header from the top of the left page to the top of the right page
NOTE for MacOS Users: To quickly copy an object, press and hold the Option key while moving a shape instead of the Alt key.
- Ensure the Paragraph panel is still open.
- To change the alignment from left to right, in the top of the Paragraph panel,
Click

- To deselect the text frame,
Click anywhere on the page away from the text frame
The headers for the newsletter's inside pages are now complete. Let's add the page numbers to the bottom of the pages now.
Using dynamically updated page numbers
One of the many helpful features of InDesign is the ability to have page number references that dynamically update themselves based on what page they're on. We'll be using this feature to add page numbers to the inside pages parent that will automatically update to reflect the appropriate page number in the document.
NOTE: When we add the dynamically updating page number to the B-Inside parent, the page number will display as the letter B, since that's the prefix for the parent pages we're working on — when the parent is applied to a document page, we'll see the correct page number instead of the letter B.
Let's go ahead and add a page number to the left page of the spread now. To do this, we'll create a small text frame just underneath the left side of the left column — it'll be a quarter of an inch tall by a half inch wide (or one grid square high by two grid squares wide). Once we have the text frame, we'll add the dynamically updating page number to it, then style it and center it in the frame. After we create the page number of the left page, we'll copy and paste it onto the right page.
- Activate the Type tool.
- To create the text frame for the left-hand page, directly underneath the left side of the left column,
Press & Drag a text frame one grid square high by two grid squares tall
- To insert a dynamically updating page number for the current page,
Right-Click the text frame, Point Insert Special Character, Point Markers, Click Current Page Number
- To center the text horizontally, on the Control panel,
Click

- To open the Text Frame Options dialog box, on the keyboard, press:
Control key + B
- To set the vertical justification to center, in the Align: field of the Vertical Justification section of the dialog box,
Click
 , Click Center, Click
- With the Type tool active, select the text in the page number frame.
- To change the font to Verdana Regular, in the Font drop-down menu in the Control panel,
Click
 , type: Verdana, Click Verdana Regular
 - To change the font size to 10 pt, in the Font Size field,
Press & Drag value, type: 10 Enter key
- To activate the Selection tool, in the Tools panel,
Click

- To select the frame with the page number, if necessary, in the lower left corner of the page,
Click the text frame
- To copy the page number frame, on the keyboard, press:
Control key + C
- To paste a copy of the page number frame, on the keyboard, press:
Control key + V
- To reposition the pasted page number frame, with the Selection tool active,
Press & Drag the frame into position on the right side page, under the right side of the right column of text
- To save the file, on the keyboard, press:
Control key + S
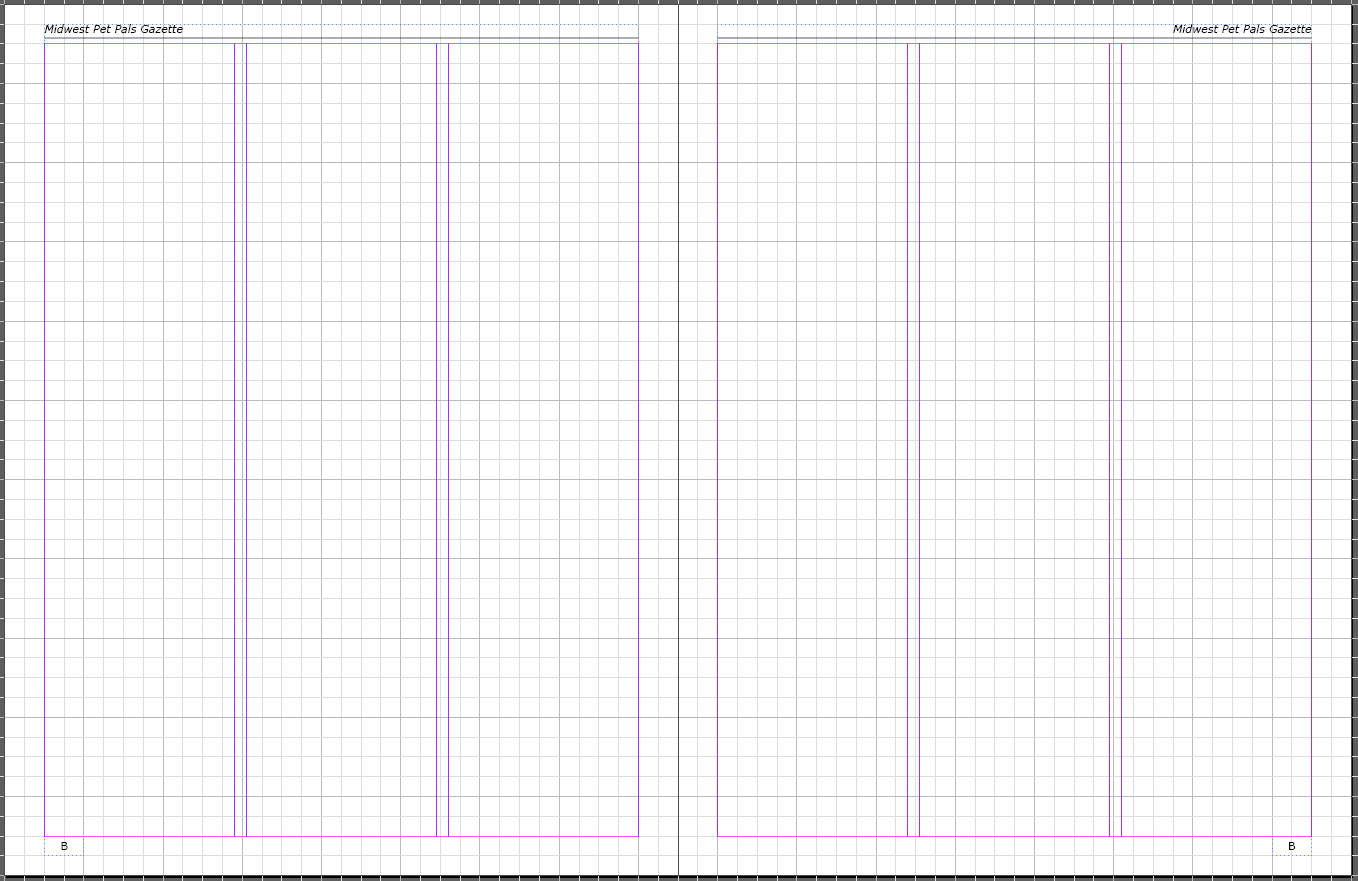
The B-Inside parent spread should look like the following image:

At this point, we're done with adding the structure to the parent pages.

