

Our <script> element is effectively blank again, and we are ready to start our actual project.
Before we rush into trying to add the functionality for our slide show page, it is really important to understand the structure or DOM of our page.
Let's review the HTML now.
The most pertinent parts of the page are labeled in the following diagram:
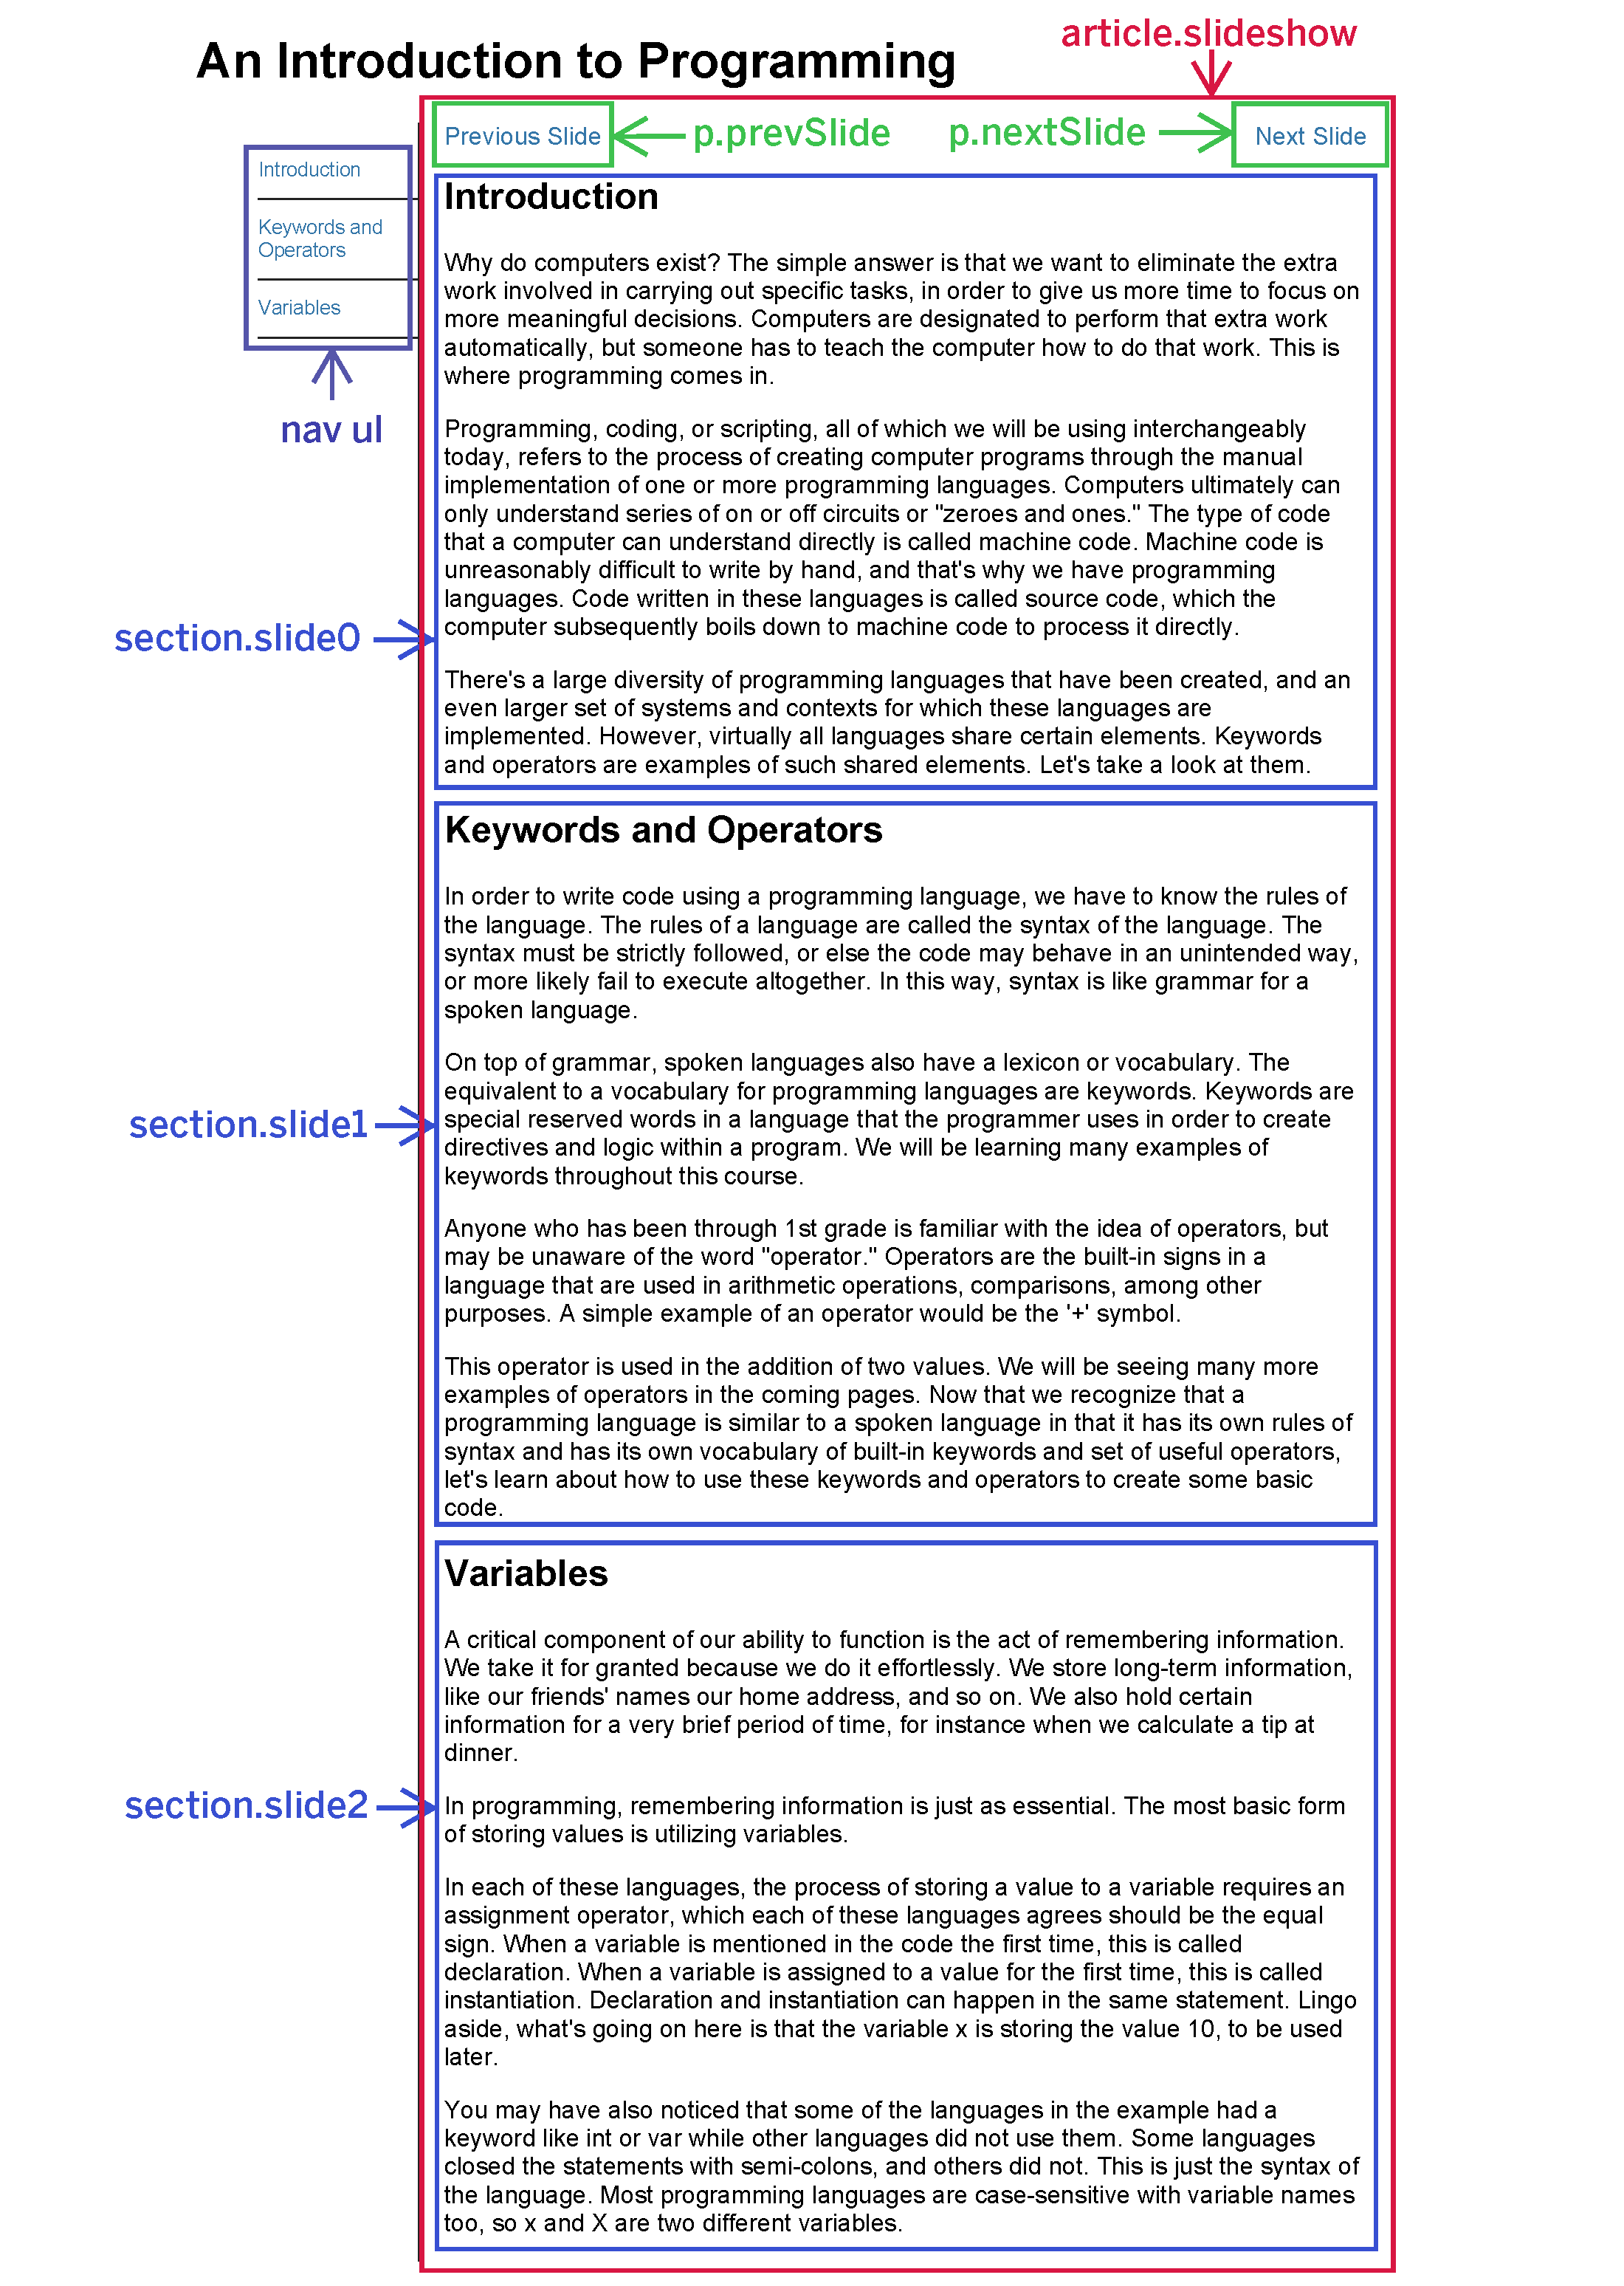
To sum it up, the HTML includes:
- An <article> element that contains all of our slide data
- three <section> elements that each represent a different slide of the slide show, with the class attributes with the values "slide0", "slide1", and "slide2".
- two <p> elements, which are intended to control going forward and backward from the current slide. These paragraphs are above the slide sections and possess the class names "prevSlide" and "nextSlide".
- one <ul> element inside of a <nav> that floats to the left of our slides. The <li> elements in this <ul> are intended to allow the visitor to flip to their desired slide.
Before we go any further, let's take some time to create some guides to help with the rest of our project. We will be using some comments to help keep everything organized.
Organizing Code with Comments
Our project's desired functionality has several distinct steps. To accomplish those steps, we'll write some JavaScript code. Before we write that code, let's outline it with pseudocode, or discrete statements written in plain language that describe the tasks the code will accomplish.
Let's create some pseudocode inside our <script> element to help guide our project.
Step 1.To add pseudocode, type:
<script>
// Turn all <h2> nodes gray
// Hide all slides
// Show the first slide
// Go to the next slide
// Go to the previous slide
// Create slide-to-slide jump navigation
// Create slide numbers

/* This was practice code
Exiting code block