Creating letters and envelopes may seem like an obvious use of mail merge. But we aren't limited just to correspondence that is printed on paper. We can also use mail merge to create and send email messages. This process is similar to creating letters and will involve using Microsoft Word, Excel, and Outlook.
Available Files
The following files are available for download:
Creating the document
The email messages we send will be to the people whose proposals were not selected for the conference. To create these messages, we will begin with a Microsoft Word document that contains the letterhead of the Midwest Cycling Cooperative as well as the standard text. We do not want to overwrite this message with our mail merge, so we will save it as a new file.
NOTE: We will use "MM" at the end of the file name to show that this is indeed a mail merge document and will have a connection to a data source.
- To view the saved files,
Navigate to the MailMerge_Office folder
- To open the Unaccepted document,
Double-ClickUnaccepted.docx
- To enable editing, if necessary,
Click

- To begin saving the document with a new name, in Microsoft Word,
Click File, Click Save As
- To select the current name, in the Name field,
Click the current name
- To rename the file, in the Name field, type:
Unaccepted-MM Enter key
Examining the data source
Now that the message has been saved with a new name, let's examine the data source. When we created the letters and envelopes, we used an Excel workbook named Applicants as the data source. For the email messages, we will use a second workbook, Reviewed.xlsx. This workbook contains all of the conference proposals with a column indicating if the proposal was accepted.
- To view the saved files,
Navigate to the MailMerge_Office folder
- To open the Reviewed spreadsheet,
Double-ClickReviewed.xlsx
- To enable editing, if necessary,
Click

The Reviewed worksheet contains all of the information for the submitted proposals. Column J indicates if the proposal was accepted. In addition, the accepted entries have been sorted into categories (column K) and assigned a room (column L) and a time (column M).
- Close the Excel workbook.
Creating a mail merge with filtered data
The email messages we are going to send will be to the people whose proposals were not selected. Therefore, our source file will have to be filtered to show only those entries. This can be done as part of the mail merge process.
- To move to the Mailings tab, on the ribbon,
Click the Mailings tab
- To begin the mail merge for email messages, in the Start Mail Merge group,
Click
 , Click E-mail Messages
- To begin selecting the data source, in the Start Mail Merge group,
Click
 , Click Using an Existing List...
 Navigate to the MailMerge_Office folder.
- To choose the correct file,
Double-ClickReviewed.xlsx
The correct workbook is now ready to be merged with the document.
Because we are sending this email only to the people whose proposals were not accepted, we need to filter the source data. We can do that now.
- To open the Mail Merge Recipients dialog box, in the Start Mail Merge group,
Click

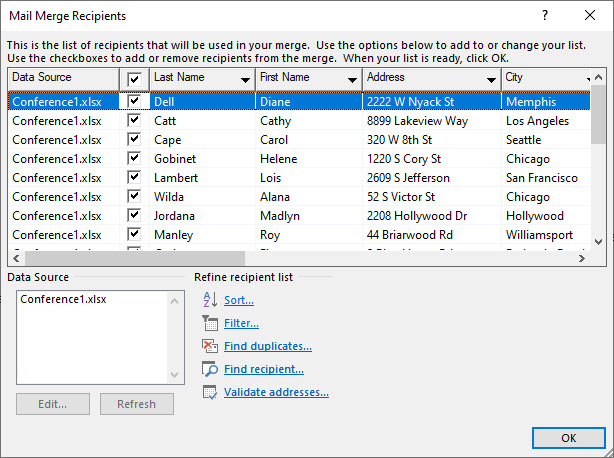
The Mail Merge Recipients dialog box opens:

This dialog box shows all of the fields and entries in the source data worksheet. Using the built-in options we can filter or sort our source data. We could also find a specific recipient or duplicate records. Let's filter the data now.
- To see the Accepted column, in the Mail Merge Recipients dialog box,
Scroll to the right
- To filter the Accepted column,
Click
 , Click No
The list adjusts and we see the five unaccepted proposals.
- To confirm the filter, in the Mail Merge Recipients dialog box,
Click

There is no visible change to the email document. However, when we begin adding merge fields, only the recipients with unaccepted proposals will be available to us.
Because this is an email message, not a letter, there is no need for an inside address. We will add a greeting line.
- To correctly place the cursor, in the email,
Click below the letterhead
- To open the Insert Greeting Line dialog box, in the Write & Insert Fields group,
Click

- To accept the defaults and insert the greeting line, in the Insert Greeting Line dialog box,
Click

- To preview the results, in the Preview Results group,
Click

- To review the other email messages, in the Preview Results group,
Click

Changing Outlook to offline mode
When sending merged emails it may be advisable to take Microsoft Outlook into offline mode, review the emails, then return to online mode to send them. This will give an extra level of protection from accidentally sending emails with typos or misinformation or sending emails to the wrong people.
- Open Microsoft Outlook.
- To move to the Send/Receive tab, on the ribbon,
Click the Send/Receive tab
- To change to offline mode, in the Preferences group,
Click

In Outlook the status bar now indicates that we're working offline.
![]()
When working in offline mode, all the editing takes place on your local installation of Outlook. No messages will be sent or received until we return to online mode.
Let's return to Word and complete the mail merge.
Completing the mail merge in offline mode
Now that we are working in offline mode, we can return to Word and complete the mail merge.
- Return to Word.
- To open the Merge to E-mail dialog box, in the Finish group,
Click
 , Click Send Email Messages...
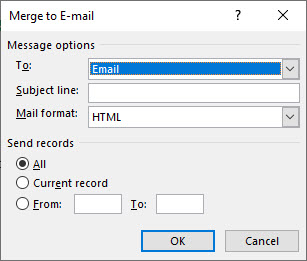
The Merge to E-mail dialog box opens:

This dialog box allows us to choose which field to use to send the email. In our case, we want to use the Email field. We can also add a subject line and choose the mail format. An option to choose which records to send is on the bottom half of the dialog box. We want to add a subject line and then accept the defaults.
- To add a subject line, in the Subject line field, type:
Thank you for your proposal
- To accept the defaults and subject line, in the Merge to E-mail dialog box,
Click

You may see some flashing on your screen, but for the most part, there is no visible change to the Word document.
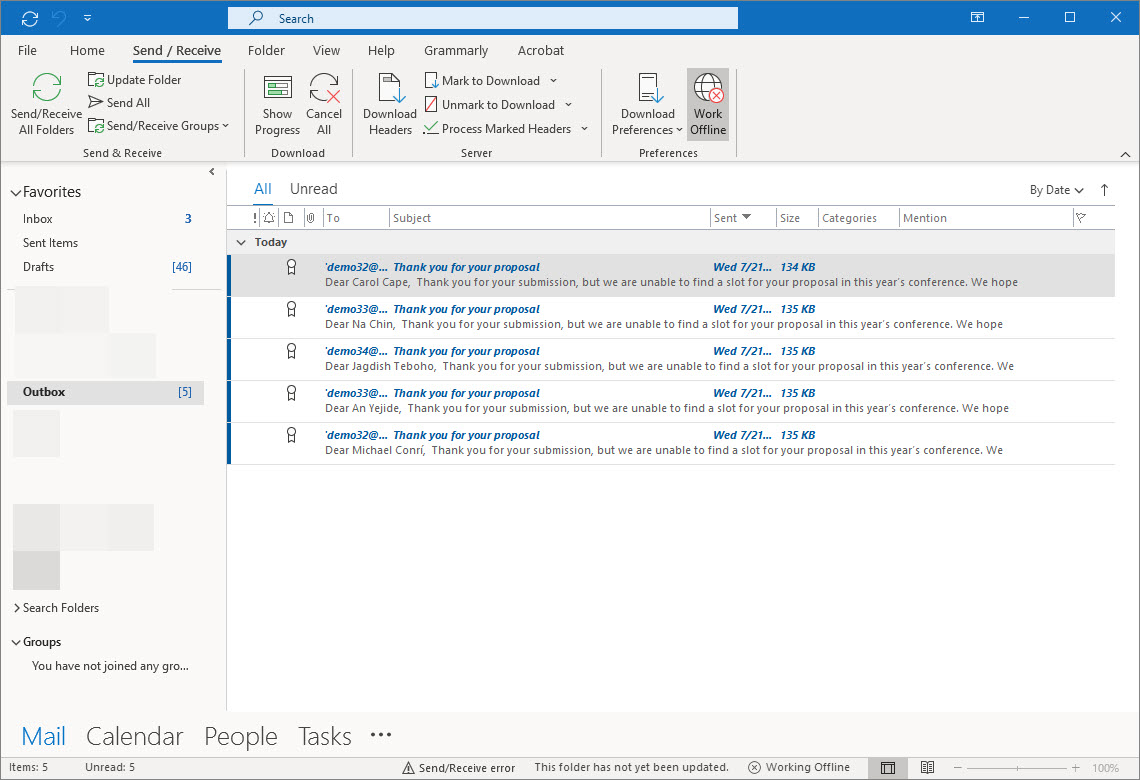
Because Outlook is currently in offline mode, the messages have not been sent. They are waiting in the Outbox. We can open and make changes to the message before returning to online mode and sending them.
- Return to Outlook.
- To view the messages in the Outbox, in the folder list,
Click Outbox
There are five email messages in the Outbox:

NOTE: For demonstration purposes, many of the recipients share email addresses.
At this point, we could edit individual email messages or even delete messages we don't want to send. Let's make a quick addition to one of the messages.
- To open the first email in the Outbox,
Double-click the first email
- To position the cursor,
Click at the end of the word "Committee," press: Enter key
- To add the postscript, type:
P.S. It was nice to see you at the regional conference.
- To close the email message,
Click

- To accept the changes, in the Microsoft Outlook dialog box,
Click

Now that all of the edits have been made and saved, we can return to online mode. When the Work Offline button is toggled off, the messages will quickly be sent.
- To return to online mode, in the Preferences group,
Click

After a moment or two, four of the messages have been sent. The Outbox contains only the message we revised. This message will need to be sent manually.
- To open the message, in the Outbox,
Double-Click the message
The message will open in a new window.
- To send the message,
Click

Let's check the Sent Items folder to see that the messages were sent.
- To examine the Sent Items folder, in the folder list,
Click Sent Items
The five emails are in the Sent Items folder and our mail merge is complete.
Let's close the mail merge document.
- To close the Unaccepted-MM document,
Click

- To save the document, if necessary,
Click


