If you have ever kept a paper calendar or daily planner, you have probably recorded information about upcoming milestones that you want to remember. You may have written in assignments, doctor and dental appointments, meetings, and such. Outlook's calendar allows us to do all of this and more.
With Outlook, there are basically 3 different types of entries that will appear on your calendar:
- Appointments - calendar entries which do not invite another participant(s) and are entered during a specific time block; for example, a dentist appointment, lunch with a friend, time set aside to work on an important project, etc.
- Meetings - calendar entries that occur after a meeting invitation has been sent or received. Meetings usually involve more than one person.
- Events - day long milestones, such as birthdays, anniversaries, conferences, etc.
During the course of these materials, we will explore each type of calendar entry.
Making a New Appointment
First, we will launch Outlook and then we will make a new appointment.
Step1. Launch Outlook.
Outlook opens and we see the default Inbox view:
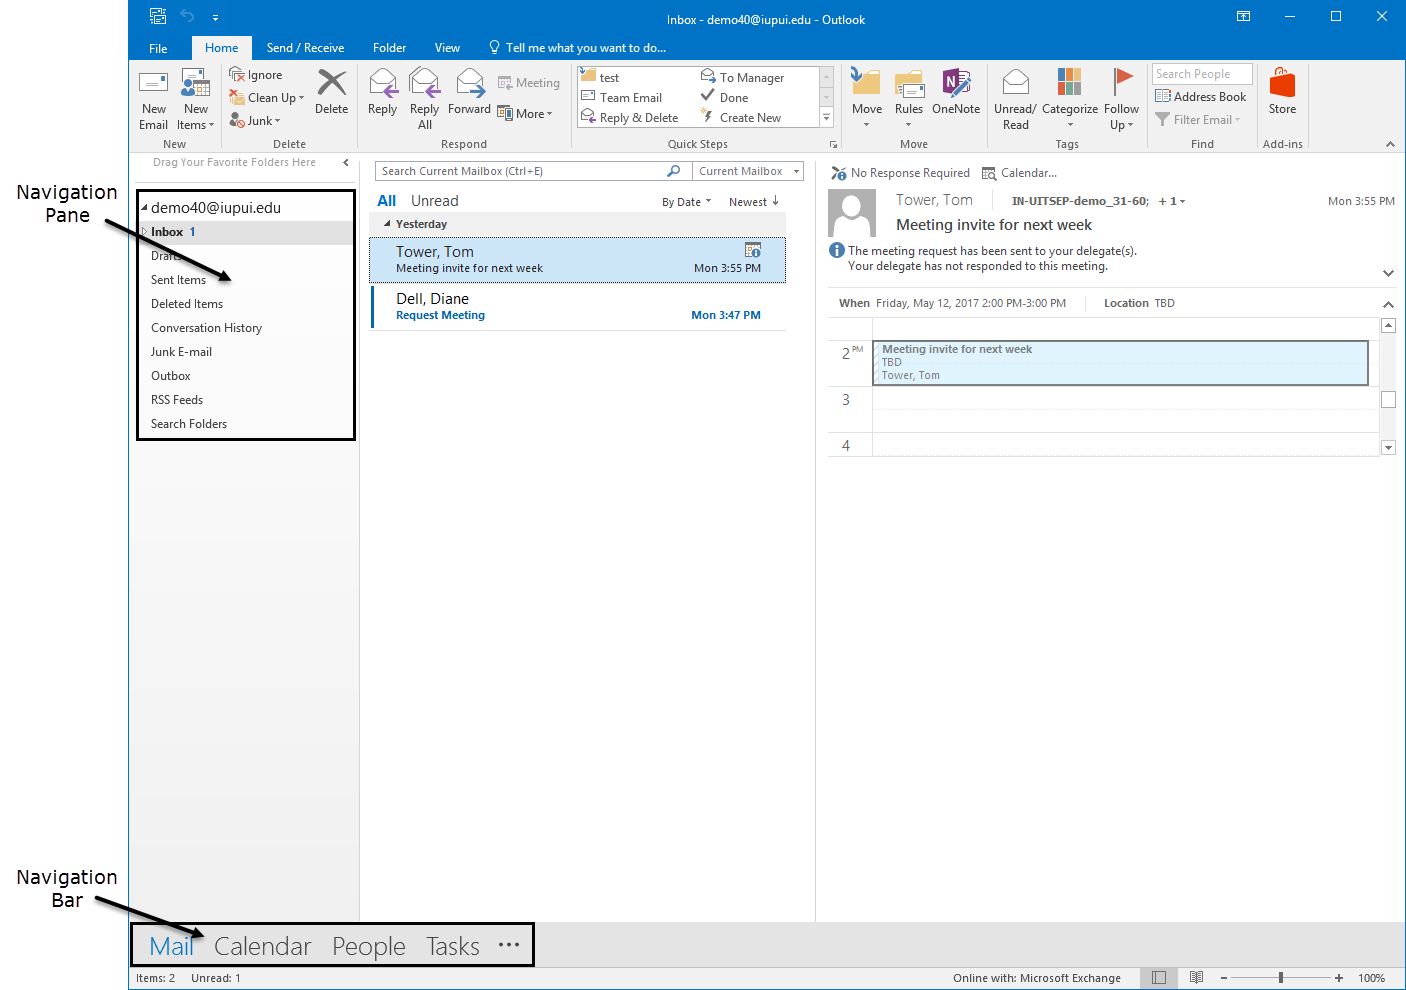
On the left side is the Navigation pane, which contains a list of folders. The Navigation bar appears at the bottom and provides access to the various Outlook application folders, or application views. Each application folder focuses on a specific set of related options and lists, with their related navigation panes and standard toolbars. By default, Outlook opens with the Mail view activated.
Let's make a new appointment from the Inbox. We will use the New Appointment command.
Step2. To generate a New Appointment form, in the New group, on the Ribbon,
Click , Click Appointment
An Untitled - Appointment form opens:
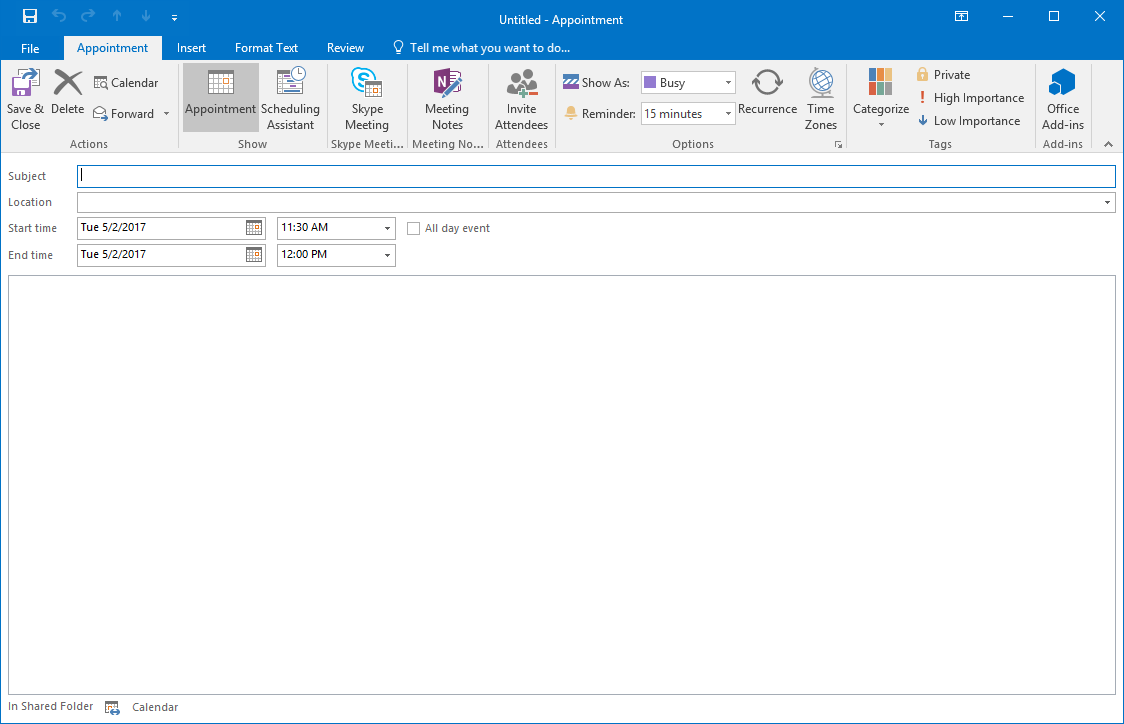
By default, the Start time and End time fields are populated with today's date, and the time field defaults to the next full half-hour slot.
Step3. To assign a subject, in the Subject field, type:
Gallery Tour Tab key
Step4. To designate a place, in the Location field, type:
Art Gallery Tab keyTab key
Step5. To assign a time, in the Start time hour field, type:
a time that is 10 minutes from now
Step6. To save the appointment, in the Actions group,
Click
The appointment closes, and we immediately see the reminder for it:
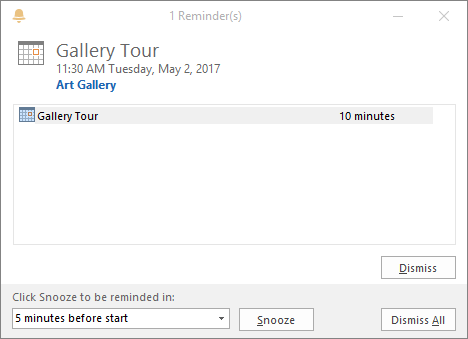
We see this reminder because the default reminder time is set to 15 minutes. This means that we will get a reminder 15 minutes before any appointment or meeting that is listed on our calendar, and if we log in less than 15 minutes before the appointment, it will appear then.
NOTE: If the reminder doesn't appear at this point, it will do so in the next few minutes.
Using Reminders
Every few minutes, Outlook monitors four specific folders for reminders: Calendar, Inbox, People, and Tasks. All of these reminders work in exactly the same way. The default 15 minute reminder can be changed or reminders can be turned off. Later in the materials, we will view a video that shows us how to do this.
For each reminder we receive, we can highlight the item and choose from the following options:
- Dismiss - The reminder does not appear again.
- Dismiss All - Dismisses all visible reminders; none will appear again.
- Snooze - The same reminder will appear again in the time that is specified in the Snooze Time field. This works just like the snooze feature on an alarm clock.
Since the appointment time is near, we will dismiss the reminder.
Step1. To dismiss the reminder,
Click
Now, the reminder will not reappear.
At this point, we would like to view our calendar and schedule some more appointments.
Working with the Calendar's 1-Day View
Let's use a different method to add a new appointment to our calendar. We will add the appointment directly in the desired time slot.
Step1. To view the Outlook calendar, from the Navigation Bar,
Click
The calendar appears:
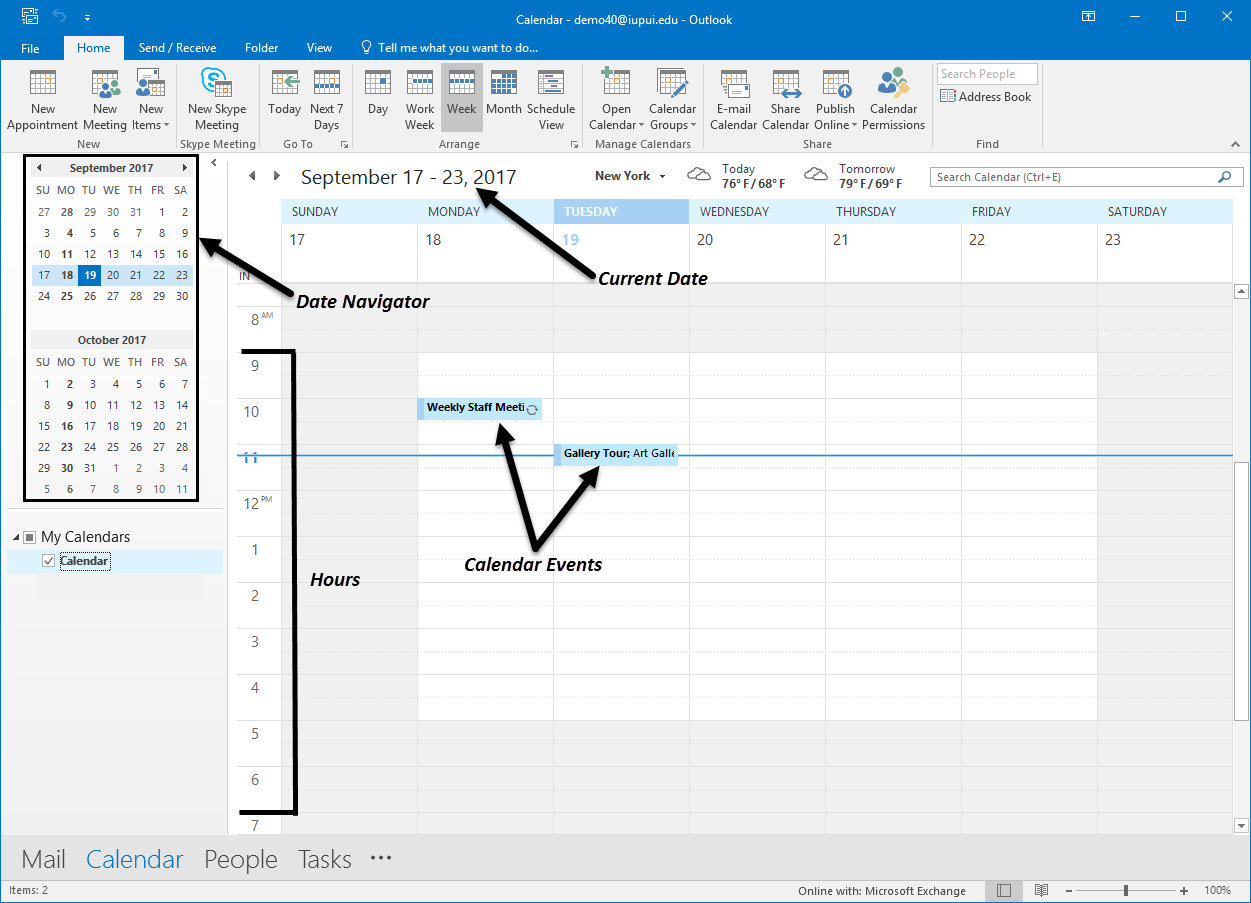
The main window displays the current date at the top, with each of the hours of the day listed down the left side of the Central Viewing area. By default, the time is laid out in half-hour increments.
In the top, left corner of the screen is a tiny thumbnail calendar called the Date Navigator.
When we open the Outlook calendar for the first time, it can appear in a variety of different views. We will use the 1-day view to make our appointment.
Step2. To see the 1-Day view, in the Arrange group, if necessary,
Click
The calendar changes slightly. We now see today's date at the top. Any appointments or meetings that are taking place today appear in the calendar.
In Outlook, one way to add appointments is to type them directly into the calendar. When we use this method, first we must select the appropriate date and then we must specify a time slot for the appointment. We can use the Date Navigator to quickly move to a desired date.
Step3. To view the 1-day timeline for tomorrow, in the Date Navigator,
Clickthe next weekday's date
The date displayed at the top of the 1-day window is that of the next weekday.
Step4. To start adding the appointment, in the Central Viewing area,
Press & Drag from 12:00 pm to 1:00 pm
The daily timeline from 12:00 to 1:00 should be highlighted:
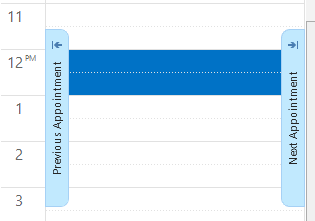
While we do not see a blinking cursor, as soon as a time slot is highlighted, we can begin typing in a subject for our appointment.
Step5. To assign a subject, type:
Lunch with Abby Enter
Now the appointment has been added to our calendar.
Making an Appointment from a Message
In Outlook, it is easy to create an appointment from an email message in a simple press-and-drag action.
Moving an Appointment
Outlook makes it easy to move appointments. It isn't necessary to delete and then go through the process of setting up the appointment a second time. Instead, we can simply press and drag appointments to where they need to be on the calendar.
Using the Show Time as Field
In Outlook we can designate time as Free, Busy, Tentative, or Out of Office. There is a slim vertical bar on the far left side of any scheduled time slot. This bar displays a fill color to designate the appropriate status.
Description of the video:
In Outlook it is easy to create an appointment from an email message in a single press and drag action.
In fact we can change any type of Outlook item into another type of item by dragging it to the appropriate button on the navigation pane.
Let's see how to make an appointment from a message.
First if necessary return to the Inbox, in the navigation bar click the Mail button.
The Inbox appears with a list of our messages we see one with a line that reads "Request meeting".
Let's say that we already know what this message says, we ran into the marketing director in the hallway and she told us that she sent a message asking if we could meet tomorrow.
We want to put this on our calendar so we will convert this message into an appointment now.
To open the message in a new appointment form, press and drag the "Request meeting" message to Calendar.
The appointment form opens.
To change the subject of this appointment, in the Subject field press and drag "Request meeting" and type "Lunch with the marketing director".
To make the new appointment for tomorrow, in the Start Time date field, press and drag the text that is there and type Tomorrow.
To move to the next field press the Tab key.
Tomorrow's date appears in the Start Time and End Time fields, of course this will be different depending on when you're watching this video.
To make this appointment for lunch time at Noon, in the Start Time hour field, type Noon and press the Tab key.
To save the appointment, in the Actions group, click the Save And Close button.
The appointment is added to the calendar and by default has been scheduled for half an hour from Noon to 12:30 PM.
It is easy to move appointments in Outlook.
It is not necessary to delete and then go through the process of setting up the appointment a second time.
Instead we can simply press and drag the appointment to where it needs to be on our calendar.
It may be necessary to return to the Calendar to do this, if so click the Calendar button on the navigation bar.
To view the upcoming week day schedule, in the date navigator, click the next week day's date.
The calendar view moves to the upcoming week day.
We can see the appointment we just made with the marketing director, now let's move that appointment to another date.
Press and drag the "Lunch with the marketing director" appointment box to the next week on the date navigator.
The calendar view switches to the new date and we see the appointment in the appropriate time slot.
In Outlook we could designate time as free, busy, tentative, or out of the office.
The slim vertical bar on the far left side of the scheduled time slot displays a fill color to go along with the appropriate status.
On our calendar is the meeting labeled "Lunch with Abby".
Currently this vertical bar is filled with a light blue color for our meeting, this indicates that we are busy during this time.
Let's mark this as tentative until we can confirm with Abby that she is available for lunch.
To open the lunch appointment double click the "Lunch with Abby" time slot.
To change the status from busy to tentative, in the Options group, click the down arrow next to Busy and then click Tentative.
To save the appointment in the Actions group click Save and Close.
The appointment now appears in the Calendar view with a blue and white vertical striped bar on the left indicating that it is tentative.

 , Click Appointment


