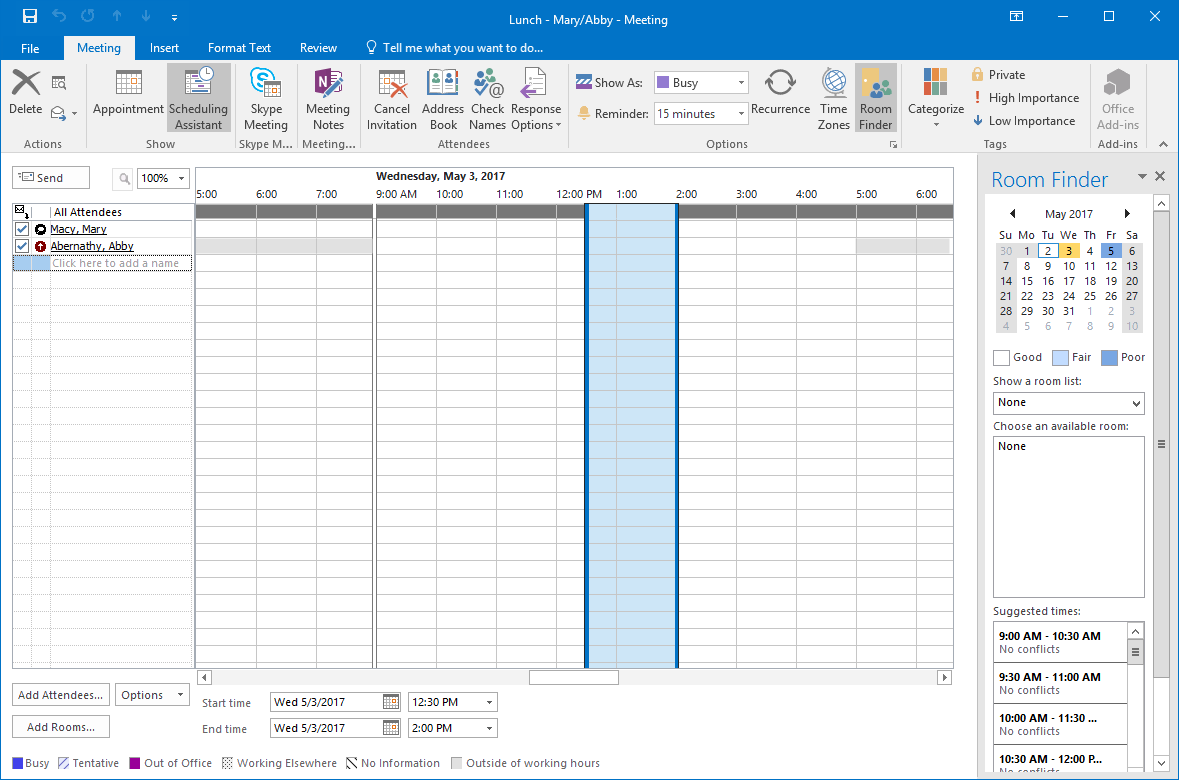
At the beginning of this workshop, we created a lunch appointment with our colleague, Abby. In the preceding video, we saw how to mark that meeting as tentative until we could confirm with Abby that she was available.
To confirm, we could send her an email and then wait for her reply, but that is not an efficient way to schedule meetings. Instead, we will use the Scheduling Assistant in Outlook.This feature allows users to make sure that others are available during a specific time slot, so that when meeting invitations are sent, there is a very good chance that the people invited will be available during that time.
First, let's find the appointment for the lunch date with Abby.
Changing Calendar Views
We may have strayed away from our current time frame. Let's move back to today's date, so that it will be easier to find the lunch date that we need to reschedule.
Step1. To move to the Home tab, on the Ribbon, if necessary,
Click the Home tab
Step2. To move to today's date on the calendar, in the Go To group,
Click
Step3. To move to the tentative date with the manager, in the Date Navigator,
Clickthe date for the next weekday
Step4. To view the Outlook calendar in Week view, in the Arrange group,
Click
Step5. To open the appointment,
Double-Click the appointment labeled, "Lunch with Abby"
Viewing Free and Busy Times
When we set this up as an appointment earlier, we did not invite Abby to meet with us. Let's do that now.
Step1. To invite Abby, in the Attendees group,
Click
Step2. To enter the username, in the "To..." field, type:
demo31 Tab key
Step3. To add more information to the subject line,
Press & Drag "Lunch with Abby,"
type: Lunch-Mary/Abby
Step4. To add some body text, in the body section, type:
Abby,
Would you like to meet for lunch tomorrow?
Regards,
Mary
Step5. To view our colleague's Free/Busy times, in the Show group,
Click

Step6. To designate the meeting as Busy, in the Options group, if necessary,
Click , Click Busy
Step7. To move back to the Appointment form, on the Ribbon,
Click
Step8. To add a new location for our meeting, in the Location field, type:
Campus Center
Step9. To invite our colleague, to the left of the attendee names,
Click
Viewing Non-Consecutive Days
In the last exercise, when scheduling the appointment with Abby, we looked at the Outlook calendar using the "Week" view. There is also a "Work Week" view, which displays only Monday through Friday. But what if someone does not work a traditional work week? Let's say that she works Mondays, Wednesdays, Fridays, Saturdays, and Sundays on most weeks. If this is the case, she may want to pull up just these days on her calendar.
Outlook allows us to view up to 15 non-consecutive calendar days in a single window.
Step1. To return to the Home command tab, on the Ribbon,
Click the Home tab
Step2. To return to 1-day view, in the Arrange group,
Click
Step3. To view today's date, in the Date Navigator,
Click Today's date
Step4. To view several non-consecutive days, press:
Control key and Click a nearby day in the Date Navigator
Step5. To view more days, repeat step 3, above.
NOTE: To deselect a date, Control key and Click the date in the Date Navigator.
Step6. To return to the current day, in the Arrange group,
Click

