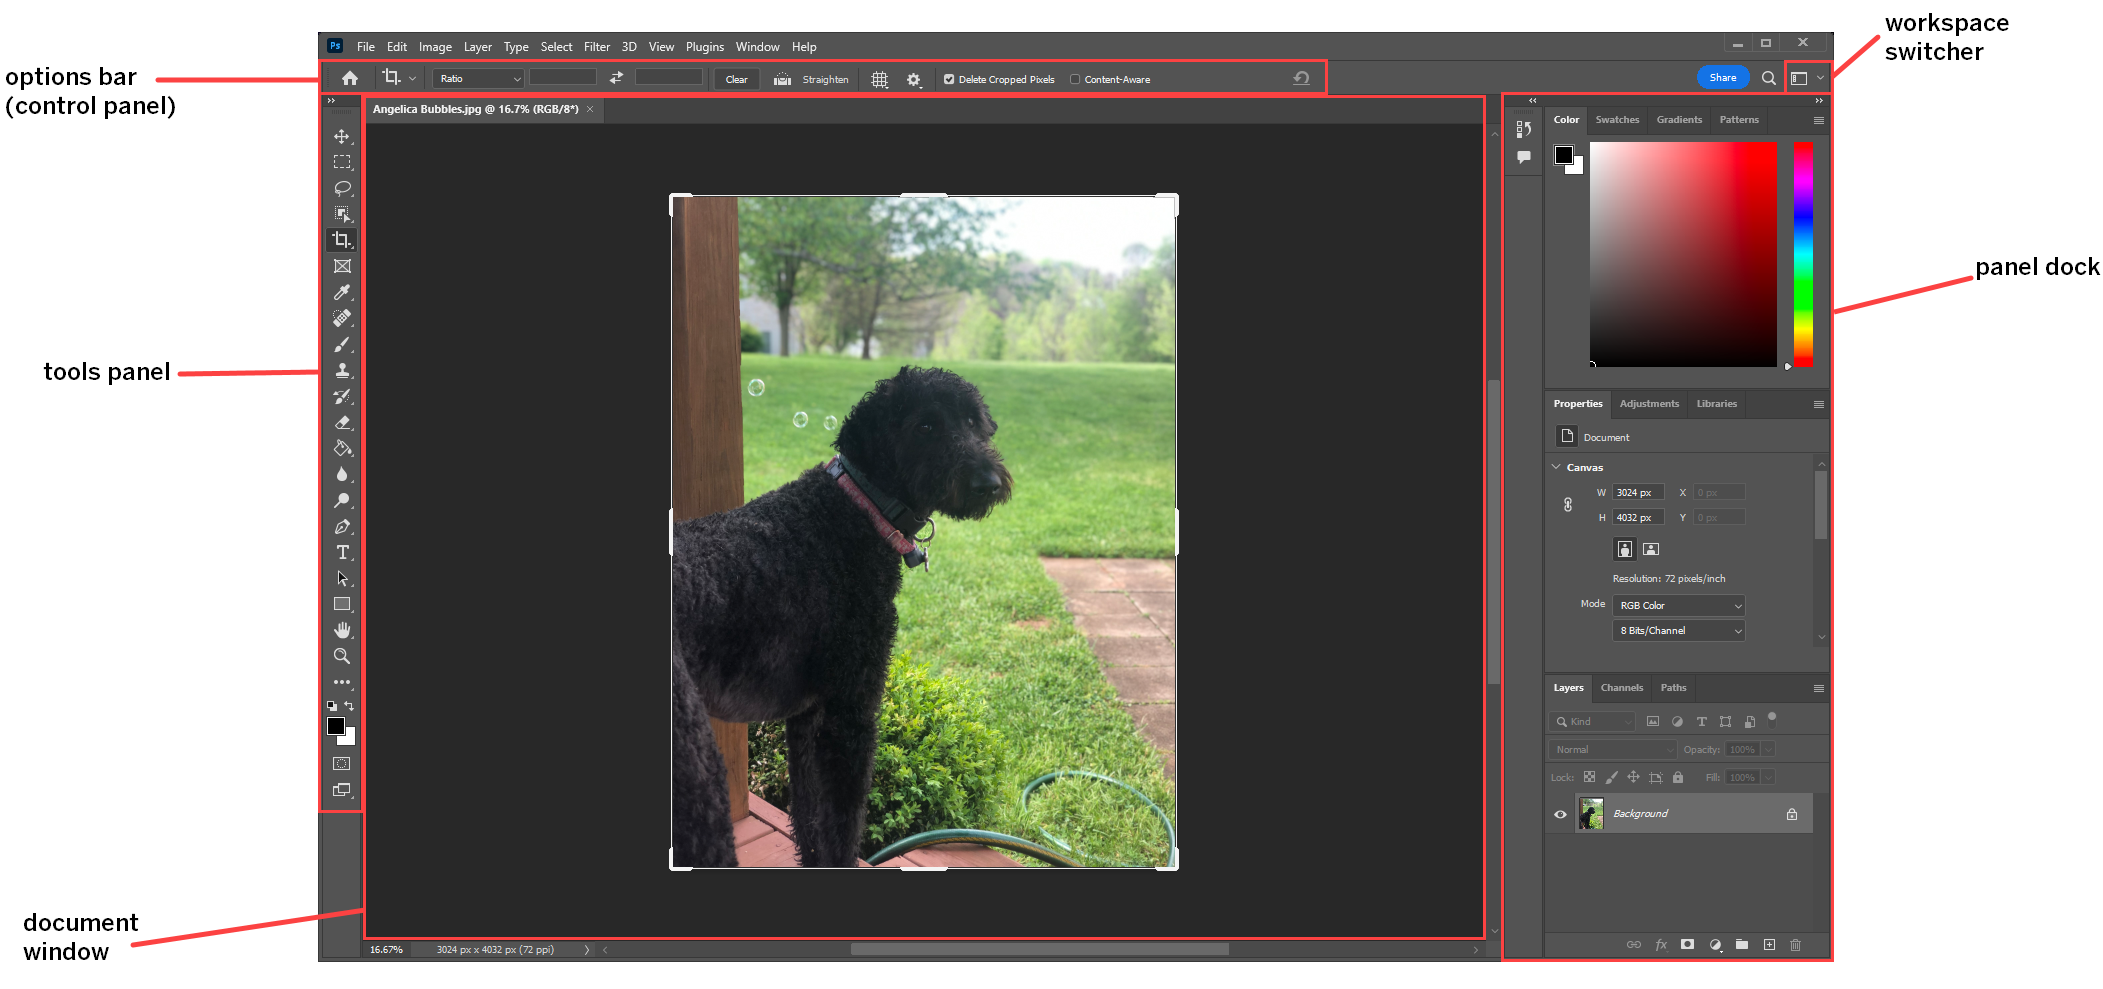
The Tools panel is located on the left side of the Photoshop window, and contains all the tools necessary to create and edit graphics in Photoshop.
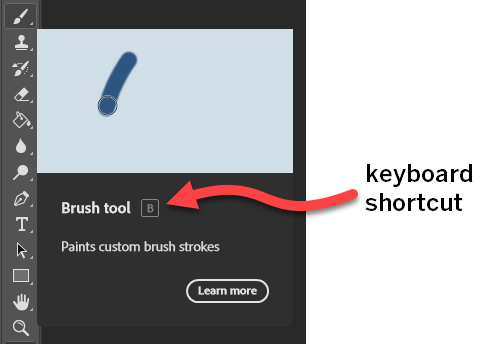
There are two ways to activate a tool in the Tools panel – you can either click on the tool's icon or use the tool's keyboard shortcut. To find out the keyboard shortcut for a specific tool, hover over the tool and a tooltip will appear with the keyboard shortcut displayed after the tool's name, as shown in the following screenshot:

NOTE: To turn off Rich Tooltips, like the one shown in the previous image, in the Menu bar, Click Edit, Point Preferences, Click Tools, then uncheck the box next to Show Rich Tooltips.
The Options bar (sometimes referred to as the control panel) is located at the top of the Photoshop window, underneath the Menu bar. The Options bar is context-sensitive, meaning that the contents of the Options bar will change based on the selected tool. For example, the following image shows the available options for the Brush tool:

When the Rectangular Marquee tool is active, a different set of options is visible in the Options bar, as shown in the next image.

The panel dock is located on the right side of the Photoshop window, and contains the majority of the panels needed for working with an image. Each individual panel will provide tools, functions, or other options for editing an image. The panels are collected into groups – to switch between panels, click on the desired panel's tab to display it.
There are more panels available than what's showing in the Panel dock. All of the available panels are located in the Window menu, and clicking on a panel's name in the Window menu will open the panel in the Photoshop workspace.
Photoshop has a collection of workspaces available that collect panels and other interface elements that focus on specific types of tasks, such as editing photos or creating graphics for the web. These workspaces are available through the workspace switcher located in the top right corner of the Photoshop window, and can also be accessed through the Window menu.
The document window is located in the middle of the Photoshop window, and displays the file that you are working on. Multiple files can be open at the same time – you can switch between the open files by clicking on the document tabs at the top of the document window.
Each document's tab displays some information about the open file, including the file's name, zoom level, and even the specific layer selected, as shown in the following image:

The document tab shown here shows that we have the file beach.psd open, and we're viewing the image at 100%. Additionally, we see that the active layer is girl on rock, and the color mode of the image is RGB. (For more information on color modes in Photoshop, visit the Adobe Help page Understanding Photoshop color modes.)
The bottom of the document window gives us additional information about the file we're working with:

The previous image shows more information about the file beach.psd. Specifically, it shows that the zoom level is 100%, and the dimensions of the image are 2204 pixels by 1273 pixels, and the resolution of the image is 72 pixels per inch. (We'll learn more about image resolution later on in the course, but if you're curious to learn more now, visit the Adobe Help page Photoshop image size and resolution.)


