Understanding adjustments
The Adjustments panel contains many common adjustments that we may want to apply to an image. For example, we can make the colors in an image more vibrant, change the brightness and contrast of an image, and even make an image black and white. While some of the adjustments found in the Adjustment panel can be made in other ways, using the appropriate adjustment in the Adjustment panel has a number of benefits. To understand those benefits, we'll need to understand the concepts of destructive and non-destructive editing.
Destructive and non-destructive editing
To gain a better idea of what destructive and non-destructive edits are, let's think about a common image editing task: adjusting an image's brightness and contrast. There are two ways we could do this:
- by using the Brightness/Contrast dialog box accessible through Image > Adjustments in the Menu bar
- by using the Brightness/Contrast adjustment in the Adjustments panel
Which method is the best one to use, however — the one in the Image menu or the one in the Adjustments panel? Both methods achieve the same results; changing the brightness and contrast of an image. However, what if you want to be able to edit the brightness of the image later on, or revert the image to its original state?
If you used the Brightness/Contrast dialog box, those changes can't be undone once the image has been saved. This is an example of destructive editing, as it makes changes to the original image that can't be reverted later on if desired.
However, if you used the Adjustments panel to make changes to the image, those changes are editable later on because of how those adjustments are stored. Since these can be edited or removed and don't affect the original image, they're an example of non-destructive editing. Whenever possible, it's preferable to make non-destructive edits to an image so they can be easily reverted later on.
What makes an adjustment applied from the Adjustments panel a non-destructive edit? It's all in how Photoshop applies the adjustment — when making an adjustment using the Adjustment panel, that adjustment is stored in a layer. With the adjustment stored in a layer, we're able to control which underlying layers are affected by the adjustment, and also able to go back and edit the adjustment itself if desired. We'll explore layers in more depth in a moment - for now, let's go ahead and add an adjustment to the image.
NOTE: For more information on non-destructive editing techniques, view the Nondestructive editing article on the Adobe Help site.
Adjusting the lighting of the image with a Levels adjustment
At this point, we're ready to start lightening the image. We'll be doing this using the Levels adjustment.
When we select an adjustment, Photoshop will open the Properties panel for that specific adjustment. Let's start the process of adding a Levels adjustment, and view its properties in the Properties panel.
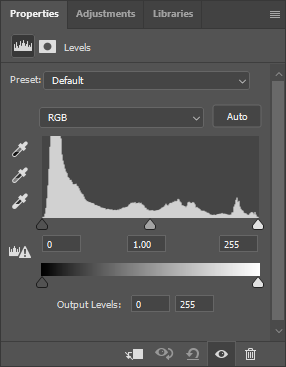
The Properties panel will open, and display the properties for the Levels adjustment:

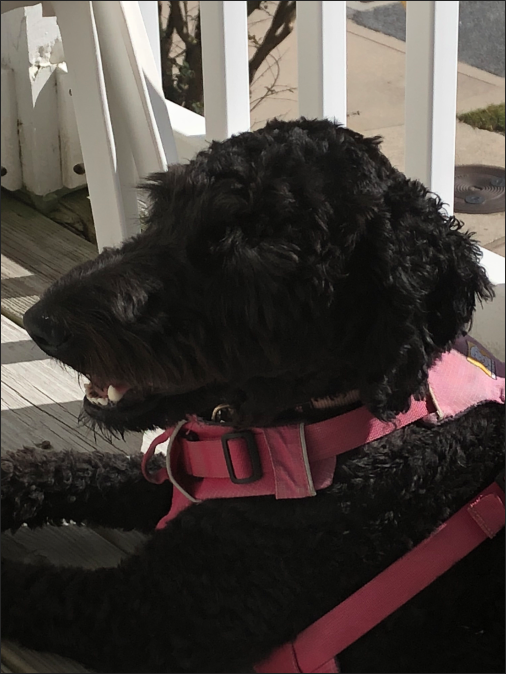
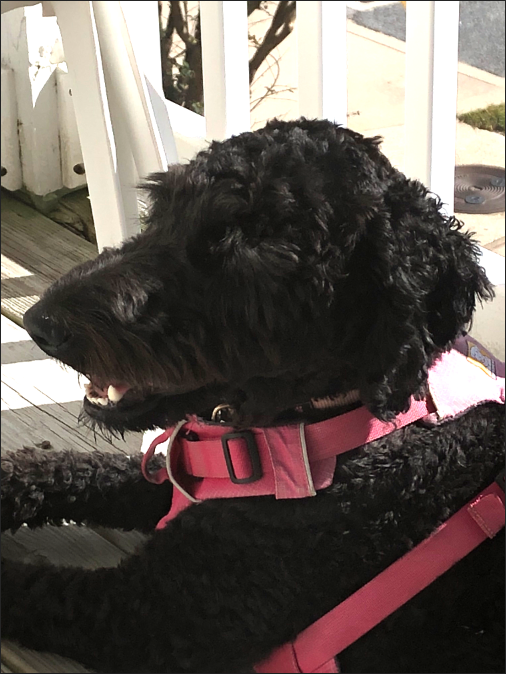
The top part of the panel displays a histogram (which looks like mountains) representing the tonal range of the image. Underneath that, there are controls that will help us adjust the overall lightness or darkness in the image. The histogram is a chart that shows the relative amount of pixels that are of varying brightness, with the amount of darker pixels displayed on the left and lighter pixels on the right. The histogram for Happy Angelica.jpg shows higher “mountains” on the left side and smaller ones on the right, which tells us mathematically what we can already see by looking at the image — the photo is a little too dark.
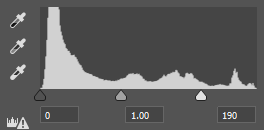
Let’s adjust the lighting of the image to make the details of the dog more visible.
The photograph should now look similar to the following image:

We can see the details in Angelica's fur a little better, but now the background is too bright. We'll explore how to fix that in the next section.


