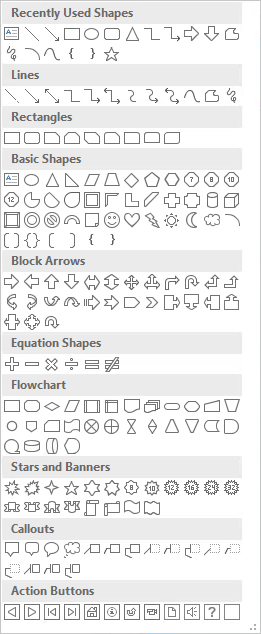
PowerPoint contains a Shapes gallery which includes lines, basic shapes, arrows, equation shapes, stars and banners, and more. Shapes can be formatted like other graphic elements. They can call attention to important parts of our slide, add visual interest, and even hold text.
Inserting a Shape
Let's add a shape to slide 6.
Step 1. To move to slide 6, in the slide thumbnail list,
Click slide 6
Step 2. To move to the Insert tab, on the Ribbon,
Click the Insert tab
Step 3. To begin to add a shape, in the Illustrations group,
Click ![]()

NOTE: You may have to scroll down the gallery to see all of the options, depending on the screen height and resolution settings.
Step 4. To select a shape to add to slide 6,
Click the second icon in the Callouts section (Rounded Rectangular Callout)
Step 5. To draw the shape on the slide,
Press & Drag across and down on the slide
Step 6. To resize the shape,
Press & Drag the sizing handles
Step 7. To begin to reposition the shape on the slide,
Point to the frame around the shape
Step 8. To reposition the shape,
Press & Drag the shape to the right of the text
Step 9. Verify that the shape is still selected.
NOTE for MacOS Users: The tab is labeled Shape Format.
Step 10. To change the fill color of the shape, in the Shape Styles group on the Format tab,
Click ![]() , Click any color
, Click any color
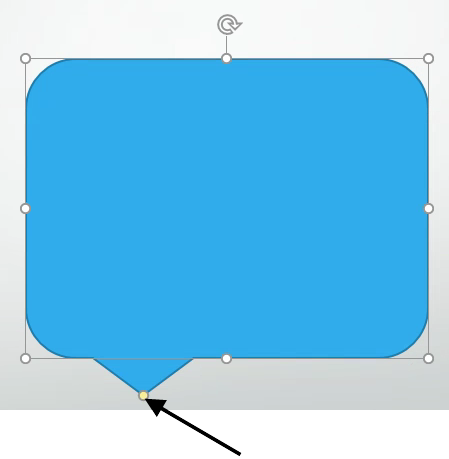
Step 11. To adjust the callout so the tail points to the third bullet,
Press & Drag 
until it points to the third bullet
Step 12. To add text, type:
Use a callout to let viewers know that something is important.
Adding Alternative Text to a Shape
Like other graphic elements, shapes added to PowerPoint should be given alternative text that can be read by a screen reader. Earlier we added an Alt Text button to the Quick Access Toolbar. Let's use it now.
Step 1. To select the shape, if necessary,
Click the shape
NOTE for MacOS Users: We were not able to add the button to the Quick Access Toolbar. To open the correct pane, Control key+Click the shape, Click Format Shape..., Click ![]() .
.
Step 2. To see the Alt Text options, on the Quick Access Toolbar
Click ![]()
Step 3. To display the Alt Text fields, if necessary,
Click ![]()
Step 4. To add a description, in the Description box, type:
Speech bubble with the text, "Use a callout to let viewers know that something is important."
NOTE: It is important to note that screen readers may not recognize a shape or the alternative text associated with the shape. When using these graphics, take care that you don't place essential information in the shape as it may be missed by screen readers. If a shape must be used, consider using text boxes to hold the text. Text boxes should have no trouble being read by screen readers.
Step 5. To close the Format Picture pane,
Click 
Step 6. Save the presentation Creating_a_Presentation.pptx.

