PowerPoint provides several different ways to edit, deliver, and print a presentation. These views are listed under the View tab on the Ribbon:

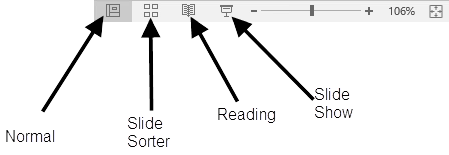
There are also shortcut buttons available for some of these views on the far right side of the status bar at the bottom of the screen:

NOTE for MacOS Users: The Reading view does not exist in PowerPoint 2016 for Mac.
The following table lists all of the available views and provides information about each:
| View | Function |
|---|---|
| Normal | Main editing view. Includes three working areas: Slide pane, Slide Thumbnail list, and the Notes pane. |
| Outline | Displays the text of the presentation without graphics, tables, or templates and makes it easy to focus on content and make changes to text. |
| Slide Sorter | Displays thumbnails of each slide and makes it easy to rearrange, add, or delete slides, or to apply and preview transition and animation effects. |
| Reading View (not available in PowerPoint 2016 for Mac) | Displays the presentation in the open window with small navigation buttons at the bottom. Most useful when one person is viewing a slide show on a computer monitor. |
| Slide Show | Slides take up the full computer screen and no navigation buttons are displayed. Most useful for sharing a presentation with a group on a large screen. |
| Master Views: Slide, Handout, and Notes | These views can only be selected from the View tab on the Ribbon. Every presentation has Master slides working in the background. These Master slides store information about the presentation, and make it possible to make universal changes very quickly. |
Working in Outline View
The Outline view displays the text of a presentation in the slide thumbnail list without graphics, tables, or design templates. This allows us to focus on the content. Working in Outline view can also help us create a more accessible presentation. Within this view we can see the structure of the presentation, including subtitles and lists. This structure is usually how a screen reader will read through the presentation.
Let's take a moment to look at Outline view.
Step 1. To move to the View tab, on the Ribbon,
Click the View tab
Step 2. To switch to Outline view, in the Presentation Views group,
Click ![]()
Step 3. To move back to Normal view, in the Presentation Views group,
Click ![]()
Working in Slide Sorter View
In Slide Sorter view, we can see all slides in our presentation in thumbnail form. This makes it very easy to delete and reorder the slides. In addition, we can preview transition and animation effects.
We will view the entire presentation in Slide Sorter view now.
Step 1. To view all the slides in the presentation at one time, in the Presentation Views group,
Click ![]()
Deleting a Slide
Since our class periods are only 40 minutes long, we must condense our presentation as much as possible. Therefore, we will delete slide 9.
Step 1. To select the slide to delete,
Click slide 9
Step 2. To delete the slide, press:
Delete key
NOTE: Slides may also be deleted from the slide thumbnail list when you are in Normal view. Just select the slide(s) and then press Delete key.
Reordering Slides
Next we will reorder slides in Slide Sorter view by moving the "Working with Tabs" slide to the end of the presentation.
Step 1. To position the cursor,
Point to the slide 8 thumbnail
Step 2. To move the slide,
Press & Drag the thumbnail to the end of the slide list
NOTE: You can also reorder slides in the slide thumbnail list by dragging the slide icon(s) to a new location.
Step 3. To return to Normal view,
Double-Click slide 2

