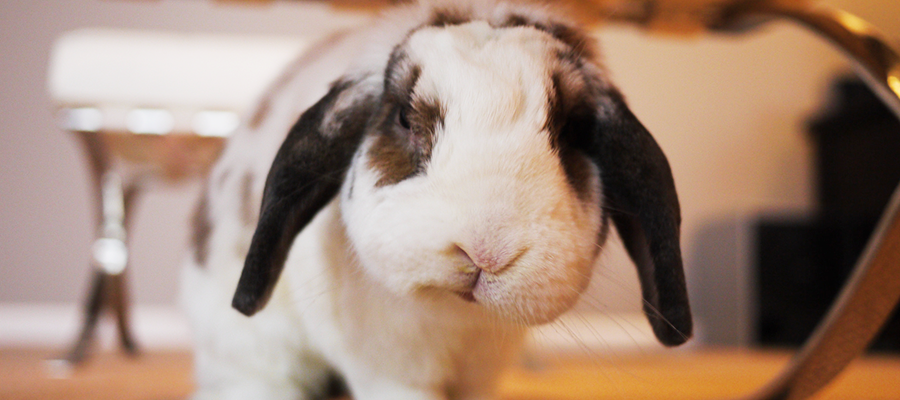
One way to create web graphics with Photoshop is to work with existing graphics. We'll be doing that for our first graphic - the header image for Hannah's website. She wants us to crop the image so it will fit into her website a little better, and also brighten the image and make the colors more vibrant. We'll start with cropping the image first.
Working with the Crop Tool
When we want to select a specific area of an image that we'd like to keep, we can use the Crop tool to select the area we want. We'll be cropping our image to a 9 by 4 ratio, so we can easily resize it to 900 by 400 pixels. This is a good size for a header graphic that won't be too overwhelming to visitors when they first come to a website.
Let's start the process of cropping the rabbit image.
Step1. To begin the cropping process, in the Tools panel,
Click
Step2. To change the type of crop to perform, in the Control panel, if necessary,
Click , Click Ratio

Step3. To change the size of the cropping area, in the Cropping Width field in the Control panel, type:
9 Tab key 4
Step4. To move the image around, in the image window,
Press & Drag the image within the frame
Step5. To complete the crop, in the Control panel,
Click
Understanding Size and Resolution for Web Graphics
Image size and resolution are two important things we need to think about when creating web graphics in Photoshop. Creating graphics that will be used on the web need to be approached differently than graphics that will be used in a print publication.
Image Size for the Web
When creating web graphics, we need to ensure they're the correct size before placing them in the site. While it is possible to scale graphics included in a web page by using HTML and CSS, this isn't typically done for a number of reasons. Large images that are scaled down will take longer to load on a website, and images that are scaled up in size may look distorted. When creating images for the web, want to make sure our images are the proper size for our site before incorporating them into the site itself.
As we think about editing the rabbit image, we'll want to be aware of the different types of devices that might be used to view our site, and size our graphics accordingly. While mobile devices have screens of varying sizes and resolutions, the minimum display resolution for desktop monitors is 1024x768 pixels - so it's a good practice to make sure your images aren't larger than 1000 pixels wide to prevent horizontal scrolling on a desktop.
Resolution for Web Graphics
Digital images are made up of tiny dots that hold color information. When these dots are blended together, they form a picture. Resolution refers to the number of pixels per square inch of screen, or ppi, of the image file. This is also referred to as dots per inch, or dpi, when working with print images. Images created for screen use don't necessarily need to be at as high a resolution as images created for print - when making web graphics, we'll want to aim for a resolution of 72 to 96 pixels per inch.
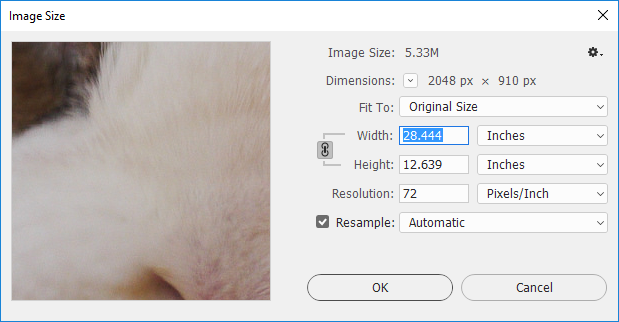
When we're working with images that are scanned into a computer or taken with a digital camera, it's a good idea to check the image's resolution and size before we save it for the web. Let's do that now.
Step1. To open the Image Size dialog box, in the Menu bar,
Click Image, Click Image Size...

Step2. To constrain proportions, if necessary,
Click
Step3. To change the width measurement to pixels, if necessary, in the Width dropdown,
Click , Click Pixels
Step4. To change the width of the image, in the Width field of the Image Size dialog box, type:
900
Step5. Verify the value in the Resolution field is 72 ppi.
Step6. To accept the changes we've made,
Click
Step7. To save the file as a Photoshop document, in the Menu bar,
Click File, Click Save As...
Step8. To indicate the file type, if necessary, in the file type field,
Click , Click Photoshop (*.PSD, *.PDD)
Step9. To give the file a name, in the File Name field,
Press & Drag value, type: banner Enter
Step10. To accept the default save options, if necessary, in the Photoshop Format Options dialog box,
Click
Working With the Adjustments Panel
Now that we have our image cropped, we can work on making it look its best. One thing that could be done to make the image look better would be to increase the brightness. We can do this with the Adjustments panel. First, let's make it so our image takes up the entire Photoshop window. We can do this with a tool shortcut.
Step1. To make our image take up the full Photoshop window, in the Tools panel,
Double-Click
Step2. To switch to the Adjustments panel, if necessary, in the panel dock,
Click
Step3. To open the Brightness/Contrast properties panel, in the Adjustments panel,
Click
Step4. To change the brightness of the image, in the Brightness field,
Press & Drag the current value, type: 50 Enter
Step6. To open the Vibrance properies panel, in the Adjustments panel,
Click
NOTE: You may need to switch back to the Adjustments panel first, in order to see the Vibrance adjustment.
Step7. To change the vibrance of the colors in the image, in the Vibrance field,
Press & Drag the current value, type: 50 Enter

Step8. Save the file.

