As mentioned earlier, Hannah is looking for a new logo for her website, one that incorporates a simple drawing of a rabbit with the name of her pet shop. We can use Illustrator to accomplish this, and create a logo that will be displayed at the top of her website.
We'll build a simple logo using the Shape tools, specifically the ellipse and polygon tools. These tools allow us to quickly make shapes of any size we need. As we work, we'll also make use of the grid and the rulers to ensure everything is aligned properly. Let's start off by zooming in to our artboard so we can see it better, if we need to.
Step1. To zoom in on our artboard, if necessary, in the Tools panel,
Click , Click the artboard a few times until the artboard takes up most of the screen
Step2. To activate the Ellipse tool, in the Tools panel,
Click , Click
Step3. To begin creating a circle,
Click on the artboard
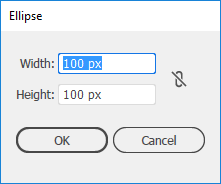
Step4. In the Width field of the Ellipse dialog box, type:
50 Tab key 50 Enter
Step5. Repeat step 3, and in the dialog box that appears, type:
20 Tab key 50 Enter
Step6. To activate the Selection tool, in the Tools panel,
Click
Step7. To position the oval correctly,
Press & Drag the oval so it is one grid square down from the top of the artboard, and two grid squares away from the left side of the artboard
Step8. To move the circle into place,
Press & Drag the circle until it is two grid squares away from the left side of the artboard, and one grid square away from the bottom
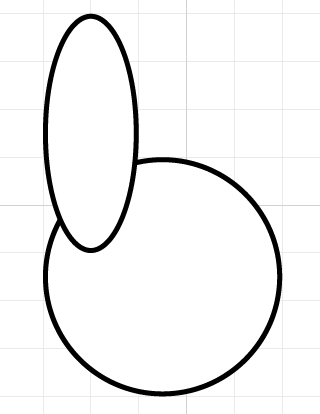
Step9. To make a copy of the oval, with the Selection tool active,
Press & Hold the Alt key, then Press & Drag the oval to the right side of the circle, one grid square away from the left oval
NOTE: To move the shape along a straight line, after you've begun moving the shape, hold the Shift key to constrain the shape to moving along a straight line.
Step10. To save the file, on the keyboard, press:
Control key+S
NOTE for MacOS Users: The keyboard shortcut for saving a file is Command key+S.
Using the Pathfinder Panel
The Pathfinder panel offers us many options for working with shapes and paths on our artboard. If we want to make complex shapes without using tools such as the Pen tool, we can use the Pathfinder panel to make combinations of shapes into complex objects.
Let's use the Pathfinder panel to unite the three shapes on our artboard into one.
Step1. To open the Pathfinder panel, in the Menu bar,
Click Window, Click Pathfinder
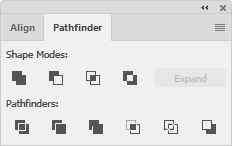
Step2. Ensure the Selection tool is active.
Step3. To begin the process of uniting the shapes, with the Selection tool active,
Press & Drag a selection over all three round shapes on the artboard
Step4. To unite the shapes, in the Pathfinder panel,
Click
Step5. To deselect the shape,
Click outside of the artboard
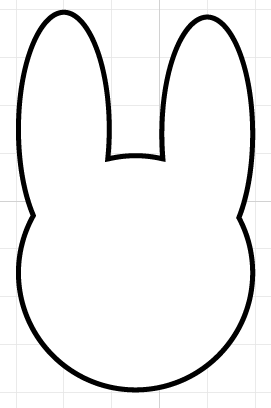
Step6. To dock the Pathfinder panel,
Press & Drag the Pathfinder panel group to the Panel dock at the right side of the screen
Working with Ruler Guides
Step1. To create a ruler guide,
Point to the horizontal ruler, then Press & Drag downward to the 60 pixel mark on the vertical ruler
Step2. To create a vertical ruler guide,
Point to the vertical ruler, then Press & Drag to the right until the ruler guide runs through the center of the rabbit's head
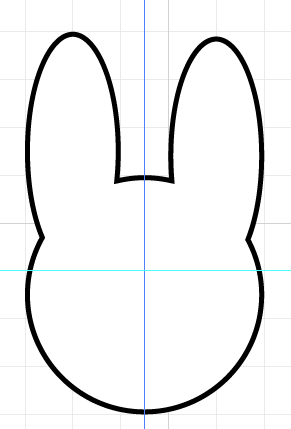
NOTE: The position of the vertical ruler guide should be approximately four and a half grid squares from the left side of the artboard.
Using More Shape Tools
To finish the rabbit's face, we'll be using two different tools - the Ellipse tool, which we've already used, and the Polygon tool. Let's start by making the rabbit's eyes with the Ellipse tool, and then move onto creating the nose.
Step1. To ensure nothing is selected, click outside the artboard.
Step2. Activate the Ellipse tool.
NOTE: To open a panel that isn't currently visible on the screen, on the Menu bar, Click Window, then Click the panel's name.
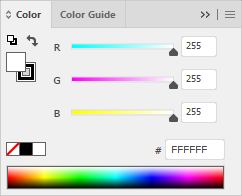
NOTE: Depending on your Illustrator configuration, your Color panel may be partially collapsed, or only showing the color spectrum. To expand the Color panel, in the Color tab, Click ![]() until your Color panel looks similar to the example above.
until your Color panel looks similar to the example above.
Step4. To change the fill color, in the Color panel,
Click , Click the black color swatch located above the color spectrum
Step5. To create the first eye, with the Ellipse tool active,
Click the artboard
Step6. In the Ellipse dialog box, type the following:
6 Tab key 6 Enter
Step7. To switch to the Selection tool, on the keyboard, press:
V
Step8. To move the eye into position, with the Selection tool active,
Press & Drag the eye to the left side of the rabbit's head, centered on the horizontal ruler guide
Step9. To make a copy of the circle to use as the second eye,
Press & Hold the Alt key, then Press & Drag a copy of the black circle to the right
NOTE: It might be necessary to deselect the eye first before attempting to copy it with the Alt-drag method.
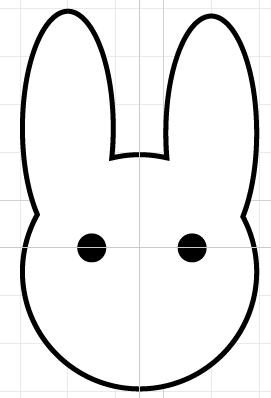
Now we're ready to add the rabbit's nose.
Working with the Polygon Tool
Step1. To switch to the Polygon tool, in the Tools panel,
Press & Hold , Click
Step2. To start the process of adding a triangle to our artboard,
Click on the artboard
Step3. To indicate how large the shape should be, in the Radius field,
Press & Drag the current value, type: 5 Tab key
Step4. To indicate that we want our shape to have three sides, in the Sides field, type:
3 Enter
Step5. To change the nose color to pink, in the Color panel,
Click a pink color in the color spectrum
Step6. To change the stroke to None, in the Color panel, if necessary,
Click , Click
Step7. Activate the Selection tool.
Step8. To select the triangle, if necessary,
Click the triangle
Step9. To rotate the triangle so one of the points is pointing downward, with the Selection tool active,
Press & Hold the Shift key, Point to a corner until you see  , Press & Drag to rotate the triangle
NOTE: Holding down the Shift key while pressing and dragging to rotate the shape will result in rotating in 45-degree increments.
Altering the Corners of a Shape with the Selection Tool
We now have a nose for our rabbit, but it looks too angular. There are a couple of ways we could soften the corners on our triangle; one way to do this involves the Selection tool.
Step1. Ensure the Selection tool is active.
Step2. To select the triangle, if necessary,
Click the triangle
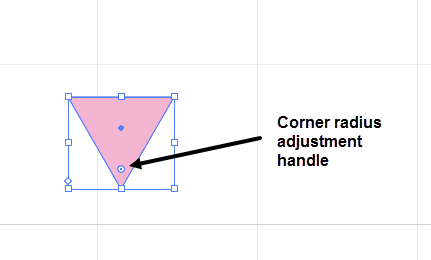
Step3. To zoom in so we can see better,
Click , Click the artboard a few times
Step4. Activate the Selection tool.
Step5. To round the corners of the nose, with the Selection tool active,
Press & Drag the corner radius handle until the corners are slightly rounded
Step6. Zoom out, if necessary.
Step7. To move the nose into place, with the Selection tool active,
Press & Drag the triangle into place on the vertical ruler guide, with the bottom point of the triangle aligned with the ruler guide
Step8. To deselect everything on the artboard,
Click outside of the artboard
Step9. Save the file.
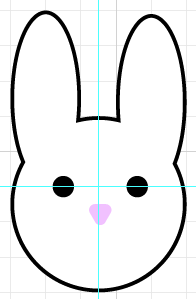
Step10. To select all the shapes on the artboard, with the Selection tool active,
Click the rabbit's head, Press & Hold the Shift key, then Click each of the eyes and the nose
Step11. To group all the shapes into one unit, on the keyboard, press:
Control key+G
NOTE for MacOS Users: The keyboard shortcut for grouping items is Command key+G.
Step12. Deselect all the shapes on our artboard.
Step13. Save the file.

