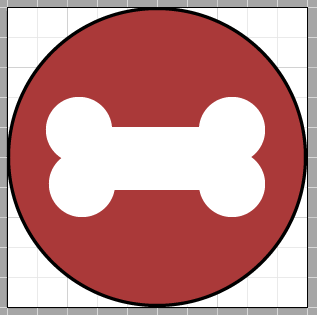
Our next task will be creating icons to highlight features of Hannah's site. We will be using the Shape tools and the Pathfinder panel to accomplish this. We'll be making two icons: a bone and a dog house. Let's start by creating a background shape for our icon, and then create a bone shape to use as part of the first icon. First, we'll need to create an artboard to house our graphic.
Working with Artboards in Illustrator
Before we start on the next set of graphics for Hannah's website, we'll need to add a new place for creating our graphics. In Illustrator, we can create many different graphics and save them together within one document. We can accomplish this by using artboards. An artboard, in Illustrator, represents a printable region of artwork, and we can create up to 100 artboards in one file. Artboards in Illustrator have many uses. Today, we'll be making use of artboards to create a number of independent elements for a website that will be saved as one file, and that we can later export individually. We already have one artboard, which Illustrator created for us when we created a new document. We'll now create a new one to build an icon on.
There are many different ways to create a new artboard in Illustrator. Let's explore one of those methods now. First, we'll need to open up the Artboards panel.
Step1. To switch to the Artboards panel, in the panel dock,
Click
NOTE: In Illustrator CC 2017 and earlier, the Artboards panel may be minimized at the very bottom of the panel dock — if that is the case, Double-Click the Artboards tab to expand it.
Step2. To create a new artboard, in the Artboards panel,
Click
Step3. To name our first artboard, in the Artboards panel,
Double-Click Artboard 1 text, type: Logo Enter
Step4. Repeat step 3 for Artboard 2, and give it the name "Icon Template".
Step5. To view both of our artboards at the same time, in the Tools panel,
Double-Click
Step6. To activate the Artboard tool, in the Tools panel,
Click
Step7. To select the Icon Template artboard, with the Artboard tool active,
Click the Icon Template artboard
Step8. To resize the Icon Template artboard, in Width field of the Control panel, type:
100 Tab key 100
Step9. To move an artboard,
Press & Drag the Icon Template artboard to a new place in the document window, lining the upper left corner of the artboard with a set of intersecting gridlines
Creating an Icon Template
Step1. To zoom into the Icon Template artboard, in the Tools panel,
Click , Click the artboard several times until it takes up most of the screen
Step2. To activate the Ellipse tool, in the Tools panel,
Press & Hold , Click
Step3. To ensure nothing on our artboard is selected, in the Menu bar,
Click Select, Click Deselect
Step4. To set our colors to the default colors, on the keyboard, type:
D
Step5. To start making the circle that will act as the icon background, on the Icon Template artboard,
Click the artboard
Step6. To indicate what size we want our icon to be, in the Ellipse dialog box, type:
100 Tab key 100
Step7. To move the circle onto the artboard, if necessary,
Click , Press & Drag circle onto the artboard
Duplicating an Artboard Containing Artwork
Sometimes we may want to duplicate an artboard and the artwork it contains. We can do this with the Artboard tool by holding the Alt key while attempting to move an existing artboard. First, let's zoom out so we can see our workspace.
Step1. To zoom out and see our entire workspace at once, in the Tools panel,
Double-Click
Step2. To activate the Artboard tool, in the Tools panel,
Click
Step3. To duplicate the Icon Template artboard,
Press & Hold the Alt key, then Press & Drag the artboard to a new location in the workspace
Step4. Rename the artboard, giving it the name Bone.
Step5. Repeat step 3, and rename the artboard with the name Doghouse.
Step6. If necessary, use the Artboard tool to rearrange the new artboards.
Creating the Bone Icon
We've already had some experience working with the shape tools. Let's put that experience to use by creating the bone icon on our own.
This section has less guidance than the previous sections. If you would like a walk-through, watch this videoabout Creating the Bone Icon.
Step1. Make sure you're working on the Bone artboard.
Step2. Use the shape tools to create shapes that can be assembled into a dog bone shape.
Step3. When you are satisfied with how your bone looks, unite the shapes into one bone shape using the Pathfinder panel.
Step4. Use the color palette you created in Paletton to add color to the background of your icon.
Step5. Remove the stroke color from the bone shape.
Step6. Group all the shapes on the artboard.
Step7. Save the file.


