Sometimes, when creating graphics for the web, we may have a logo or image that we may want to incorporate into several different artboards or files. Illustrator allows us to store an object as a symbol, which allows us to reuse the image as many times as we want without having to copy and paste the image. One of the benefits of working with symbols is that if one instance of the symbol is edited, all other instances of the symbol will change as well. We can also save a collection of symbols and reuse them in other Illustrator documents. This can be incredibly helpful if we are reusing a specific set of graphics in many different documents.
Modifying an Existing Symbol
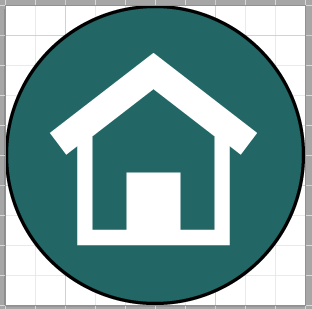
Hannah mentioned that she would like one of the icons to have a doghouse on it. While we could draw a doghouse from scratch, there is a symbol available in Illustrator's Symbols panel that we can modify to look like a dog house. We'll make use of that as we create our last icon. Before we do that, et's change the color of the icon's background first.
Step1. Using the Selection tool, click on the icon background on the Doghouse artboard.
Step2. Change the fill color to one of the colors from the color palette created in Paletton earlier.
Step3. To open the Symbols panel, on the Menu bar,
Click Window, Click Symbols
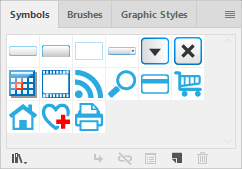
The Symbols panel appears:

Step3. To begin the process of duplicating the house symbol, in the Symbols panel,
Click the blue house
Step4. To duplicate the symbol,
Click , Click Duplicate Symbol
Step5. To add the house symbol to the Doghouse icon artboard, in the Symbols panel,
Press & Drag the house symbol to the Doghouse artboard
Step6. To start editing the symbol, in the Control panel,
Click

7. To continue editing the symbol.
Click
Using the Direct Selection Tool to Modify a Shape
To make this shape look more like a dog house, we'll want to remove the chimney that is on the roof. We can do this by using the Direct Selection tool, which allows us to select individual parts of a shape and edit or delete them. In this instance, we'll be working with anchor points - points that connect the different lines in our shape. We'll select the two anchor points that make up the chimney and delete them.
Step1. To begin removing the chimney on the house, in the Tools panel,
Click
Step2. To remove one of the anchor points for the chimney, with the Direct Selection tool active,
Click one of the anchor points that form the top of the chimney, press the Delete key
Step3. Repeat step 2 for the other point on the chimney.
Step4. To change the color of the house to white, in the Color panel,
Click the fill swatch, Click the white swatch above the color spectrum
Step5. To accept the changes we've made to the symbol, in the upper left corner of the workspace area,
Click
Step6. Select both shapes and group them together.

Step7. Save the file.

