Once we have created a page with the layout and styles we want, we can save the completed page as a template, so that it can be used to create the other pages in our site. When we save a page as a template, we can easily create new pages that have the same layout.
Another advantage of using templates is that when we make a change to the template, all the pages based on that template are updated as well. Moreover, we will not have to attach the external style sheet to those new pages because every new template-based page will have the style sheet linked to it.
Saving a Document as a Template File
When a document is saved as a template, Dreamweaver creates a new folder called Templates and creates a template file in this folder with a.dwt filename extension, indicating that this file is a template.
The options to save a template or insert template items are unavailable in Live view.
Step1. Open structure.html, if necessary.
Step2. To switch to Design view,
Click , Click Design
Step3. To begin saving structure.html as a template, on the menu bar,
Click File, Click Save as Template...
NOTE: If you are prompted to define a site click the cancel button and do the steps in the Preparing and Managing Website lesson under the "Defining a Site Locally" heading before continuing.
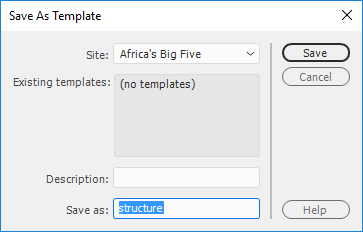
Step4. To set the name of the template, type:
africa
Step5. To save the template,
Click![]()
Step6. To update the links,
Click![]()
NOTE: If we click No, Dreamweaver will not update the links, so links to files in subfolders would be broken.
Step7. To see what happened when we saved the file as a template,
Click![]()
Step8. To expand the folder,
Click![]() next to the Templates folder
next to the Templates folder
Inserting Editable Regions
We want our pages to have a consistent look, but we also want to have some different content in each individual page. Therefore, we have to insert editable regions in the template file for the sections that we will need to edit. Otherwise, the template-based documents won't allow us to insert or edit any content.
We want the main text of the page to be editable. To accomplish this, we will insert three editable regions: one for the text in the h2, one for the content text, and one for the image. We are inserting a separate editable region for the heading text because we want the h2 element and image to be separate editable regions. That way, we can ensure that we always have a h2 and an image element on each page.
Adding Editable Region for Heading
Let's insert an editable region for the h2 element.
Step1. To select the h2 text,
Press & Drag across "Placeholder Heading"
Step2. To begin inserting an editable region, on the menu bar,
Click Insert, Point Template, Click Editable Region
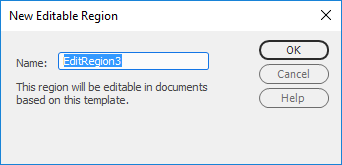
Step3. To name the new editable region, in the Name field, type:
main_heading Enter
Step4. To deselect the main_heading region,
Click anywhere outside of the editable region
Note: For a video demonstration of inserting an editable region see the Dreamweaver CC 2017 - Creating a Template with an Editable Region video.
Adding Editable Regions to a Paragraph
Step1. To position the cursor,
Click in the lorem ipsum text
Step2. To select the paragraph, in the tag selector,
Click
Step3. To begin inserting an editable region, on the menu bar,
Click Insert, Point Template, Click Editable Region
Step4. To name the new editable region, in the Name field, type:
body_text Enter
Adding Editable Region for Image
Now we will add an editable region to the image. Having the image in a separate editable region will ensure we remember to add an image on each page.
Step1. To select the image,
Click the Image Placeholder
Step2. To begin inserting an editable region for the image,
Click Insert, Point Template, Click Editable Region
Step3. To name the new editable region, in the Name field, type:
main_img Enter
Step4. Save the document.
Step5. To turn off the warning,
Click the "Don't show me this message again." checkbox, Click![]()
Step6. Close africa.dwt.
Creating a New Page from a Template File
We will create at least two pages from our template file, africa.dwt.
Let's create the home page of our site first.
Step1. To begin creating a new page from the template file,
Click File, Click New...
Step2. To see the template file, in the New Document dialog box,
Click Site Templates
Step3. To select the correct site, if necessary,
Click Africa's Big Five
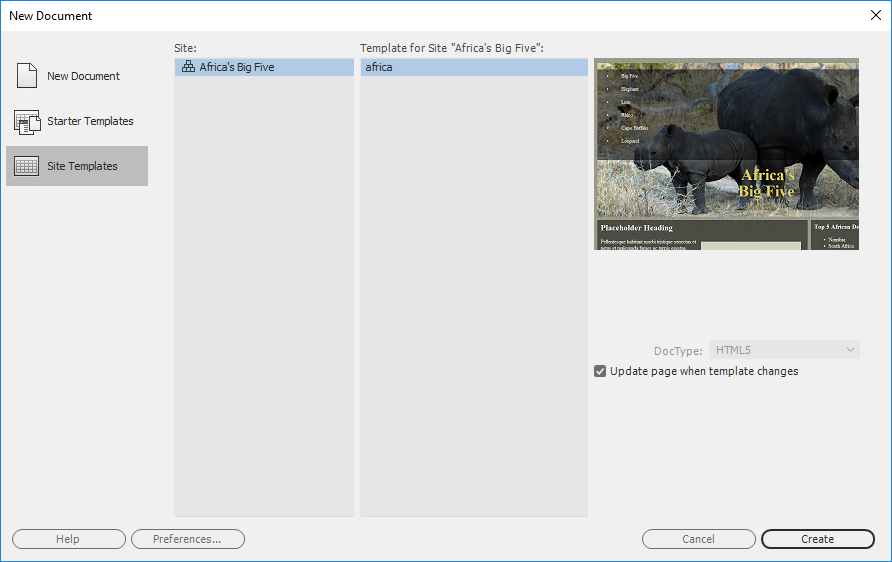
Step4. To create a new page from the index template,
Click![]()
Step5. To save the document as index.html, press:
Control key+s, type: index.html, press: Enter
Step6. To replace the main_heading text:
Triple-Click Placeholder Heading, type: Welcome
Step7. To begin replacing the sample text, in the body_text editable region,
Click inside the body_text region,
press: Control key+a
Step8. To delete the text, press:
Delete key
Step9. To open the text file, from the Files panel,
Double-Click index.txt
Step10. To select and copy the text, press:
Control key+a, Control key+c
Step11. To close the file, press:
Control key+w
Step12. To paste the content, press;
Control key+v
Replacing Placeholder Image
Now, let's replace the image we used as a placeholder image in structure.html.
Step1. To select the image,
Click the Image Placeholder
Step2. To expand the images folder,
Click![]() to the left of the images folder
to the left of the images folder
Step3. To change the image source, on the Properties panel, in the Src field,
Press & Drag![]()
to yawning_lion.jpg in the Files panel
Step4. To add alt text, on the Properties panel, in Alt field, type:
Yawning male lion
Step5. To position the cursor,
Click before the text that starts "Other highlights..."
Step6. To insert the image, from the menu bar,
Click Insert, Click Image, Double-Click elephant.jpg
Step7. To add alt text, on the Properties panel, in Alt field type:
African bush elephant
Step8. To apply the floatright class, in the Properties panel Class drop-down,
Click![]() , Click floatright
, Click floatright
Step9. Save the document.
Step10. To preview the page in a browser, press:
F12 key
NOTE for MacOS Users: To preview the page, press Option+FN key+F12 key.
Step11. Close the browser and return to Dreamweaver.
Step12. Close index.html.
Creating Additional Pages from the Template File
Now we will create the second page of our site from the template file.
Step1. To create another new page from the template, press:
Control key+n, press: Enter
Step2. Confirm Dreamweaver is in Design view.
Step3. To save the new document as elephant.html, press:
Control key+s, type: elephant.html, press: Enter
Step4. To change the heading, in the main_heading editable region,
Triple-Click Placeholder Heading, type: Elephant
Step5. To begin replacing the sample text, in the body_text editable region,
Click in the body_text region
Step6. To remove the placeholder text of the body_text region, press:
Control key+a, Delete key
Step7. To open the text file, from the Files panel,
Double-Click elephant.txt
Step8. To select and copy the text, press:
Control key+a,Control key+v
Step9. To close the text file, press:
Control key+w
Step10. To paste the content, press:
Control key+v
Step11. To change the title of the document, on the Properties panel, in the Document Title field,
Click after the current title, type: ": Elephant"
Replacing An Image
Now let's replace the placeholder image.
Step1. To select the image,
Click the Image Placeholder
Step2. To change the image source, on the Properties panel, in the Src field,
Press & Drag![]() to
to
AfricanElephant.jpg in the Files panel
Step3. To add alt text, on the Properties panel, in Alt field type:
African elephant walking in tall grass
Step4. Save the document.
Previewing the Finished Pages
Let's take a look at our finished pages in a web browser.
Step1. To preview the page in a browser, press:
F12 key
NOTE for MacOS Users: To preview the page, press Option+FN key+F12 key.
Step2. To visit the home page, in the navigation,
Click Big Five
Step3. To visit the elephant page,
Click Elephant
Step4. Close the browser and return to Dreamweaver.
Step5. Close elephant.html.
Modifying Template Files
We want to add the date the site was last updated in the footer on all the pages in the site. Luckily, we can make this change in the template file, which will automatically update all of the pages based on that template. Note that if we make a change within an editable region on the template, however, we will not see that change in template-based pages.
Editing a Template File
Let's learn how to update a template file.
Step1. To expand the Templates folder in the Files panel, if necessary,
Click![]() to the left of the Templates folder
to the left of the Templates folder
Step2. To open the template,
Double-Click africa.dwt
Step3. Confirm Dreamweaver is still in Design view.
Step4. To specify the location for the last updated date,
Click before the current year
Step5. To add a line break, press:
Shift key+Enter
Step6. To move to the blank line, press:
Up Arrow key
Step7. To add text, type:
Last Updated:
Step8. To change to the Insert panel,
Click![]()
Step9. Scroll down until Date is visible.
Step10. To start to insert the new date, from the Insert panel,
Click Date
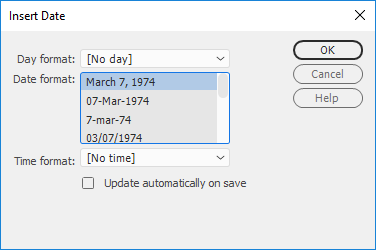
Step11. Select a date format.
Step12. Select a time format.
Step13. To make Dreamweaver update the date automatically each time the file is saved,
Click the "Update automatically on save" checkbox
Step14. To insert the date,
Click![]()
NOTE: The date will automatically update when changes are made to the editable regions of a template-based page, even if the date is in a locked region. Any changes made to the template itself will update the date on all template-based pages.
Saving a Modified Template File
We finished the changes we needed in our template file. Now we need to save our template.
Step1. Save the document.
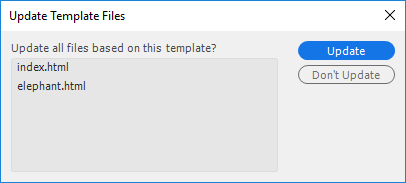
Step2. To update all these pages,
Click![]()
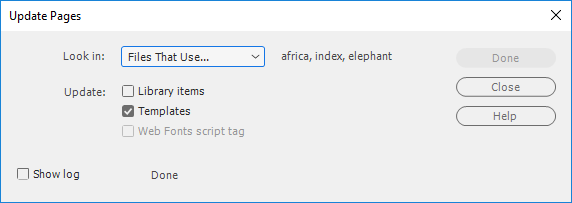
NOTE: If the Show log checkbox is selected, we see information about which files were examined, updated, or could not be updated and how long the update took.
Step3. To close the report box,
Click![]()
Step4. Close africa.dwt.
Step5. To switch to the Files panel,
Click![]()
Step6. Open index.html.
Step7. To preview index.html in a browser, press:
F12 key
NOTE for MacOS Users: To preview the page, press Option+FN key+F12 key.
Step8. Visit the elephant page.
Step9. Close the browser and return to Dreamweaver.
Editing the CSS File of a Template
While the template locks down the changes that can be made in the HTML files that are based on the template, it does not limit changes that can be made to the CSS file, or other associated files. To demonstrate this, let's fix the style of the link in the footer.
Notice if we try to click the link in the footer, we get the symbol for no. While we can edit the CSS document, the locked down parts of the template-based pages can make it difficult to select elements. This means we may have to type the selector we want in the CSS Designer panel, rather than having Dreamweaver provide the selector.
Step1. To switch to the CSS Designer,
Click![]()
Step2. To start to add a new selector,
Click next to Selectors
Step3. To change the selector, type:
footer a Enter
Step4. To accept the selector, press:
Enter
Step5. To view Text properties,
Click
Step6. To view the color properties,
Click![]()
Step7. To change the type of color to hex,
Click![]()
Step8. To change color to white,
Press & Drag the middle slider to the top,
press: Enter
Step9. To save all the changes,
Control key+Shift key+Alt key+s

