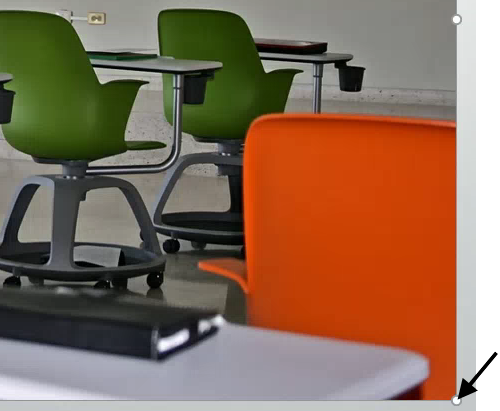
When using PowerPoint, we can insert images we find online, or we can bring in images from other sources. We can use digital pictures that we have taken ourselves, scanned photographs or drawings, and images taken from clip art packages that we have purchased.
For today's workshop, we will insert a picture that we have saved in a folder. Before we add the image, let's move to the correct slide.
Step 1. To move to slide 2, in the slide thumbnail list,
Click slide 2
Step 2. To move to the Insert tab, on the Ribbon,
Click the Insert tab
Step 3. To begin inserting a picture, in the Images group,
Click ![]()
NOTE for MacOS Users: To begin inserting a picture, Click the Picture button, then Click the Picture from File... option.
Step 4. To move to the desktop,
Click ![]()
Step 5. To open the epclass folder,
Double-Click ![]()
Step 6. To open the correct folder,
Double-Click the PPT_Basics folder
Step 7. To insert the correct image,
Double-Click Classroom.jpg
Resizing and Repositioning an Image
PowerPoint makes it easy to resize and reposition graphics. Let's see how to do this now.
Step 1. Verify that the graphic is selected.
Step 2. To position the cursor,
Point 
Step 3. To resize the graphic,
Press & Drag the sizing handle inward until the graphic will fit to the right of the text
Step 4. To begin moving the graphic, with the graphic selected,
Point to the graphic
Step 5. To move the graphic,
Press & Drag the graphic
to the right of the bulleted list
Step 6. To deselect the graphic,
Click on the outer edge of the slide
Adding Alternative Text to Images
Images added to PowerPoint should be given alternative text; this descriptive text can be read by a screen reader and helps convey the message of an image without visual cues. This is especially important when images contain content that is essential to the presentation and are not merely decorative.
We will need to perform several steps the first time we add alternative text to an image. Going forward, we'll add an Alt Text button the Quick Access toolbar so it will be faster and easier for future images.
Step 1. To begin adding the alternative text to this image,
Right-Click the graphic
NOTE for MacOS Users: To begin adding the alternative text to this image, press: Control key+Click the graphic.
Step 2. To open the Format Picture pane,
Click Format Picture...
Step 3. To move to the Size & Properties options,
Click ![]()
Step 4. To see the Alt Text options,
Click ![]()
Step 5. To add a description, in the Description box, type:
Photo of a classroom
Step 6. To close the Format Picture pane,
Click 
Step 7. Save the presentation Creating_a_Presentation.pptx.
Adding the Alt Text Button to the Quick Access Toolbar
All images and graphics (tables, charts, and so on) in our presentation should include alternative text. To save time, we can add the Alt Text button to the Quick Access Toolbar.
NOTE for MacOS Users: While PowerPoint 2016 for Mac does have the option to customize the Quick Access Toolbar, at this time the Alt Text button is not available. To add additional alternative text, the steps in the previous section will need to be repeated. Skip forward to the heading, "Checking the Reading Order of a Slide".
Step 1. To begin customizing the Quick Access Toolbar, on the Quick Access Toolbar,
Click ![]()
Step 2. To change the command list,
Click More Commands...
Step 3. To see more commands,
Click ![]() ,
,
Click Commands Not in the Ribbon
Step 4. To add the Alt Text button, in the list of commands,
Click ![]() , Click
, Click ![]()
Step 5. To accept this change and close the dialog box,
Click ![]()
Checking the Reading Order of a Slide
When using a screen reader to view a PowerPoint presentation, the text, images, shapes, and other objects on a slide will be read in a specific order. It is always a good idea to check this to make sure that the elements will be read in a way that makes sense. Let's do this now.
Step 1. To move to the Home tab, if necessary,
Click the Home tab
Step 2. To open the Selection pane, in the Drawing group,
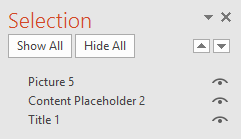
Click  , Click Selection Pane...

Step 3. To begin renaming the picture, in the Selection pane,
Double-Click Picture #
Step 4. To rename the image,
Press & Drag the text, type: Classroom Enter
Step 5. To close the Selection pane,
Click 

